Saturday, 31 March 2012

simply stampin' challenge week 53

This week's Simply Stampin' Challenge is a colour challenge. This week's colours are 

Tangerine Tango, Daffodil Delight, Wild Wasabi


Spring Bunting

Stamp Set: Pennant Parade
Ink: Tangerine Tango
Cardstock: Very Vanilla, Wild Wasabi, Tangerine Tango, Daffodil Delight
DSP: Tangerine Tango, Wild Wasabi, Daffodil Delight Paper Stack
Punches: Petite Pennants, Boho Blossoms, Itty Bitty, Curly Label
Accessories: Rhinestones

These colours are very bright and there wasn't a neutral colour in there so I added vanilla to the mix and made this card into a cute bunting card! The scallop pennants are plain cardstock and the triangle pennants are paper stack dsp. On each of the pennants are cute flowers made with the boho blossoms and the itty bitty punch pack and finished off with rhinestones. I stamped the sentiment and punched it out with the curly label punch because I stamped the seniment really badly the first time on my card so this is a cover up! To add just a tiny bit more colour to the curly label I ran my marker around the edge. I added a couple more rhinestones and there you go - done! 

Did you like this clean and crisp springtime card! Why not head over the the SSC blog to see the other DT entries and enter your own creation - if you don't have the exact colours that's fine just use the closest ones you do have! I look forward to seeing your creations!

Happy Stampin',

Amanda xx

Thursday, 29 March 2012

party bunting

Morning all! 

Don't you just love getting new stuff to play with?! I am super bad at it. Occassionally I borrow stamp sets/punches/dies off my downline when I fancy something different to play with. Below is such an occasion. 


Party Bunting

Stamp Set: Party This Way
Ink: Pumpkin Pie, Pacific Point, Rich Razzleberry, Real Red, Old Olive
Cardstock: Whisper White, Pumpkin Pie, Pacific Point, Rich Razzleberry, Real Red, Old Olive
Punch: Petite Pennants
Big Shot: Timeless Type Junior Alphabet
Accessories: Brads, Baker's Twine

I stamped a load of the balloons in the background using a masking technique so I could get them to overlap each other. I also used the stamping off technique for a lighter shade - so they would match with the bunting but also let the bunting stand out over quite a busy background! The pennants were stamped and punched and then the letters for the word PARTY cut out with the timeless type alphabet. I threaded all the pennants onto some baker's twine and fastened it with some brads. 

I hope you enjoyed my little playful creation! 

Happy Stampin',

Amanda xo

Wednesday, 28 March 2012

easter chicks

Hi there! I hope you are all having a good week. Isn't the weather just glorious?! I hope you are all taking a little time out of your busy lives to kick back and enjoy it! 

Here's the 5th card in the spring card club collection. Similar layout to the penguin card it also uses the owl builder to make these sweet little chicks!


Easter Chicks

Stamp Set: Teeny Tiny Wishes, Borderlines
Ink: So Saffron, Certainly Celery, Early Espresso
Cardstock: Certainly Celery, Whisper White, Very Vanilla, So Saffron, Peach Parfait, Early Espresso
Punches: Owl Builder, 5 Petal Flower
Extras: Cocktail Stick, Sponge

Okay so this is the same layout really but the chicks have wings which are just the petals cut off the 5 petal flower punch. The chicks were sponged to give a little bit more shading and texture. The top little chick is holding a banner which has the sentiment on it - how sweet right?! 
Anyway I won't go into all of the ins and outs of how I made the card - you'll have to read my post on the penguin card for that! 

Hope you liked this little take on the owl punch - its such a versatile punch. If you haven't got it yet I'd totally recommend getting it - its totally worth it!!! 

Thanks for stopping by! 

Amanda x

Tuesday, 27 March 2012

paper players challenge

Any of my faithful blog readers will know that I am a design team member for Simply Stampin' Challenge blog. I love doing it, but what with having to produce an entry for that every week, my own personal projects, SU business stuff and general life I don't really find time to look at other challenge blogs and NEVER seem to be organised enough to actually enter any - I've had the best of intentions several times but not quite succeeded. Anyway, today I was surfing the net and came across The Paper Players. Their sketch for the week looked interesting and I thought I could do something with it! So here's the sketch I was working from along with my own take on it!


Spring Flowers & Frame

Stamp Set: Teeny Tiny Wishes
Ink: Rich Razzleberry
Cardstock: Very Vanilla, Old Olive, Rich Razzleberry, Tangerine Tango
Punches: Scallop Circle, Boho Blossoms, 5 Petal Flower, Curly Label, Scallop Trim 
Big Shot: Little Leaves, Oval Frame
Ribbon: Very Vanilla Satin
Accessories: Brights Brad, Rhinestones

So this was actually my third attempt at this sketch - my first two attempts just developed into something else and they were so pretty I didn't want to mess around with them to fit the sketch so this is my third try and its using a few left overs! Oh I love cards that use leftovers! I had this Razzleberry flower which has been sitting in my craft room for probably about 9 months now - its the scallop circle, split cardstock to make it poofy and fastened with a brights brad. Underneath is the 5 petal flower for the leaves. I had the idea that it would look really nice in the oval embossed frame but it looked a little lonely so I used some little tangerine boho blossoms and little leaves to fill it out. I added my sentiment to the side and punched a border with the scallop trim for the bottom of the card. Finally I added some ribbon and rhinestones to just finish it off. 

I hope you like this little number - I'm quite pleased with how it worked out - its defo a hand delivery number though as the flower is POOFY!!! Let me know what you think and leave me a comment! 

Thanks for stopping by! 

Amanda x

Monday, 26 March 2012

welcome vicky

This is the sweet little card that I made for my newest downline - Vicky! Welcome to Stampin' Up Vicky! 
So Vicky is crazy about penguins and seeing as the owl builder punch makes awesome little penguins I jumped on it to make her a welcome card!


Penguin Hello

Stamp Set: Teen Tiny Wishes, Border Lines
Ink: Baja Breeze, Basic Black, So Saffron
Cardstock: Baja Breeze, Whisper White, Basic Black, Pretty in Pink, Rose Red, So Saffron, Certainly Celery, Peach Parfait
Punches: Owl Builder, Itty Bitty
Accessories: Rhinestones, Cocktail Stick

So as in previous posts I just cut off the ears of the owl to make it into a penguin, I added Peach Parfait feet,  White breasts, and after adding their eyes and beaks I customised them with hearts, flowers and a bow and buttons (tux penguin). The bottom was stamped with the borderlines for a little texture and base for them, and following the same layout as the chick card we made at this month's card club I assembled them on top in a slightly wobbly tower! It was finished off with a flag attached to a cocktail stick - the sentiment is the first half of a sentiment from Teeny Tiny Wishes - hello baby - all I wanted was the hello so that's all I inked up. I added some rhinestones to glitz it up a bit! 

Hope you liked today's share and I'm sure Vicky loved it with her little welcome gift - pot of buttons!! 

Happy Stampin',

Amanda xx

Sunday, 25 March 2012

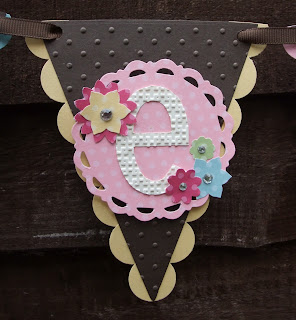
create bunting

Just thought I would show you more images of my cute bunting I made for this month's class - its going to go in my craft room - yes my newly cleaned and tidied craft room!! 


Cardstock: Early Espresso, Pretty in Pink, So Saffrom, Very Vanilla, Pear Pizzazz, Baja Breeze
DSP: Subtles Paper Stack
Big Shot: Simple Alphabet Letters, Fun Flowers, Blossom Party, Perfect Pennants, Polka Dot Emboss, Square Lattice Emboss
Punches: Boho Blossoms, 3/4" Circle
Accessories: Rhinestones, Buttons
Extras: Crop a dile

Isn't it lovely?! The girls that came along to class this month made some gorgeous bunting and each one was so different!! 

I will be sure to take a photo of my bunting up in my craft room when I have finally decided where I want to put it! Decisions, decisions, hey?!

Please leave me a comment, they make my day!

Happy Stampin',

Amanda x

Saturday, 24 March 2012

simply stampin' challenge week 52

Its Saturday again and time for another Simply Stampin' Challenge. This week is a sketch! And here is what we had to work with...


And below is what I created with it! 


Birthday Car

Stamp Set: Need For Speed, Happiest Birthday Wishes (Hostess)
Ink: Pool Party, So Saffron, Sahara Sand, Certainly Celery, Pear Pizzazz, Lucky Limeade, Basic Black
Cardstock: Whisper White, Pool Party, Lucky Limeade
Punch: Corner Rounder, Scallop Edge
Ribbon: Pool Party Ruffled, Pear Pizzazz Stitched Poly, Linen Thread

I really didn't play around with this sketch too much - it was a simple one and it worked for me. I actually had lots of ideas but in the end I went with this car as it was floating around my craft room while I was doing my mammoth tidy this week, I really wanted to use it up before it got lost. 

I coloured in the stamped image and mounted it on some Pool Party cardstock. I then punched a scallop edge in Lucky Limeade and added it to the bottom, over the divide between the pool and limeade cardstock  I layered up some ribbon. Ribbon can be manly, right?! Well, that's what I was trying to go for anyway, let me know what you think! First ribbon layer was the Pool Party ruffled ribbon (I just wanted a thin layer of pool ruffled edge), then the Pear Pizzazz Stitched Poly Ribbon. Finally I tied a scrap of linen thread over the top. How lovely does this look? I'm so pleased with it. I popped the entire thing up in dimensionals and layered it on some Whisper White cardstock on a Pool Party card base. At the bottom I stamped the word  "birthday" - its part of a larger sentiment but I only chose to ink up the word birthday - this as mainly because I liked the font and the full sentiment was too large for the space I had. 

Now why don't you step over to the Simply Stampin' Challenge blog, check out what the other DT members have created for you and enter your own creation using this cute sketch! 

Thanks for popping by, please leave a comment, 

Happy Stampin',

Amanda x

Friday, 23 March 2012

daffodils

Man, I am beat! I am so tired - its been a long couple of days (I am writing this on Thursday night and scheduling it for Friday morning - what I do with most of my posts!). On the plus side my craft room is looking amazing! I think its the tidiest its EVER been - and we've only lived here for a year and 8 months - whoops! Ive still got bits to do and tidy and organise my storage systems and stuff but its getting there!

Now onto a card to share with you! Today's is another of the March card club series. Definitely very springtime - 


Easter Daffodils

Stamp Set: Teeny Tiny Wishes
Ink: Peach Parfait
Cardstock: Very Vanilla, Daffodil Delight, Pumpkin Pie, Pear Pizzazz
Punches: 5 Petal Flower, Boho Blossoms, Decorative Label
Extras: Sponge, Embossing Stylus, Mat Pack

First we sponged the flowers with a little bit of Peach Parfait ink and then laying the punched flowers down on the mat pack we used the embossing stylus in the centre of the flowers to give a bit of shape to the flowers. Three strips of cardstock were laid down for the stalks and then the flowers added to the top (we put dimensionals under the yellow flowers to help it keep its shape! For the grass its just a strip of Pear Pizzazz cardstock that I snipped in to every couple of millimetres - after the entire thing was snipped in to I cut in at an angle to give it some varying height and a little more texture. I guess its similar to what a hair dresser does when they cut layers in your hair? The final thing to do was to stamp the sentiment, punch it out wit the decorative label punch and sponge. I just slipped it in under the grass and there you have it, one quick and simple Easter card!  

I hope you liked today's quick post. Come back tomorrow for another Simply Stampin' Challenge! 

Have a great day! 

Amanda xx

Thursday, 22 March 2012

blossom party pot

Thought I would quickly share with you another of the cards we did at this month's card club today. It was a fun card to make - I've seen them floating around on the internet for quite a while and thought it would be a really fun springtime card to make. Once you know where to cut it was surprisingly VERY easy to make and looks fab! 


Blossom Party Flower Pot

Stamp Set: Teeny Tiny Wishes
Ink: Early Espresso
Cardstock: Early Espresso, Whisper White, Blushing Bride, Calypso Coral, Wisteria Wonder, Lucky Limeade
DSP: Berry Blossoms
Ribbon: Whisper White Satin
Big Shot: Blossom Party
Extras: Paper Crimper

So I adhered the ribbon to the card as well as the piece of polka dot DSP. I made the flower pot into a pocket with one glue dot on either side top corner! Next I stamped the sentiment and then adhered that peice if Whisper White to the Early Espresso mat. At the to of this I added 3 dimensionals - centre top, then on either side slightly lower than the middle one - this is where I stuck my flowers I then slipped the insert inth the pocket and added some leaves to fill in the gaps. (I made my leaves by folding a piece of cardstock in half and cut a half leaf shape along the fold, while it was still folded I ran it through the paper crimper for some texture, when it is unfolded you have a beautiful leaf!) Once I had added my leaves I stuck the bow on in the gap left, and voila! as simple as that! 

Hope you liked this - sorry I haven't been very diligent with blogging this week - I spent the day today tackling my craft room - it went really well actually, Ive seen bits of floor and desk that I don't think I've seen for about a year! Woah *embarassed* anyway I am intending on having another good old crack at it tomorrow and then start organising my things - I really need to sort out some better storage solutions for my craft things - that's how it gets in such a mess because I get EVERYTHING out in order to use it...ugh! I've been pinning (on pinterest - my latest addiction!) solutions and ideas so stay tuned to see how my craft room turns out - maybe I'll even get the chance to take a few photos when its all done! I considered taking a photo of the carange that was the before shot but I was too embarrassed to have anyone see it! I'm just glad its looking so much better alreadY! Anyway I should stop babbling o and get cracking once again! 

Thanks for stopping by! 

Have a great day! 

Amanda 

Monday, 19 March 2012

simply stampin challenge week 51

Simply Stampin' Challenge time again folks - sorry I'm a few days late - such a busy weekend I didn't get the chance to photograph my project!! This week is a theme, and the theme is...

Totally Tags

I'm afraid due to a busy week and not feeling great I don't have anything massively spectacular for you today. Here are some sweet little tags that I made though. Hope you like them!


Stamp Set: n/a
Ink: n/a
Cardstock: Confetti Ivory, Confetti White
DSP: Everyday Elegance (SAB)
Punches: 5 Petal Flower, 3/4" Circle
Big Shot: Beautiful Wings, Two Tags
Accessories: Crystal Effects

I cut the tags out with the big shot and then decorated them with some flowers I punched with the 5 Petal Flower punch - great way to show off some of the gorgeous patterns! I further highlighted the pretty patterns by adding crystal effects to some of the detail areas! I also added a few little butterflies I had strewn around - great way to use up scraps is to turn them into tags! (Everything I used to make these tags were scraps from other projects!)

Hope you liked my really simple project today. Please check out the Simply Stampin' Challenge blog to see what other tagtastic creations the DT has come up with for you this week and then have a go at making and entering your own tags! I'd love to see what you create! 

Happy Stampin',

Amanda xx

blossom into springtime

Man oh man, busy weekend - filled with work, people turning up at the wrong time, cooking and cleaning and some waking up late! Well despite everything both Mums seemed to have a good time yesterday on omther's day - I cooked diner for them. Yum!  

Anyway its a gorgeous day today so I thought I'd show you one of the sweet cards that we made this month at card club! 


Birthday Blossoms

Stamp Set: Simply Soft (Hostess), Teeny Tiny Wishes
Ink: Pink Pirouette, Pretty in Pink, Regal Rose, Pear Pizzazz, Crumb Cake, Early Espresso
Cardstock: Pretty in Pink, Very Vanilla
Punch: Decorative Label
Accessories: Champagne Shimmer Mist
Extras: Sponge

So I stamped the blossoms several times and coloured them in with my stampin' write markers. I stamped the seniment on a strap piece of cardstock and punched it out with half the decorative label punch. I also filled in a little bit of the dead space with a few of the little blossoms. I sponged the pretty in pink cardstock with some regal rose ink and then adhered everything together! Finally I spritzed it with champagne shimmer mist for some sparkly shine! 

Have a lovely day everyone! 

Amanda x

Friday, 16 March 2012

springtime is precious

Sorry I've been a bit hit and miss the last couple of weeks. Its been super busy around here - this week hasn't been as bad as last week but still really busy. I decided to take a day off on Tuesday though, just felt worn out and needed a day off of being creative just to sit back and enjoy some me time. 

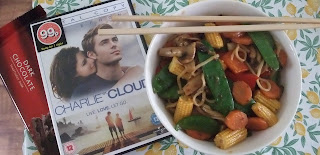
So I just thought I'd show you my lovely afternoon in picture form.


An AMAZING veggie stirfry, chick flicky movie and chocolate! Yum!! 

Last few day I have also not been feeling too good - migraines, tummy ache etc. Ugh! anyway I thought I use some of this down time to catch up on my blogging and prepare for my SUPER long busy weekend!!! 

Below is one of the cards from card club this month. 


Stamp Set: Precious Butterflies (Hostess)
Ink: So Saffron, Certainly Celery, Wild Wasabi, Early Espresso
Cardstock: Whisper White
DSP: Domestic Goddess 
Big Shot: Top Note, Beautiful Wings Embosslit
Accessories: Rhinestones
Extras: Sponge

I cut a mask with the top note die and teporarily adhered it to my card base. I then sponged with So Saffron and Certainly Celery ink  to fill in the blank masked area. I then stamped the spring sprig around the outside before removing the mask. I stamped my sentiment on the card and added some embosslit butterflies! 

Do you like it? Why not leave me a comment and let me know! 

Just one final note, I am putting through a Stampin' Up! order this weekend so if you would like to grab some SU goodies with free shipping and take advantage of Sale-A-Bration before it ends on March 31st then please email me on amanda_burditt@hotmail.co.uk or call me on 07717206098 with your order by Saturday evening! Don't miss out on your chance to get free products! 

Thanks for popping by!

Amanda xx

Thursday, 15 March 2012

a flutter of butterflies

Saturday was Stu's Great Aunt Lil's birthday - I do cooking and clean for her a couple times a week so obviously I needed to make her a lovely card for her special day. Here's her card...


Fresh Butterflies

Stamp Set: Fresh Vintage (SAB), Teen Tiny Wishes
Ink: Crumb Cake, Early Espresso
Cardstock: Crumb Cake, Sahara Sand
DSP: Everyday Elegance (SAB)
Punch: Decorative Label
Big Shot: Beautiful Wings Embosslit
Accessories: Pearls
Extras: Sponge, Colour Spritzer

I stamped the large flower stamp from Fresh Vintage twice back to back in the background then stamped and punched the sentiment with the decorative label punch, sponged and added it over the top of the floral image. I used the colour spritzer to spritz Crumb Cake and Early Espresso ink over the background to add a bit more texture. I added a load of little butterflies all over the card and added some little pearls to the centres. 

What did you think to today's share? 

Happy Stampin',

Amanda x

Wednesday, 14 March 2012

tagtastic birthday

Last Friday was not only Donna's birthday but also Stuart's uncle Dave's birthday. Here's the clean and simple birthday card I made for him! 


Happy Birthday Bear

Stamp Set: Tagtastic (Hostess)
Ink: Early Espresso, Soft Suede, Poppy Parade, Lucky Limeade
Cardstock: Early Espresso, Confetti White
Punch: Decorative Label
Accessories: Mini Brads

So I had these strips of Espresso lying around that I thought would work as little banners - I cut a snake tongue end to them. I attached them to my Confetti White card base with mini brads. As the focal point I stamped the bear on the bike stamp from Tagtastic, coloured it in and punched it out. Finally to tie in the dashed line on the bear stamp I did a dashed line all around the edge of the card! 

Do you like it? Manly enough? Please leave me a comment and let me know what you think! I love reading them! 

Thanks for stopping by,

Happy Stampin',

Amanda xx


Monday, 12 March 2012

chasing my tail!

Hi there! 

Sorry for not posting last week, its been one of those super hectic weeks. I'm sure you know the type - everything seems to come at once - prepping for card club, ordering bits and pieces, Stampin' Up party for a friend, making and organising things for a craft fair (this past Sat), helping my dad with work on our roof, helping a friend with a crafty project or two of hers as well as the usual church meetings, house work and so on. I've hardly had time to stop! 

Anyway, I now have lots of pretty things to show you this week as a result of not posting any of my makes from last week! Score!

Today's card is for my good friend Donna who's birthday it was on Friday. She is a loyal crafting buddy of mine and her favourite Stampin' Up! colour is Rich Razzleberry so I obviously had to make her a razzleberry card, right?! Right!


Happy Butterfly

Stamp Set: Flight of the Butterfly
Ink: Rich Razzleberry
Cardstock: Confetti White, Rich Razzleberry
Accessories: Rhinestones, Rich Razzleberry Satin Ribbon (Retired)
Punch: Butterfly
Extras: Frost White Shimmer Mist

So I started off by stamping the butterflies - I inked up the butterfly stamp in Rich Razzleberry and then stamped twice on scrap paper before stamping on the card for a paler background shade. Next I stamped the flowers, this time stamping off once on scrap paper before stamping on the card for a slightly darker shade. I was really trying to build up layers on this card without using tons of cardstock. I stamped and punched out the butterfly in Rich Razzleberry. I added some ribbon to the side of the card, stamped the sentiment and added the butterfly, finishing it off with a few little rhinestones. To just give it a little bit more glitz I spritzed it with the shimmer mist. 

I thought I'd just finish off today with a little picture of inside the card - another little butterfly! 


Please leave me a comment, I love reading them. Thanks.

Have a great day! 

Amanda xx

Saturday, 10 March 2012

simply stampin' challenge week 50

Another Saturday, another Simply Stampin' Challenge! This week is colour challenge...


Friend & Flowers 

Stamp Set: Tagtastic
Ink: Poppy Parade
Cardstock: Crumb Cake, Poppy Parade, Baja Breeze, Very Vanilla
Punch: Boho Blossoms, Itty Bitty, Curly Label, Decorative Label
Accessories: Rhinestones

I stamped and made the cute little Tagtastic topper using the Curly and Decorative label punches. I added a flower to the top of this tag. Now this is another card using the borderlines stamp set - see really trying to get more use out of it! I thought the polka dots border just brought out the polka dots in the tag and would tie the card together nicely. I added the tag to the card over lapping the border slightly, to fill it out I punched out flowers in Crumb Cake for some tone on tone flowers. I finished it off with rhinestones and a tiny little banner with handwritten "friend" on it! 

I'll admit I didn't care much for the colour combo this time, I didn't really know where to start but I really like how its ended up and the colour combination is growing on me. I think the key was mostly neutral with a tiny dash of colour! What do you think? 

Happy Stampin',

Amanda  xo


Saturday, 3 March 2012

simply stampin' challenge week 49

Good morning all! 

Can you believe its Saturday again?! Geesh! This week has just flown by and in all honesty I don't know where its gone! Its another Simply Stampin' Challenge today and this week is a sketch challenge! Its a nice simple one for you all! Enjoy...


Just For You 

Stamp Set: Tagtastic, Borderlines
Ink: Early Espresso, Pretty in Pink, Pear Pizzazz, Sahara Sand
Cardstock: Very Vanilla, Pear Pizzazz, Pretty in Pink
Ribbon: Very Vanilla Velvet, Victoria Crochet Trim, Very Vanilla Taffeta 
Punch: Decorative Label
Accessories: Pearls

To start with I rotated the sketch 90 degrees! (You're allowed to do that you know!) Now, I stamped the leaf branch from borderlines on the cardstock - I have to admit I got this set because I thought it was so cute and for some reason hardly touched to so I've been trying to find creative ways of using it! I stamped it three times at varying heights just for added appeal. I then added some strips of velvet and crochet trim ribbon to make up the next layer of the card. for the top layer I stamped, coloured in and punched out the tag with "just for you" on it . I layered a little Pretty in Pink cardstock behind it. Finally I finished it off with a tafetta ribbon bow and some pearls.

I hope you like it! Please check out the other creations on the Simply Stampin' Challenge blog. Please do leave me a comment, I love reading them! 

Happy Stampin',

Amanda xx