Saturday 30 April 2011

simply stampin' challenge, week 5

Colour Challenge time!! Now this week I would like to say a special thanks to Vicky for lending me some cardstock as I didn't have two of the colours in the challenge, they just aren't colours that appealed to me, although I may be having a change of heart about one of them! 


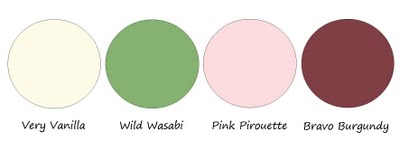
So without further ado, here are the colours in this week's challenge...


And the outcome...


For You (Birdcages)

Stamp Set: Every Little Bit 
Cardstock: Whisper White (textured), Basic Grey, Always Artichoke, Rich Razzleberry
Ink: Versamark
 Punches: Modern Label, 1" Circle, Two Step Bird
Accessories: White Embossing Powder, Linen Thread
Extras: White Gel Pen, Paper Piercer, Tombo Mono, Dimensionals

As I said a couple of these colours, I didn't have - Basic Grey and Always Artichoke! 
I started off with a rough idea that I wanted to use images from Every Little Bit using heat embossing and and a circle punch. I decided to use the bird cage as I love the image and have yet to use it!! Can you believe it!?!  I embossed quite a few, origionally intending to have them in some sort of a 3x3 pattern but when I was laying everything out I just thought, No, this is too boring. I've done a lot of cards like that before, I guess its one of my safety layouts. So I began playing with the circles at different heights, suspended somehow and suddenly thought how cool would it be to have these little birdcages hanging with linen thread on a branch!
I didn't have a long enough branch so used three branches from the two step bird punch joined together. I finished off the card by handwriting the sentiment on the modern label punch in the bottom left hand corner. It really filled the gap and rounded of the card. 
I did say one colour is growing on me, and that one is Always Artichoke! How lovely is it!?! 

Please do let me know what you think. I love reading all your comments! They really do make my day! 

Hope you do take part in this week's challenge. For the other lovely talented design team member's designs head on over to the Simply Stampin' Challenge blog! I look forward to seeing all your entries! 

Amanda xoxo

Thursday 28 April 2011

home again! (a slightly delayed update)

So, I am home from my trip away to Chester. Let me tell you, this trip did not go quite according to plan!


First off we managed to miss place the voucher for the hotel we were staying at so ended up paying it ourselves instead - not the best thing to find out the night before you go away but still we thought we could manage it, and we had been looking forward to getting away for a while so it would have been such a shame to cancel! Stu has been working really hard at school lately and I think its really important for him to have a few relaxing days away...where no work can get in the way! (its not that we haven't been relaxing at home but he has had lots of marking to do and its good to get away from all that for a while!!)


Then on the morning we went away (Wednesday) I woke up with the most awful sore throat and earache, felt really dreadful! I was kind of feeling like we weren't meant to go or something which felt really rubbish! I had a sore throat, earache and cold etc a couple weeks ago and have just been getting over it, just had a little bit of a cough left really and then Wednesday I just got full of cold all over again! I hoped it would just clear up as the day went on but if anything it got worse! When we got to Chester pretty much all we did was find a Boots chemist, buy Lemsip capsules and water and then head to a lovely little park in the centre and relax! At least the weather was gorgeous!!


Our hotel was amazing. I might sound really naive here but I've never been to such a posh hotel before, its called Crabwall Manor Hotel (definately recommend it if anyone is thinking of getting away!!!) The Manor itself is really gorgeous and has really pretty grounds to walk in or sit in and have a drink in the evening! Our room was really something (now this is coming from someone who has always gone for budget hotels and travelodges until this point!). First you walk into a sitting room and then in another room is the bedroom with a bed as wide as I am tall!! It was all furnished really lovely as well. And then the bathroom...well its definately a lot larger than the bathroom we have in our house! It had the most enormous bath(!!!!), toilet, bday, his and hers sinks and a big shower...oh and it was all underfloor heated...what luxury!!


Anyhow, I just reaslised I'm rambling quite a lot. So now I will be brief. We had the most gorgeous weather so it was perfect for doing things outside, we went to Beeston Castle (a lovely ruin on the top of a hill with a very pleasant walk up and also a great woodland walk around the base!) and after that we cooled down by stopping by the ice cream farm and having some awesome ice cream!! Its all made fresh on the farm and after a hot day and lots of walking it hit the spot. We pigged out a bit by each having a waffle cone with 2 gigantic scoops! I had chocolate fudge cookie and pistachio (both heavenly), and Stu had malt tease and double chocolate (also heavenly!). Seriously, if you ever are up in Cheshire, you have to go there its great and good fun for the kids too...lots of play areas, baby calves and you can watch the cows being milked! 


On Friday we walked around Chester, saw the Roman sights, had a lovely boat cruise down the river Dee and then in the afternoon headed over to Ness Botanical Gardens! All the rhododendrons were out, some of my favourite flowers, and as they are way too big to ever have one in our garden, so I just soaked them all up! I'd really recommend that garden too if you want a nice relaxing place with plenty to see! 


I meant to post this last week but I was still suffering with a sore throat and had a severe migraine on Sunday. I eventually went to the doctor about my throat, earache and cough yesterday...I have tonsillitis! Thankfully now I have medication and hoping I will feel better soon, I haven't really felt like doing much of anything. 


Some good news, yesterday I finally got my passport back so today I went down to the travel agent and book myself tickets to the States next month! I am very excited as I haven't been over there for almost 3 years and cannot wait to see my cousin Rachel get married! 


Catch you later, 


Amanda xoxo

Saturday 23 April 2011

simply stampin' challenge, week 4

And this week we are back to another sketch challenge! I think I've decided sketch challenges are some of my favourite! Its really great to be challenged with a sketch design for a starting point. This week's challenge template was lovely! 


Thinking of You

Stamp Set: Silhouette Sentiments
Cardstock: Certainly Celery, Elegant Eggplant, Whisper white
Ink: Versa Mark, Elegant Eggplant, Certainly Celery
Stampin' Pastels: Certainly Celery
Accessories: Whisper White Satin Ribbon, Basic Rhinestones
Extras: 1" Circle Punch, 1 3/8" Circle Punch, Dimensionals, Sponges

I stamped the flowers in versamark on the Whisper White and them used a cotton ball to apply Certainly Celery pastel to the image. I sponged the edge with Certainly Celery ink and mounted on a piece of Elegant Eggplant cardstock. I tied some ribbon to the Certainly Celery cardbase (which I sponged the edges with Elegant Eggplant ink) before adhering the chalked flower section. I stamped the flowers and bird on separate pieces of Certainly Celery cardstock, punched them out and them sponged the edges with Elegant Eggplant ink before adhering them with dimensionals. Finally I stamped the sentiment, Thinking of You, in the bottom right hand corner, and added a strip of 3 rhinestones to the corner. One more rhinestone on the branch with the bird finishes off the card! I must just say, I am LOVING this colour combo at the moment! 

Hope you enjoyed this week's challenge entry and look forward to seeing what you all create. So head on over to the Simply Stampin' Challenge blog to enter for you last chance to win some lovely goodies. Also check out the other design team member's entries! They're fab! 


Have a great weekend! 


Amanda xoxo

Wednesday 20 April 2011

floral brooch

I'm still here! After a busy week of posts everyday last week I haven't much to share at the moment, I have been busy getting all my projects ready for my May and June classes (I have some very exciting and cute projects in store so please do book your place and come along - I'm sure you won't regret it!) As a result of class planning, I haven't had much time to play (I want my class projects to be a bit of a surprise so look out for postings after my class!) 

I scoured my photo archives today just to see if there was anything I hadn't yet shared that I could put up for you all to see and I found this cute little rosette! I saw this a few weeks ago on the lovely and talented Amanda Fowler's blog, to see her tutorial on how to make them see here.


Ribbon Rosette 

Stamp Set: N/A
Cardstock: Melon Mambo
Ink: N/A
Accessories: Satin Ribbon (non SU - I wish SU sold bright pink - melon mambo - coloured satin ribbon!!!), Basic Rhinestones 
Extras: 1 3/8" Circle Punch

I cut slits in the ribbon at intervals and rounded the corners then using the heat tool heated the ribbon until it began to curl and melt a bit. When I was satisfied I covered a piece of cardstock in SNAIL and began winding and sticking the ribbon to the cardstock to form a rosette. After a while, when I was finally happy with it I cut off the excess and added a bunch of different sized rhinestones to the centre to finish it off! 
Its so gorgeous, I makes a perfect brooch or even a lovely little accent for a card!!! 

Stuart and I are going away to Chester for a couple days, using our wedding present from his brother Richard and cousin Andrew which was a afternoon tea for two and overnight stay at this fancy hotel. Looking forward to relaxing and getting away from it all for a bit and spending some quality time with my lovely hubby...I'm a little nervous leaving all my creative things at home and no access to them 'till Friday night...I'm well and truly an addict!!! Seriously I am! EEK!! 

Finally, I just want to let you know I have another workshop scheduled for Friday May 6th at mine at 7:30pm so please do come along! I'd love to see you there! 

Also, don't forget to book your place for my May class! I am soo excited!!

Take Care, 

Amanda xoxo

Saturday 16 April 2011

simply stampin' challenge, week 3

This week's Simply Stampin' Challenge is a themed challenge. And I was very excited to see that it was an Easter theme! Any excuse to decorate the house...and I'm there! I remember as a kid my mum, brother and I would decorate eggs with food colouring and wax resist. So when I was thinking about this challenge I considered trying something similar...for old time's sake with re-inkers. However at the moment I only have Marina Mist and lets face it, one colour can only go so far...so that idea is on the back burner 'till next year when hopefully I'll have more re-inkers! 


The project I did this week was inspired from an idea that was shared at the Stampin' Up! training day I attended last month, and here it is...


Easter Tree

Stamp Set: N/A
Cardstock: Certainly Celery, So Saffron, Pink Pirouette
DSP: Certainly Celery, So Saffron, Pink Pirouette, Marina Mist, Perfect Plum 
Accessories: Whisper White 1/4" Grosgrain Ribbon, Whisper White Satin Ribbon
Extras: Eyelets, Crop-a-dile, Corner Chomper, Crimper, Sticky Strip
Other: Chocolate Eggs, Chick Marshmallows, Flower Pot, Stones, Twigs

A bit different to what I normally do hey? I thought Id make a "Easter Tree".  On It are hung lots of little boxes which I made (so simple to do and really cute) and decorated with some Brights Collection DSP. Inside each box are little treats, tiny foil wrapped chocolate eggs and marshmallows. I shredded some carstock and crimped it to add inside the box to pad out the treats and make them look extra special - like they're sitting in a little nest! Finally I added some satin ribbon bows to the twigs just to fill it out a little more and make it look extra cute! Below are additional close ups of the tree and boxes! 


I intend on giving these little gifts to guests who visit us over the Easter period...a cute little surprise for them! (Anyone who came to my workshop last night got to choose one!) 

Please don't forget to head over to the Simply Stampin' Challenge blog to see what the other lovely talented design team members have created. Also enter your own creation for your chance to win some lovely goodies (for more details, check out the simply stampin challenge blog!).

Until next time, 

Amanda xoxo

Friday 15 April 2011

cravendales milk

Anyone who knows me will know that I am a sucker for a GOOD advert! One of my favourite ads at the moment is the Cravendale's Milk ad....and I thought I would just share it with you! I hope you enjoy it as much as I did! I think its really clever and funny!


Hope you like it! 


Amanda x

finally friday

I only have a little card to share with you today (I'm actually writing this post the night before, nursing my arm which is really hurting after burning it on the oven! Ice is helping a little but still hurts! booo). Its a little monogrammed notelet. 


"A" Monogrammed Notelet

Stamp Set: Broadsheet Alphabet, Punch Bunch (SAB), En Francais
Cardstock: Very Vanilla, Certainly Celery, Rich Razzleberry
Accessories: Basic Rhinestone
Extras: 1 3/8" Circle Punch, Eyelet Border Punch, Dimensionals. 

I stamped the background with the En Francais background stamp. I stamped the scalloped circle for you stamp from the Punch Bunch in Rich Razzleberry on razzleberry cardstock, I then punched out the centre so just the scallop edge remained. On a separate piece of Very Vanilla I stamped the enitial "A" and the adheredit to the centre of the scallop circle. I adhered narrow strips of Certainly Celery eyelet border to the top and bottom of the razzleberry strip. Finally, I finished off this little notelet with a rhinestone on the monogram. This would make a really cute little monogrammed gift set which is what I intend on doing with this...watch out for the finished gift sets soon! 

I hope you have a great Friday! If you're in the area, tonight, I am having my workshop so please pop along, there's a extra little something in it for all who attend!! 

One more thing, its your last chance today to enter the Simply Stampin' Colour Challenge...a new challenge is released tomorrow so please head on over, enter for your chance to win some lovely goodies!!! 

Take Care!

Amanda xo

Thursday 14 April 2011

give a little

A few days ago I said that last Thursday I went over to Vicky's to have some crafty play and use her big shot. I cut out lots with it so I have plenty to play with back at home. Here is a little gift carton I made using the Milk Carton die! I have more things I still plan on making but I will make and share them another day! Today is just a really quick simple little one!


Congrats Milk Carton

Stamp Set: Silhouette Sentiments 
Cardstock: Pink Pirouette, Rose Red DSP
Accessories: Pink Bulldog Clip
 Extras: Sticky Strip, 1" Circle Punch

This is a really great little container for giving a small gift to someone! They would make cute favours at a wedding too! 

Please leave a comment! I love reading them! 

'till tomorrow,

Ciao!

Wednesday 13 April 2011

what a lovely day!

Just a short little post to say what a lovely day I have had! For anyone that knows me, you will know that I am not really a baby and kid person...I just don't know what to do with them and afraid I'm just not good at connecting with them! So this may surprise some of you... Today Stuart and I took Harry and Ollie (new little baby Georgia's older brothers) to the park! We had SO MUCH FUN!! seriously! We swung on the swings, played football, ate an ice-cream, fed the ducks, played on the slide, more football, more sliding and more swinging! The boys totally loved it! And they were SO good all afternoon, only a tiny 30 second tantrum when it was time to go home! I wish kids were always like that! It was nice to be able to give Lydia a break from the boys, she must get so tired out looking after 3 kids! Anyhow, that's all that I wanted to say, I was actually pleasantly surprised how fun it was and needed to share it with someone!!

oh baby!

Everyone seems to be popping out babies at the moment, and I realised that I don't really have any baby cards, so I thought it was about time to put that right and use the way cute baby pram from the Fun and Fast Notes set! 


Happy New Baby

Stamp Set: Fun & Fast Notes
Cardstock: Very Vanilla, Early Espresso, Marina Mist
Ink: Early Espresso, Marina Mist 
Extras: Crystal Effects, Dimensionals, Blender Pen

I stamped the image, coloured in the wheels with a blender pen, paper pieced the carriage in marina mist using dimensionals to add a bit of depth to the image and after adhering it all together to the background, added some crystal effects just to jazz up the wheels a little bit more! Its such a simple but very cute baby card 

Side Note: This is a quick one too so good for those last minute rushes when you suddenly realise you need a card and don't have one! The time it would take to make think is probably shorter than the amount of time it would take going to a shop and picking one out! And if I do say myself, much nicer!)


I also did a girly version using Pink Pirouette cardstock and Pretty in Pink ink! 

Hope you enjoyed today's creation and please do leave a comment! 

Amanda x

Tuesday 12 April 2011

two for tuesday

As I said, I have a fair few projects and cards I've done recently and now I'm slowly adding them so you can see...I figure if I spread them out more you'll be able to appreciate them more! :) Today's two both use the Bliss stamp set which is no longer available but was a Sale-A-Bration stamp set a few months ago!


Thanks 

Stamp Set: Bliss (SAB)
Cardstock: Crumb Cake, Early Espresso, Very Vanilla
Ink: Pacific Point, Rich Razzleberry, Pumpkin Pie, Old Olive, Riding Hood Red, Crumb Cake
Extras: 1" Circle Punch, Sponge, Brown Pen (would have used early espresso pen if I had one!), Dimensionals

I simply stamped the flower image from the Bliss set in a variety of colours and then punched them out with the 1" circle punch. To make them blend in more with the background I sponged them all with Crumb Cake Ink and adhered them with dimensionals to a neutral Crumb Cake background! I hand wrote "thanks" underneath the flowers.


Fluttering Butterflies
Stamp Set: Bliss (SAB)
Cardstock: Crumb Cake, Early Espresso, Very Vanilla
Ink: Early Espresso, Elegant Eggplant
Acessories: Basic Rhinestones
Extras: Tombo Mono Multi Glue

A very simple but elegant card, and as it has no sentiment it is very versatile as to what it can be used for! Loving the cute fluttering wings of the butterflies!

(As you can see from both my cards today, I have been indulging myself in my current favourite colour...Crumb Cake!)

I hope you enjoyed today's shares! Please leave a comment, they make my day! Hope you are all having a very blessed Tuesday! 

Amanda 

Monday 11 April 2011

let's rock and roll!

It's been a little while since I added some cards that weren't challenges...I've been busy making and have now got lots to upload! Today I would like to share my experimentation with the rock and roll technique!


Thinking of You

Stamp Set: Silhouette Sentiment, Punch Potpourri 
Cardstock: Very Vanilla, Certainly Celery, Old Olive
Ink: Dafodil Delight, Pumpkin Pie, Old Olive
Extras: Staples, Dimensionals

If you would like to see how to do a card like this, and have a go yourself, why not come along to my class in May when we will all be having a go at doing the Rock and Roll technique! Its really easy and fun....not to mention very cool looking! 


Tea Bag Holder

Stamp Set: Punch Potpourri, Bliss, Silhouette Sentiments
Cardstock: Early Espresso, Certainly Celery, Marina Mist DSP
Ink: Early Espresso, Certainly Celery, Old Olive
Accessories: 1/4" Whisper White Grosgrian Ribbon, Dazzling Diamonds Glitter
Extras: Sticky Strip, Tombo Mono Multi Glue, Dimensionals, Velcro, Eyelet Border Punch, 1" Circle Punch, 1 3/8" Circle Punch

Again, this is going to be a upcoming project in my classes, so keep your eyes peeled for the class featuring this project! Its totally gorgeous and makes a fantastic gift! 

Hope you enjoyed today's offerings, please do leave a comment, they make my day! 

Amanda x

Saturday 9 April 2011

another successful workshop and a general update

Ok, so just to fill you in on the last few days, on Thursday I went over to another demonstrator's house in Northampton (because she found me on the demo finder and we thought it would be lovely to meet up and share some ideas with each other! and have some crafty play) It was so great to meet her and spend some time with another Stampin' Up! demo, that's the sad thing about having an upline that lives in Shetland! Anyway, Vicky was super lovely...and she let me play with her Big Shot!!! *Gasp* It is such a dream to use! I loved it so much and its so great all the materials you can run through it! It would be fab to cut out a load of different shapes that can then be layered on top of one another. I cut out a bunch of different little shapes so I can play at home, I intend to have a go next week and then I shall upload some photos of things I did! (Now, I cannot wait 'till my birthday in August to get my own Big Shot...but I shall be patient!)

Friday I had the day off, my friend Donna came over, I cooked a great Chinese feast - Spring Rolls, Vegetable & Noodle Stirfry, Chicken & Cashew Stirfry, Beef in Oyster Sauce, and Sweet and Sour Pork! It was SO yummy!! My hubby doesn't eat Chinese so I have to take advantage of times like these when I have friends over and just go all out...at least now I have lots of nice left overs to munch on! So we sat and ate our feast and watched Confessions of a Shopaholic...such a funny film! Unfortunately the only downside to yesterday was a rather sore throat and feeling a bit on the unwell side! 

Today I woke at the crazy early time of 7:30am after a bad nights sleep. My throat was worse, I felt awful and I had a workshop later today! I almost thought I wasn't going to make it! Thank goodness for Lemsips! I dosed myself up on Lemsip and made it to Ally's workshop! Despite my croaky voice and feeling under the weather, it went really well! I met some new people which was great (I hope I was sociable enough) and got to catch up with old friends and acquaintances! I'm so glad that my workshops are going so well, its so encouraging and I am really looking forward to running my classes soon! I already have one person signed up for my class on May 21st! It is so encouraging to see all the interest I am receiving at the moment! Thanks for everyone that has supported/supporting me in what I am doing at the moment! 

Please do get in touch if you would like to attend my class next month. 

Thanks again,

Amanda xoxo

simply stampin' challenge, week 2

This week's Simply Stampin' Challenge is a colour challenge!


The colours are:


I have to start off by saying that I colour challenges have never really been my strong point, so I struggled a bit with this one! Not to mention that I didn't actually own anything Bravo Burgundy coloured so I just got myself an ink pad, I think I would have liked to use some Bravo Burgundy cardstock too if I had had some! I still think the card turned out ok though! So without further a do, here is this week's project! 


Bouquet

Stamp Set: Every Little Bit, Greenhouse Garden
Ink: Bravo Burgundy, Pink Pirouette
Cardstock: Very Vanilla, Pink Pirouette, Pink Pirouette & Wild Wasabi DSP
Accessories: Whisper White Grosgrain Ribbon
Extras: Sponge, Crystal Effects, Dimensionals

I used used heart and flower stamps from the every little bit stamp set on dsp with Bravo Burgundy ink and then cut them out. I used the stem from the Greenhouse Garden to stamp some stalks for my bouquet on the Very Vanilla cardstock and then layered up the hearts (for leaves) and flowers. I sponged the Whisper White ribbon with the Bravo Burgundy ink and then sponged the edges of the Very Vanilla cardstock with Bravo Burgundy too, just to add some more definition (very important when you have several very pale colours all working together!). I stamped the Pink Pirouette card base with the flower stamp in  Pink Pirouette ink for a tone on tone pattern. Finally I added crystal effects to the centre of the flowers in the bouquet just to add a little more interest! 

I hope you enjoyed this week's offering! Please leave a comment! I love reading them and its so nice to see your opinions! 

It has been so great to see so many of you play along with last week's challenge and I hope even more of you will play along this week...its so fun to see what you all create and how you interpret the challenge! 

Finally, please head on over to the simply stampin' challenge blog to see what the other lovely design team members have created and to enter in for your chance to win lovely goodies! 

Take care! 

Amanda xoxo

Tuesday 5 April 2011

everyone gets to make a magnet!

As promised, here are the projects I demonstrated last night! 


Congratulations Hearts 

Stamp Set: En Francais, I {Heart} Hearts, Fun & Fast Notes
Cardstock: Crumb Cake, Riding Hood Red, Marina Mist
Ink: Versa Mark, Riding Hood Red, Pacific Point
Pastels: Marina Mist, Riding Hood Red, Pumpkin Pie
Accessories: Pumpkin Pie Button, Linen Thread
Extras: Clear Embossing Powder, Heat Tool, Cotton Balls, Sponge, Dimensionals, Glue Dot

In this first demo I really wanted to highlight the wonderful ways you can use the versa mark ink pad (something I don't think I could live without!). This also included embossing!
I stamped the En Francais background stamp with versa mark on the Crumb Cake cardstock and then used cotton balls to gently rub and blend Stampin' Pastels over it to give some gentle colour and bring out the writing! I then stamped the hearts with versa mark and covered them in clear embossing powder and heated with my heat tool. I used a sponge to rub some Pacific Point ink over the small LOVE heart to show the emboss resist technique. Finally, I adhered everything together, stamped the sentiment from Fun & Fast Notes and added a small button!


Get Well Flowers

Stamp Set: Greenhouse Garden, Fun & Fast Notes
Cardstock: Whisper White, Early Espresso, Old Olive, Crumb Cake, Marina Mist
Ink: Marina Mist, Early Espresso, Old Olive
Accessories: Basic Rhinestones, Whisper White Grosgrain Ribbon (dyed Marina Mist)
Extras: Paper Crimper, Sponge, Dimensionals, Glue Dots, Stamp-a-ma-jig, Modern Label Punch

With this demo, I wanted to show how to use a stamp-a-ma-jig as I think it is an amazing peice of kit and show how perfect it makes stamping and possitioning every single time! I also wanted to show how you can get more out of your ink pad by sponging! 

I used the stamp-a-ma-jig to stamp the medium flower from the Greenhouse Garden. Then I used the sponge to sponge Marina Mist ink around the edge of the Whisper White cardstock, I also dampened a piece of whisper white ribbon and sponged it on both size so it was Marina Mist in colour! A great way to get a piece of white ribbon to match any colour ink you have!! I love it! I layered up the cardstock and then stamped, punched and sponged the sentiment before adhering it to the bottom of the Whisper White cardstock, this just "grounds" the flowers so its not floating. finally I crimped the edge! 


Pie Thanks Magnet


Pie Magnet


Gumball Birthday Magnet


Gumball Magnet

Stamp Set: Every Little Bit, Fun & Fast Notes
Cardstock: Whisper White 
Ink: Basic Black, Pumpkin Pie, Real Red, Marina Mist, Pacific Point, Daffodil Delight, Old Olive
Accessories: Linen Thread
Extras: Bottle Cap, Magnet, small piece of tango can, Blender Pen, Crystal Effects, 1" Circle Punch, 1 3/8" Circle Punch, Dimensionals

If you want to see how to make this way cool magnet, come to my workshop next Friday!!! You get to make one yourself!! 

(CASEd from a swap I received at Coventry Training by Zoe Tant - thanks for the awesome idea!)

Hope you enjoyed seeing a bit from my latest workshops! Please do come along next Friday and bring a friend!! It would be great to see you there! 

Ta ta for now! 

Amanda xoxo

14 people...

It was a bit of a mission tonight at a workshop I did for my husband's aunt Deb, when I had 14 ladies to entertain and try to keep under control! They all seemed to have a great time, they loved watching the cards come together so quickly especially all the embossing I did, and the stamp-a-ma-jig was a hit too! They seemed really excited to make their own magnet...but by golly that was a mission to get everyone organised! I never expected so many to come! We had to do the make and take in two sessions...so it finished a lot later than was expected, but that was always going to be the case when you have that many all trying to do the same thing and needing help and advice along the way! I felt like I needed to be in six different places all at the same time! 


I only got one more booking, with another of Stu's aunts, but hopefully I'm getting some of the ladies hooked on crafty things! (especially ones that have never tried anything like this before! I totally understand that its a lot to take in at once!) I really do think its so nice to be able to come out for an evening and just relax, not have the worry of other things you should be doing, or kids nagging at you and just have fun being creative! And learning how simple it really is! So simple that ANYONE can do it!  


I'll post some photos of the cards and magnet I demonstrated tomorrow....its late now and I'm shattered! 


Also, a couple days ago I promised more on the builder wheel! Its been a massively busy weekend, much more so than I was expecting it to be, and haven't yet finished my entry. I will finish it tomorrow, take a photo of the card we made at training using the builder wheel and post that tomorrow too...two posts in one day, now that can't be a bad thing, can it!?


One last thing, if you're free and in the area, I am holding a workshop on Friday 15th April at 7:30 and all are welcome to come! There will even be a little extra something for anyone who attends as it is the week before Easter! Very exciting!! (I wonder if I am still entitled to an easter egg now I am a grown married woman?!) 


Take care, 


Catch you tomorrow,


Amanda xx