Showing posts with label labels framelits. Show all posts

Tuesday, 18 February 2014

Elegant 30

Hello! 

Just a super quick post today, Stuart is on holiday from school (yay!) and as a result we are trying to get a bunch of jobs done around the house, there's a fence to repair and I need to get my sewing machine to the repair shop. I'm not really sure what the matter with my machine is at the moment but it REALLY doesn't like me!!! Hopefully my lovely sewing machine man can get it all sorted for me! (And hope it won't cost too much either!!)

I thought it was about time that I showed you a card that my cousin asked me to make for her a few months ago. Its a pretty fun and elegant 30th birthday card! 


Stamp Set: Express Yourself
Ink: Elegant Eggplant
Cardstock: Elegant Eggplant, Elegant Eggplant Core'dinations, Pistachio Pudding, Silver Glimmer Paper, Vellum
Big Shot: Beautiful Wings Embosslit, Typeset Alphabet, Labels Framelits, Beautifully Baroque TIEF
Embellishments: Rhinestones, Pistachio Pudding Ruffle Ribbon

I just love the core'dinations card - isn't it just beautiful embossed and sanded? The embossing folder wasn't tall enough to do the entire card front so I did as much as I could and just worked it into the design with a bit of the ruffle ribbon. 


The 30 and butterflies just add a bit of sparkle and really stand out in the pistachio and glimmer paper against all that deep, rich eggplant colour. 

What's your thoughts on this colour combo? Its a bit different, right? 

Have a great Tuesday!

Happy Stampin',

Monday, 27 May 2013

May Card Club - Masculine

Good afternoon! 

Isn't it just a gloriously weekend?! Right now I'm sitting next to my beloved on our sofa outside, enjoying sun and warmth and drinking in all the beautiful spring smells, mingles with BBQs. I'm guessing quite a lot of my readers will be enjoying a nice long relaxed weekend, being a Bank Holiday in the UK and for my American friends, Memorial Day! I hope wherever you are you are enjoying good weather and spending some time with your dear friends and family. 

Stuart and I are trying our first ever proper BBQ - not like a grill out where you burn charcoal and then stick burgers and sausages on the grill to cook. I'm taking about proper American style BBQ - it involves sticking wet wood chips on the coals to smoke the meat to cook it over hours. I've watched it so many times on the Food Network - love Guy Fieri! So after watching it so many times, doing a bit of research, watching some you tube videos, I've made a dry rub for my beef brisket, made my own BBQ sauce, and got the wood smoking the meat. Now my tummy is grumbling with anticipation. Its going to be epic - if I can remember in my excitement I'll snap a few pics for you guys. 

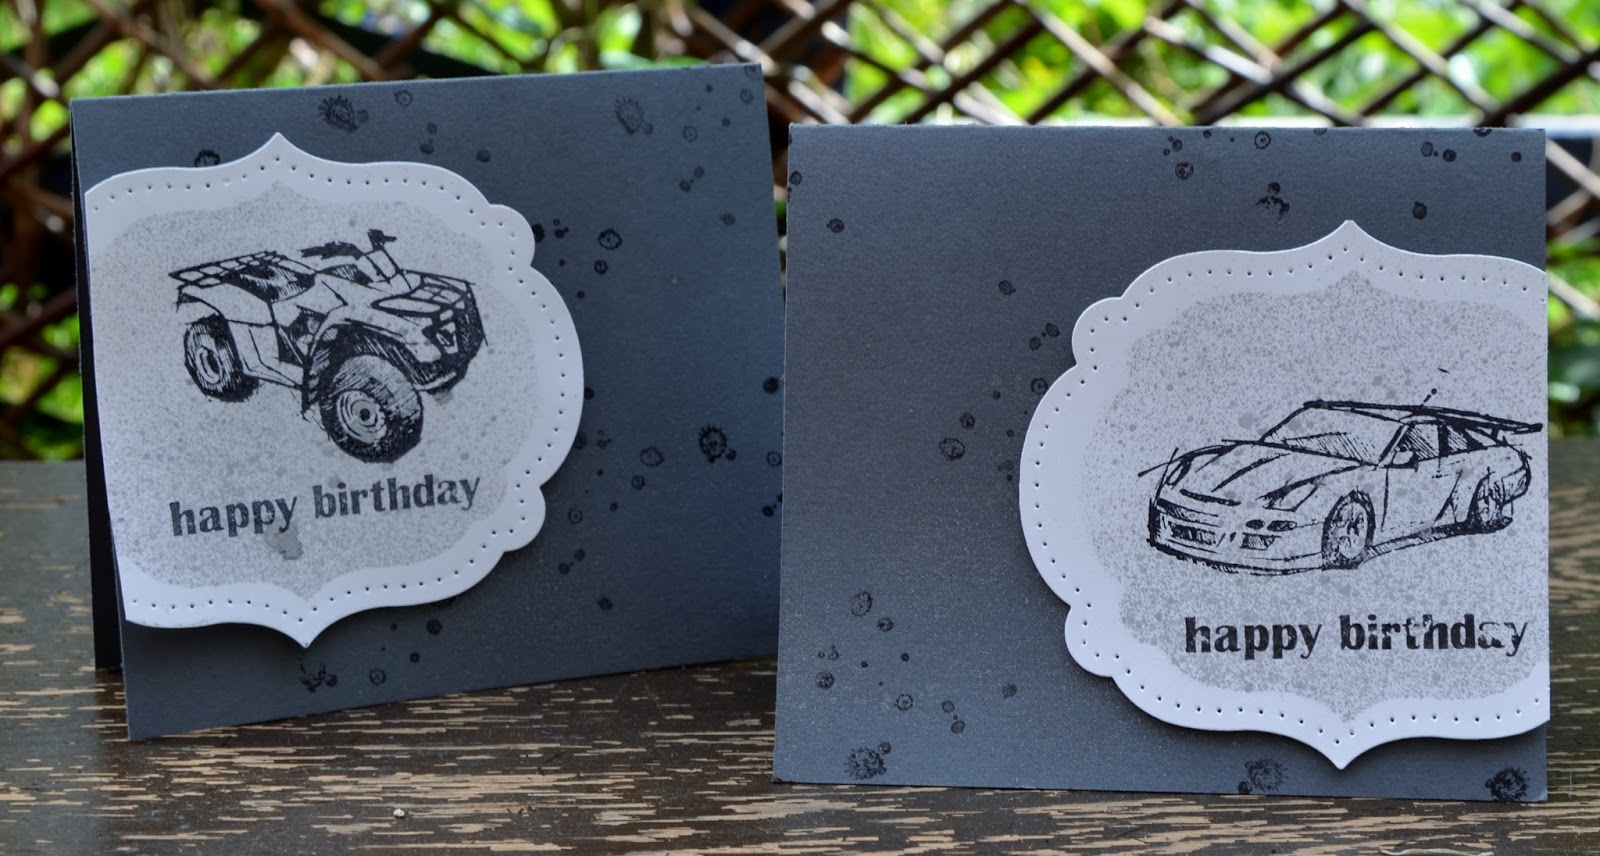
Anyway, onto some card love for y'all. I thought you'd like to see the Masculine collection of cards my lovely card club ladies made last weekend. All were designed so the sentiments could be swapped out - its great to have choice isn't it!? 

With Father's day less than a month away its time to start thinking about making some cards for those special men! 


Aren't these cards fun!?! Do you struggle for inspiration when it comes to masculine cards? They're difficult aren't they!


Stamp Set: Need For Speed, Best Dad Ever, French Foliage
Ink: Basic Black
Cardstock: Whisper White, Basic Grey
Big Shot: Labels Framelits
Extras: Silver Foil Smooch Spritz, Festive Piercing Pack

This card is a bit messy but it looks great and so its well worth getting a little sparkly for! 
A mask was cut from printer paper and temporarily adhered with my awesome two way glue pen to the white cardstock, then spritz with the fab Smooch Spritz (its ready made sparkly spritz that you can mist your projects with - amazing stuff!!). Let it dry a moment while you spritz the background and stamp it with the water blot stamp from French Foliage. By that time it should be dry so peel off the mask and cut with the next size up framelit, pierce with the piercing pack for some extra detail and then stamp the car and sentiment. I thought it looked cool chopping off part of the label. What do you think? Do you like this monochrome card? 

So what are you up to this beautiful bonus weekend day? Have a great day and stop by again soon for more on the other fun man cards we made! 

Happy Stampin',

Amanda x

Saturday, 18 May 2013

Two by Two...

Hello there!

I hope you are having a nice weekend? The weather is a bit glum here, cloudy and cold but the silver lining is, it is dry! I had a little mosey around a craft fayre and plant sale this morning and bought an azalea. Rhododendrons are one of my favourite plants, the flowers are just so gorgeous, unfortunately they're big and I didn't have room for one so seeing as azaleas are like a smaller version, I had to get one for our garden when we got married and moved in to our house. I am sad to say I am really no gardener, things die on me. Anyway, my azalea died and I've had a dead plant in a pot for quite a while now, so I thought I'd give it another go. Wish me luck!

Anyway, enough of my morning's antics. Back in March my friend Lisa had a baby boy, so of course I had to make a card for the new babe. 

I'd recently got the Two by Two stamp, I am so digging the sweet Noah's Ark with all the animals crammed in there. Its just adorable! So I thought I'd make it into a new baby card! 


Stamp Set: Two by Two, Rain or Shine
Ink: Black Stazon, Soft Suede, Daffodil Delight, Pumpkin Pie, Pool Party, Rich Razzleberry, Tempting Turquoise, Island Indigo, Basic Grey
Cardstock: Pool Party, Very Vanilla, Watercolour Paper
Punch: Cupcake Builder
Big Shot: Labels Framelits, Adorning Accents 

I had some fun with blender pens to colour this in, the watercolour paper really does make a lovely surface to colour on, its thick and holds the ink really well without buckling and pilling! I love that with the use of a blender pen I can colour in with all my ink pads and make it look like a lovely watercolour! 
I thought the hearts would look super sweet on the rain clouds and then I thought how awesome would it beto use the hearts rain drops coming from the clouds, isn't it adorable!?! 

I think what I love most is reversing the matting layer! I often use neutal card for the base and the main focus of the card with a coloured matt but I wanted the clouds and watercolouring to really show up so I reversed the matt. Here the matt is vanilla - love it!!!

Before I go I just have to tell you about my amazing grilled cheese sandwich (I wish I had a photo to show you now!) It consists of buttered bread so it grills nicely in the pan, the inside the bread is smeared with cream cheese, topped with shredded cheddar, fried bacon, tortilla chips, chilli peppers and then more cheddar and another piece of cream cheesy bread! Oh my goodness it was freakin' amazing!!

Hope you're having a great day! 

Hugs,

Amanda x


Thursday, 7 February 2013

It's All About The Pattern!

Hi there! 

I've got a really quick card for you today using the Sale-A-Bration set, Patterned Occasions - totally loving this set!


Stamp Set: Patterned Occasions, Alehambra (wheel)
Ink: Rich Razzleberry, Lucky Limeade, Daffodil Delight, Early Espresso
Cardstock: Whisper White, Rich Razzleberry, Lucky Limeade
Punch: Dotted Scallop Ribbon Border, Corner Rounder
Big Shot: Labels Framelits
Extras: Occasions Pierce Pack

Totally love the pattern from the Alehambra wheel - I think it works well with the pattern on the elephant! I also cracked out my sponges again (haven't used them much recently) to give a little colour to the edge of the labels framelit. I also added the paper piercing  inside the framelit for another little added detail. 

This would be a fun card that would work with any of the stamps in the Patterned Occasions set. Isn't it great when you find a layout that works again and again!?! Less thinking is sometimes the way forward! 

I've got a couple more cards with the Patterned Occasions for you tomorrow, so please do come back to see them! 

Happy Stampin',

Amanda x


Sunday, 7 October 2012

whirlwind weekend take 2

I'm back as promised with another darling little project that I demo'd this weekend for a couple of parties. It was World Card Making Day yesterday so in honour of it I focused on some card making techniques and tools! 

This project is another Betsy creation. I'm sorry but you're probably going to see a lot of Betsy Blossoms creations in the coming days as I am just crazy for the sweet bird, flowers and leaves!


Rainbow Blooms

Stamp Set: Betsy Blossoms, Betsy Blooms (wheel), Itty Bitty Banners
Ink: Melon Mambo, Pumpkin Pie, Daffodil Delight, Gumball Green
Cardstock: Whisper White 
Big Shot: Labels Framelits 
Extras: Festive Paper Piercing Pack
Ribbon: Daffodil Delight Stitched Grosgrain
Accessories: Rhinestones

This card is showing off the beautiful co-ordination that Stampin' Up! has! See how the flowers in the wheel stamp match so perfectly wit the flower from Betsy's Blossoms?! I love that! So I inked and wheeled the Betsy's Blooms in 3 colours - like a rainbow! In all honesty, I haven't used wheels in a while, they got a little forgotten about but recently I have regained my love or wheels and how easy they make patterned backgrounds! They are really quite inexpensive and so easy! If you haven't tried wheels yet you have to give it a go, they're so much fun! 

I was also showing off the new piercing packs that Stampin' Up! have. Its so neat that they co-ordinate with framelits and punches that SU! carry. Yes, there's that word again, co-ordination. It really is at the heart of what Stampin' Up! is all about and one of the reasons I love them as a company so much!! 

Its definitely got a good pop of colour! A cheery card as we head towards the coldness of winter! I'm not a fan of the cold so hanging on to summery cards and colours as long as possible is a must for me! 

Have a great Sunday,

Amanda x