Showing posts with label bird builder. Show all posts

Wednesday, 25 June 2014

Language of Love Florals

Hey! 

As promised, I'm back today with some details for card I shared yesterday plus another one too! 

Both these cards are using the Language of Love stamp set. Neither are at all romancey - yes I wanted to get more use out of this cute stamp set. You can still order this set which is in the Spring/Summer catalogue until the end of the month. 


Stamp Set: Language of Love, Happy Day
Ink: Pool Party, Calypso Coral, Pear Pizzazz
Cardstock: Whisper White, Pool Party, Calypso Coral, Pear Pizzazz, Silver Glimmer Paper
Punch: Bird Builder, Small Heart, Owl Builder
Embellishments: Linen Thread, Subtles Buttons

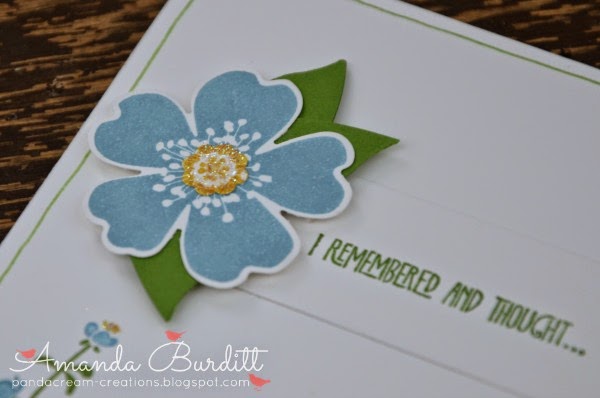
Here I used the sweet little small hearts to make some sweet flowers. I love the patterns on then and look great. I decided I wanted the leaves to have some texture to match the flowers so I used the spotty banner and punched after. I know the banner isn't quite large enough to cover the whole branch but it doesn't look too bad. 

Buttons, a little linen thread bow and glimmer heart are cute finishing touches for this clean and fresh card! 


Stamp Set: Language of Love, Happy Day
Ink: Pool Party, Calypso Coral, Pear Pizzazz
Cardstock: Whisper White, Calypso Coral, Pear Pizzazz, Silver Glimmer Paper
Punch: Bird Builder, Pansy, Fancy Flower, Owl Builder
Embellishments: Linen Thread, Subtles Buttons

Yes this is quite similar to the other card, same colour scheme, but just using one larger flower. I used the love text heart to make my own pattern paper by nesting the heart together a couple times then punching in the centre. If there's a little overlap, it doesn't matter all that much as the button can cover it. See the image below.


The fancy flower punch is retiring at the end of this month so get in quick if you want it before it's gone for good! Doesn't it layer beautifully with the pansy punch?!

I used the wing from the bird builder to make the leaves. Again button, linen thread bow and a glitery heart are sweet finishing touches.

Hope you're having a great day. 

Happy Stampin',

Monday, 23 June 2014

Floral Quatrafancy

Hello!!

Its been a while hasn't it!! Did you miss me?! Life has been totally manic around here lately and I'm afraid doing much of anything in my craft room or on the blog has had to take a bit of a back seat. 

Today was my first day on the new permanent job as a Learning Mentor. Its quite different to working in the manic Student Services and I'm still not entirely sure what to make of it. I just want to get properly stuck in to the job now and its a bit frustrating as I don't have any students to see as my group of kids don't start school until September. 

Anyway, I've also been super busy finishing off a million and one wedding things for a client - 90 favour boxes with bows, tags, menu cards, table plan, table numbers, orders of service....as you can imagine, I've been very busy! 

Now that the wedding is over I'm hoping to have a quieter few weeks where I can get creating beautiful things for you. I have a bunch of new goodies from preorder that I haven't even touched yet!! Scandalous I know!!


Stamp Set: Remembering Your Birthday
Ink: Strawberry Slush, Pear Pizzazz
Cardstock: Pear Pizzazz, Whisper White
DSP: Quatrafancy, Gingham Garden
Punch: Bird Builder, Pansy, Blossom
Embellishments: Brights Buttons, In-Color Buttons, Brights Candy Dots
Other: White Gel Pen

I totally love these bright happy flowers. The patterned papers are beautiful and I will really miss both the Quatrafancy and Gingham Garden papers when they retire next week! 

Buttons and candy dots are the finishing touches this card needs. I also added some cute doodles too! 


I layered up lots of the flowers for a really full effect - love it! I used the wing from the bird punch to make some large leaves. I also decided I wanted a little more body and texture so added some curly twirly sprigs too! 


For a smaller little flower in the centre of the pansy flower I cut the petals apart and layered four of them on top to make a smaller flower. The button just covers up the joins in the centre.

Right, I am off to have a run. I'm back to trying to get through the couch to 5k challenge. I feel like I've been lazy of late and really need to get into some exercise again. 

Catch you again tomorrow,

Happy Stampin',

Friday, 25 April 2014

Sanded Watercolor Wonder

Hello! 

Its Friday! I having another sick day. Still feeling pretty awful! I took some sleeping tablets last night and managed to sleep the whole night through, at least I don't feel quite so shattered and sleep deprived as I have been but still feeling pretty horrid. Anyway, I have a card I made on Monday to share with you today.

I'm loving the core'dinations paper that SU has in the current Annual Catalugue. I think it looks so fun embossed and sanded for a lighter shade beneath. Obviously you could emboss and sand any papers but the beauty of the core'dinations is the different colour under the surface. If you haven't played with core'dinations yet I'd totally recommend giving it a try! 

Now, the thought occurred to me that the watercolour notecards might look quite pretty embossed and sanded, yes its only white under the surface but I had a feeling it'd soften the intense colour and create a pretty effect! 


Stamp Set: Label Love, Pennant Parade
Ink: Baked Brown Sugar
Cardstock: Whisper White, Gumball Green, Crushed Curry, Pear Pizzazz, Baked Brown Sugar, Vellum, Watercolor Wonder Notecards
Punch: Itty Bitty, Boho Blossoms, Bird Builder, Artisan Label, 1" Circle
Big Shot: Beautifully Baroque
Embellishments: Gold Sequin Trim

I'm super impressed how this has turned out, the card was very pretty but I did feel the colour was super intense so this just added a beautiful soft texture and finish to the notelet. 


I wasn't entirely sure what I wanted to add to this background but I knew whatever I did add I didn't want anything that would take away from the beauty of the background. I finally opted for the artisan label which has a pretty shape but isn't too big either.


I decorated it with flowers and cracked out the gold sequin trim which I've been meaning to use for ages! I used the sequins in a scattered fashion as I would have with rhinestones or pearls. The beauty of the sequins is they're a lot more post friendly! 

Hope you enjoyed this today! 

Happy Stampin',

Thursday, 17 April 2014

Forget-Me-Not!

Hello! 

Wow its been a busy few days! Tim and Sarah's wedding was on Tuesday - the weather was absolutely gorgeous. It was such a beautiful wedding, the bride's dress was gorgeous, the flowers were so pretty...they just looked so so blissfully happy. Love it! 

I've spent yesterday and today catching up on housework and having a fun day with Kathryn and the boys! We went to the park, fed the ducks, saw lots of adorable ducklings (I was so tempted to slip a couple into my handbag!), had a picnic on the grass, did some running and played in the playground. Its such fun being a kid! 

Now its the end of the day and I am finally getting around to looking at my blog again. 


Stamp Set: Morning Meadow, Remembering Your Birthday
Ink: Marina Mist, Crushed Curry, Gumball Green
Cardstock: Whisper White, Gumball Green
Big Shot: Chalk Talk Framelits
Punch: Bird Builder, Pansy, Itty Bitty
Embellishments: Dazzling Diamonds

This is a really simple little card. I thought that the flowers looked like forget-me-nots. I love these flowers a lot and always look forward to seeing them flower each year. They're not out yet, but soon! 
I also thought that forget-me-nots would be a cute idea for the a belated birthday card! 


Marina Mist seemed like the perfect colour for the forget-me-nots and the bright yellow centres! I didn't want to cover up the yellow centres with anything like rhinestones or pearls so I thought the best way to add a little sparkle would be to use the 2 way glue pen and the dazzling diamonds glitter.

Don't the bird wings just make the most fab leaves?!


And of course a little quick stamping inside the card finished it off perfectly! 

I'll be back tomorrow with something else to share! 

Happy Stampin',

Wednesday, 26 March 2014

Spring Get Well

Hello! 

Its a long and busy week this week, not much time for crafting and blogging I'm afraid. I'm super busy at school each day, plus helping Aunty Lil and my parents' church has a Bible exhibition on this week with live actors of which I happen to be one. I'm not much of an actor but anything to help them out and the local school kids attending seem to be really enjoying it too which is nice to see! 

Oh and to just add a little more interest to my week, I've got a bit of an eye infection. I went to see my friend Emma at the pharmacy and she was able to give me some eye drops so I'm hoping this will work. 

I have another get well card I made a little while ago for a friend having an op.

Stamp Set: Petite Petals, Thoughts and Prayers
Ink: Pear Pizzazz, Crisp Cantaloupe, So Saffron
Cardstock: Crisp Cantalouope, So Saffron, Pear Pizzazz, Pistachio Pudding
Embellishments: Pearls
Punch: Bird Builder, Itty Bitty, Petite Petals

This is pretty similar to previous cards I've shown you. I used the scoring stylus and the foam sheet to give the flowers some body. 

I'm just loving the Pistachio Pudding and Pear Pizzazz together, I think they really play off each other so well.  The dashed line is just a nice simple detail around the outside edge of the card. 


The itty bitty flowers are stamped with the Petite Petals flower and just the middle punched out. I really like doing this as it just seems to blend and tie the card together that extra little bit. 

Lots of little leaves finish it off with some pearls for a finishing touch.


Inside is just another bit of a sentimen and a few more flowers. I used the stylus to add some shape bit left the pearls off so that it didn't bulk up the inside of the card. 

Happy Stampin',


Tuesday, 18 March 2014

Strawberry Petals

Hi! 

How did it get to the end of Tuesday already?! I spent the afternoon sewing (lots of lovely fabric to use that I bought at the Knitting & Stitching Show last week!!). Anyhow, I did get a little time to do some paper crafting too. 

Things are taking a little longer to get done as my foot is really causing me havoc which means less crafting time - going to try and get to the doctor this week. Its very painful and all that walking in London really didn't help matters, not to mention Stuart sat on it getting into bed last night. Ouch!!

I had a brilliant time yesterday with Kat and the boys. We tested out a new place just down the road for me and it was very lovely - huge slices of cake and lots of tea plus a fun play area for the kids. I got loads of cuddles! Yay!! Arthur is just the sweetest thing and very snuggly and even Euan seem full of hug yesterday! I'll never say no to a hug. 


Not the most pictuesque photo in the world - I look tired, Arthur is mid yawn and Euan has a mouthful of mini cheddars!! But I thought you might like to see a little photo of these cuties!


I was clearing out a bag I had taken to Vicky's a while ago for our last crafty play date and found some flowers I'd made in preparation for making into a car when I got home. I actually decided to scrap my original idea of putting the large pansy flower on the same card as the petite petals and ended up making two clean and simple cards!  


Stamp Set: Flower Shop, Petite Petals, Express Yourself
Ink: Strawberry Slush, Summer Starfruit, Gumball Green
Cardstock: Strawberry Slush, Summer Starfruit, Gumball Green, Very Vanilla
Punch: Pansy, Petite Petals, Boho Blossoms, Bird Builder
Embellishments: Large Rhinestones

This is pretty straight forward really, There's two layers on the pansy flower and the petite petals for some extra dimension and body. I decided to add one of the punches from the boho blossoms punch because I thought it could use a little more of something in the centre. It was also stamped with the Petite Petals stamp so it blended in well with the other layers - its those little touches that really make a card look extra polished! Dontcha think? More "fluff" was added to the boho punch by snipping between each petal. 


I like the idea of having a few of these cards ready made up for emergencies - when you've got the stamps and punches out, they don't take long to put together. However, leave the sentiment off until you need a card then you can quickly add whatever sentiment you need! 


Stamp Set: Petite Petals, Express Yourself
Ink: Strawberry Slush, Summer Starfruit, Gumball Green
Cardstock: Strawberry Slush, Summer Starfruit, Gumball Green, Very Vanilla
Punch: Petite Petals, Itty Bitty, Bird Builder
Embellishments: Rhinestones

Again, pretty much the same as the previous card but with smaller flowers all in a row. The itty bitty punch has the Petite Petals stamped on them so they have that extra texture. 


I'm really enjoying the vanilla on these cards. I began to reach for white and then thought hey, you use white on pretty much everything at the moment, so I tried out vanilla here and it worked a treat! 

Hope you enjoyed these little numbers today. Sorry my post got up so very late in the day! 

Happy Stampin',

Saturday, 15 March 2014

1st Girly

Hi folks! 

Afraid I've had a lazy day today - well, not that lazy! Got a bunch of cutting and sewing done for my latest sewing project (I'll tell you more about it later). I just haven't done any card making today. Perhaps tomorrow I'll crank out a couple! 

I thought I'd quickly share a little card I made for a friend's little girl who was 1 last Sunday. I forgot about it so this was a last minute card. 


Stamp Set: Chalk Talk
Ink: Crisp Cantaloupe
Cardstock: Wisteria Wonder, Whisper White, So Saffron, Crisp Cantaloupe, Pear Pizzazz
Punch: Itty Bitty, Bird Builder
Big Shot: Chalk Talk, Typeset Alphabet
Embellishments: Dazzling Details

Okay so its just a really simple card with confetti flowers. 


I used the embossing stylus to give the flowers some shape. I really wanted to do something in the centre, I didn't want to use rhinestones or pearls so I went for a cheaper and super speedy option...dazzling details. I let it dry while I was out at church and then it was ready to deliver later that day! 

Happy Stampin',

Monday, 10 March 2014

Giant Cupcake

Hi!

Another new week. Got much on this week? Mine is actually shaping up to be a pretty good one! We have card club this morning and this evening which is going to be good fun. Then on Wednesday evening I'm getting a train down to London to stay with my friend Emma. We're going to see some art exhibitions and hang out. On Thursday Sam is coming to join us so we'll all have Friday together before coming home in the evening! Sounds exhausting but it should be good fun too! Don't worry, I'll have some posts lined up for you while I'm away! 

So my friend Vicky asked me a few weeks ago to make a 30th birthday card for her friend. When I asked her if there was anything specific she was looking for she just said "big cupcake". Okay I think I can work something out there! 


Stamp Set: Express Yourself, Petite Petals
Ink: Pistachio Pudding, Crisp Cantaloupe, Gumball Green
Cardstock: Crumb Cake , Pistachio Pudding, Crisp Cantaloupe, Pool Party, Whisper White, Gumball Green, Silver Glimmer Paper
DSP: Sweet Sorbet

Punch: Modern Label, 1 3/4" Scallop Circle, 1 3/8" Circle, Petite Petals, Bird Builder, Scallop Border
Big Shot: Typeset Alphabet, Decorative Dots (SAB)
Ribbon: Pool Party Ruffle (retired), Silver Baker's Twine
Embellishments: Rhinestone
Other: Tooth Pick

So this card was a bit of a case of just adding and removing items until it looked right. 

I started by just drawing out a huge cupcake on a piece of printer paper using the cupcake builder as my inspiration for the shape. I then just worked at it until it was right and then cut the pieces of pattern paper and cardstock. Here's a photo of the back so you can see how it folds a bit better! 

I thought the striped Sweet Sorbet paper was perfect for the cupcake liner - adding the scallop border punch to the top made it even more realistic. It did however look like a lot of pattern with nothing to break it up. the ribbon I eventually decided on is some that was retired - I kind of wanted to use crisp cantaloupe ruffled ribbon but I didn't have any and using more pistachio would be overload I think.


The 30 piece is supposed to resemble one of those cupcake toppers that seem to be quite fashionable at the moment. I actually sandwiched a toothpick between two of the scallop circles and pierced it through the frosting layer. 


Some texture and sponging on the frosting was to add some interest to quite a large area of Pistachio Pudding and look kind of like sprinkles. 

The flowers were one of the later additions - I loved the topper but it didn't seem to quite gel with the card right. I guess the card just looked a little bare so I added some flowers and leaves. the rhinestones are a nice finishing touch as if they are just sprinkled on. 

Hope you enjoyed this. 

Happy Stampin',

Wednesday, 5 March 2014

Spring Petals PP185

Hello!

Today I have a card for the Paper Players' weekly challenge! This week the theme is "Thankful for Spring". I know a lot of people out there have had a pretty horrid winter with storms/floods and snow... I know we've had it very fortunate - worst that's happened for us is our fence has blown down! However, I think its safe to say we are ALL looking forward to Spring! 


I love spring - its just such a beautiful time of the year - the weather is getting warmer, there's birds and butterflies, lambs, bunnies, and lots of flowers. Flowers is definitely the first thing that springs to mind for me when I think of Spring. 


Stamp Set: Petite Petals, Lots of Thanks, En Francais
Ink: Blushing Bride, So Saffron, Soft Suede, Pear Pizzazz
Cardstock: Soft Sky, Whisper White, So Saffron, Pearr Pizzazz, Pink Pirouette, Pistachio Pudding
Punch: Petite Petals, Itty Bitty, Bird Builder
Big Shot: Ovals Framelits
Embellishments: Pearls

I chose to use some really lovely pastel/ice-cream colours! They just cry Spring to me! 


I was inspired by a card I saw on Pinterest making a window card - I thought the flowers would be the perfect frame for the Thank You sentiment. I cut the oval out with the framelits and added the White oval inside the card so it matched up. 

I was in two minds about what to do on the Soft Sky - I was toying with the idea of embossing it but I thought that it might be a bit too much texture - I needed something for a little pattern but not too much to detract from what I really wanted to be the star of the show - the flowers! I saw the En Francais stamp and thought it would probably work quite well for some pattern. 


Aren't the flowers gorgeous!?! I only used the watercolour effect stamp from Petite Petals. I used the same stamp for the saffron flowers too and just punched the centres - it gives them a bit of texture which just ties them in with the rest of the card. 

The open flower has 3 layers of flower built up plus a smaller saffron flower in the centre. I used the embossing stylus and the foam mat to give these flowers some real shape. They were worked in a circle in the centre and also inside each petal. It took some time to do all these flowers but the body it produces just gives that real "WOW" factor! 

The budding flowers Also have 3 flowers but the centre one is flipped so when folded into the centre the stamping still shows. To get the petals to meet in the centre I snipped slightly between the petals and worked it a lot with the stylus to get the shape. In the centre is a scrunched ball of paper to keep the shape. 


There's a couple of colours for the leaves because it just adds another little touch - the leaves don't look so heavy. For the tiny saffron flower I snipped off individual leaves and added them to the flowers.Cute, huh? 

The whole thing is finished off with a few pearls for the flower centres. 

Think this is one of my favourite cards of the moment! Its just so pretty and totally screams spring to me! Do you like it? 

Happy Stampin',

Friday, 28 February 2014

Popping Petals CQC230

Hello!

I got quite a lot done yesterday so today I've got another card challenge for you - today its for Colour Q. And again its another really lovely colour combo - but different from colours I usually use.

Tonight I'm going to meet little Arthur! He's my bestie's new babe and also lil bro to my gorgeous godson, Euan! They are such a lovely family and I can't wait to hang with them all this evening, eat pizza and of course have LOTS of cuddles! 


As I was thinking about this combo I decided how striking this combo would be to use black as the main base colour and add pops of colour! 


Stamp Set: Petite Petals, Lots of Thanks, Gorgeous Grunge
Ink: Coastal Cabana, Crumb Cake, Versa Mark
Cardstock: Coastal Cabana, Crumb Cake, Summer Starfruit
Punch: Bird Builder, Petite Petals, Itty Bitty
Embellishments: Pearls
Other: White Embossing Powder

Okay, I am just loving this. I've never been a black girl. I do like colour but I wouldn't say I like dramatic pops of colour like this. However, recently this has really grown on me - I am just loving colour pops against the black! 

After fiddling around with the flowers for a little while on the black card base I decided that it needed something else to ground it so I dug out the gorgeous grunge set and embossed the splatters in white! It was just the perfect background. The flowers' petals are bent up for a bit more dimension. The branch from the bird builder punch made the perfect leaves for the flowers - I just snipped off the three/four leaves and discarded the extra leaves and branch. 


When it came to the sentiment, I really thought I wanted to emboss a sentiment but I was feeling really happy with my card and I was actually feeling pretty nervous about screwing up my card. For that reason I decided to emboss my sentiment on a separate piece of cardstock and then add it over to. Using the tone on tone look it doesn't detract so much as using another colour would have and allowed me to add just a tiny pop of colour with a couple leaves and mini flower! 

What do you think to this card? Are you liking the black and colour "pop" look? 

Happy Stampin',

Monday, 24 February 2014

Fishin' Around....sorta

Hello! 

Wow its been pretty busy today! I had Envelope Punch Board Class here this morning followed by a goodly amount of sewing and some card making! As a result I forgot to get a blog post out so sorry that today's is a little later than usual...but I'm here now. 

Today I have an adorable little project I made a while ago but haven't gotten around to sharing it with you yet. The card was based on the super cute a la carte stamp Fishin' Around


And here's my version.....


Stamp Set: Pennant Parade
Ink: Tangerine Tango, Baked Brown Sugar, Pear Pizzazz, Basic Black
Cardstock: Pool Party, Whisper White, Crushed Curry, Crumb Cake, Pear Pizzazz, Window Sheet
Big Shot: Circle Framelits
Punch: Owl Builder, Small Heart, Bird Builder, 3/4" Circle
Embellishments: Dazzling Diamonds

Aren't the fish just darling?! So to make the shaped card I just made sure my card base was folded and slightly too short on the top and bottom to cut a complete circle. the white is torn to give the impression of water. The crumb cake at the base is also torn to look like sand. Everything was popped up on dimensionals in layers so I could add some window sheet over the top which really gives the impression of a fish bowl. The dimensionals really add a lot of dimension to this card which I just love. 


Just a little photos to show some of the dimension! The window sheet is adhered with glue dots along the top and then cleverly hidden with a strip of Pool Party that looks like the rim of the bowl!


I made sure that the sand layers and the white top was very slightly smaller than the Pool Party card base so it looks like an actual fish bowl. 

The branch from the bird builder punch works great for some weeds and the tiny sentiment from Pennant Parade worked perfectly on the little flag! 
Dazzling Diamonds just takes these little fishies to the next level! Oh and there's glitter on the bubbles too!

Hope you enjoyed this cute little make. 

Happy Stampin',