Showing posts with label en francais. Show all posts

Wednesday, 28 May 2014

Orange Poppy

Hello! 

Wow has it really been a week since I last blogged?! Last week was really crazy. If you remember, I told you that I didn't get the job I applied for at school. On the Tuesday I got told Friday would be my final day working in Student Services - sooner than I had originally been told I'd be leaving so that came as a bit of a shock. Everything was just going really wrong but I was trying to pick myself up and just to my best til the end of the week. I think all the stress and disappointment really made me tired and although the headaches has finally subsided I was sleeping a lot. 

So roll on 7pm on Thursday night, we'd had dinner and I was curled up having a nap on Stuart's lap watching some tv when the phone went, much to my surprise it was the head teacher on the phone wanting to speak to me. Anyway, he basically offered me a job! Not at all what I was expecting to happen and not even a job I had at all considered. This job is as a Learning Mentor. Well you can imagine how happy this made me, and after a night of sleepless consideration, excitement and a chat with the current learning mentors at he school I accepted! Absolutely thrilled to have a permanent full time job! I'll tell you more about it later as this is already getting quite long and I'm sure you'd rather skip to something pretty! 

The card I have for you today reminds me of my Granny - she had these beautiful, big, bright orange oriental poppies in her front garden that she used to love. They were so bright and punchy - I actually have some of them in my garden now - like a little remembrance of her.


Stamp Set: Simply Sketched, En Francais
Ink: Crumb Cake, Baked Brown Sugar, Pumpkin Pie, Tangerine Tango, Old Olive, Black Stazon
CardstockL Very Vanilla, Baked Brown Sugar
Big Shot: Circles Framelits
Embellishments: Brights Buttons, Gold Baker's Twine
Other: Essentials Pierce Pack

I started off with stamping the poppy with the stazon ink on the vanilla cardstock, and used blender pens to colour it in. I then stamped over the top with the En Francais background stamp for a little subtle pattern/texture. 


I used the framelits to cut out a frame for the poppy panel to sit behind, ensuring that it was just big enough to fit the poppy and a sentiment in the frame. I wanted a little extra detail for the circular frame so used the pierce pack to do a little bit of paper piercing around the edge. I think it really finishes off the frame nicely. 

I used the leaves to add a little more pattern to the top and bottom opposing corners in a tone on tone colour. 

Love the final detail of the little button and small knot of baker's twine! 


Inside as it was quite a dark card base I like to add a white or vanilla insert. Of course a little stamping just pretties it up and only took a moment! 

I hope you enjoyed this card. I really love the Simply Sketched set which is a hostess set and will only be available if you host a party before the end of June! 

Now Stuart is taking me away to Chester for a couple nights (as its school holiday this week!), I should be back sometime on Friday. I'll be taking the laptop with me but not sure I'll get much time to blog - it is a holiday afterall! 

Have a lovely week! 

Happy Stampin',

Wednesday, 5 March 2014

Spring Petals PP185

Hello!

Today I have a card for the Paper Players' weekly challenge! This week the theme is "Thankful for Spring". I know a lot of people out there have had a pretty horrid winter with storms/floods and snow... I know we've had it very fortunate - worst that's happened for us is our fence has blown down! However, I think its safe to say we are ALL looking forward to Spring! 


I love spring - its just such a beautiful time of the year - the weather is getting warmer, there's birds and butterflies, lambs, bunnies, and lots of flowers. Flowers is definitely the first thing that springs to mind for me when I think of Spring. 


Stamp Set: Petite Petals, Lots of Thanks, En Francais
Ink: Blushing Bride, So Saffron, Soft Suede, Pear Pizzazz
Cardstock: Soft Sky, Whisper White, So Saffron, Pearr Pizzazz, Pink Pirouette, Pistachio Pudding
Punch: Petite Petals, Itty Bitty, Bird Builder
Big Shot: Ovals Framelits
Embellishments: Pearls

I chose to use some really lovely pastel/ice-cream colours! They just cry Spring to me! 


I was inspired by a card I saw on Pinterest making a window card - I thought the flowers would be the perfect frame for the Thank You sentiment. I cut the oval out with the framelits and added the White oval inside the card so it matched up. 

I was in two minds about what to do on the Soft Sky - I was toying with the idea of embossing it but I thought that it might be a bit too much texture - I needed something for a little pattern but not too much to detract from what I really wanted to be the star of the show - the flowers! I saw the En Francais stamp and thought it would probably work quite well for some pattern. 


Aren't the flowers gorgeous!?! I only used the watercolour effect stamp from Petite Petals. I used the same stamp for the saffron flowers too and just punched the centres - it gives them a bit of texture which just ties them in with the rest of the card. 

The open flower has 3 layers of flower built up plus a smaller saffron flower in the centre. I used the embossing stylus and the foam mat to give these flowers some real shape. They were worked in a circle in the centre and also inside each petal. It took some time to do all these flowers but the body it produces just gives that real "WOW" factor! 

The budding flowers Also have 3 flowers but the centre one is flipped so when folded into the centre the stamping still shows. To get the petals to meet in the centre I snipped slightly between the petals and worked it a lot with the stylus to get the shape. In the centre is a scrunched ball of paper to keep the shape. 


There's a couple of colours for the leaves because it just adds another little touch - the leaves don't look so heavy. For the tiny saffron flower I snipped off individual leaves and added them to the flowers.Cute, huh? 

The whole thing is finished off with a few pearls for the flower centres. 

Think this is one of my favourite cards of the moment! Its just so pretty and totally screams spring to me! Do you like it? 

Happy Stampin',
Monday, 3 June 2013

Feather, feather...

Hi! 

Sorry its been a week since my last blog post, I was supposed to blog on Thursday but I was attempting to tidy my craft room and got distracted and so blogging slipped my mind. 

Exams were in full swing today so I was in school for some invigillation work, gazing at the gorgeous sunshine while watching kids sitting their history exam today. It took me back to my exams...not great memories! Watching them write was much easier! 

So last week/weekend I was trying to make an attempt on tidying my craft room - its a true mess. I kept finding half finished cards or scraps/shapes that would probably have gone in the bin if I hadn't used so I ended up stopping to make something. Unfortunately that meant getting other things out to finish the project...and I was back to the beginning again. 

One of the things I discovered was the Boutique Boxes which you can find in the Spring/Summer catty. Its £7.25 and comes with LOADS of little bits. 8 precut boxes, 8 printed note cards, 16 buttons, a die cut sheet, Very Vanilla/Crumb Cake baker's twine and dimensionals. 

The boxes turned out to be pretty small (great for a very small gift but I just wished they were bigger), as a result I had planned to give away the leftovers - I'd made up two boxes and notecards with a few of the die cuts for my downline at team training but there were tons left over and I was just feeling uninspired. Mainly because I was looking at them as boxes, not card potential! 

Roll in a facebook update from the lovely and talented Teneale Williams. I just fell in love with her use of the feathers and it inspired me to have a go myself and do a CASE of it. I got a little carried away and ended up with 25+ cards using all the bits and bobs in the kit! LOVE IT!!


Stamp Set: En FRancais, French Foliage, Pennant Parade, Fabulous Phrases
Ink: Sahara Sand, Basic Grey
Cardstock: Very Vanilla, Sahara Sand, Summer Starfruit
Extras: Boutique Boxes, Sewing Machine


What do you think? I just love these feathers and sewing them on just adds depth and texture! The background has lots of depth to it by lots of layers of stamping, sponging. 

Did you enjoy today's share? Please do leave me a comment and let me know what you think of them!

Have you ever sewn cards with your sewing machine before? Not crossed your mind? Want to see more of it? I've got more to come. For more information on sewn cards check out tomorrow's post! See you there! 

Stampin' Hugs,

Amanda xo

Saturday, 28 May 2011

simply stampin' challenge, week 9

This week's Simply Stampin' Challenge is a Theme, Flower Frenzy! I wish I had more time to work on this, I had lots of ideas but have been so busy that I just had hardly any time! I must also apologise for the poorness in quality of these photos, you know how it is, photos and windows...they just do not mix!  Anyhow, here is my creation...


Herb Flower Garden

Stamp Set: En Francais
Cardstock: So Saffron, Garden Green
DSP: Pretty in Pink, Rose Red, Wild Wasabi, Daffodil Delight
Ink: Riding Hood Red
Punches: Eyelet Border Punch, 1" Circle Punch, 1 3/8" Circle Punch, Two Step Bird
Extras: Florist Wire, Green Washi Tape, sponge

On my window sil in my kitchen i have some herbs growing, theyre only babies and look a little sad at the moment, so I thought they needed a little cheering up and give myself something to look at when I'm doing the washing up!
I made rosettes using the eyelet border punch and concertina folding the dsp, I finished off each flower with a circle punch stamped with the En Francais background stamp to add some texture and sponged the edges to soften it! Finally I wrapped green tape around some florist wire, and adhered it to the rosette. I also used the wing from the Two Step Bird punch to make some little leaves. 

I hope you liked this week's creation, thanks so much for stopping by. Why not leave a comment, I love reading them! 

Til next time,

Amanda xx


Friday, 15 April 2011

finally friday

I only have a little card to share with you today (I'm actually writing this post the night before, nursing my arm which is really hurting after burning it on the oven! Ice is helping a little but still hurts! booo). Its a little monogrammed notelet. 


"A" Monogrammed Notelet

Stamp Set: Broadsheet Alphabet, Punch Bunch (SAB), En Francais
Cardstock: Very Vanilla, Certainly Celery, Rich Razzleberry
Accessories: Basic Rhinestone
Extras: 1 3/8" Circle Punch, Eyelet Border Punch, Dimensionals. 

I stamped the background with the En Francais background stamp. I stamped the scalloped circle for you stamp from the Punch Bunch in Rich Razzleberry on razzleberry cardstock, I then punched out the centre so just the scallop edge remained. On a separate piece of Very Vanilla I stamped the enitial "A" and the adheredit to the centre of the scallop circle. I adhered narrow strips of Certainly Celery eyelet border to the top and bottom of the razzleberry strip. Finally, I finished off this little notelet with a rhinestone on the monogram. This would make a really cute little monogrammed gift set which is what I intend on doing with this...watch out for the finished gift sets soon! 

I hope you have a great Friday! If you're in the area, tonight, I am having my workshop so please pop along, there's a extra little something in it for all who attend!! 

One more thing, its your last chance today to enter the Simply Stampin' Colour Challenge...a new challenge is released tomorrow so please head on over, enter for your chance to win some lovely goodies!!! 

Take Care!

Amanda xo

Tuesday, 5 April 2011

everyone gets to make a magnet!

As promised, here are the projects I demonstrated last night! 


Congratulations Hearts 

Stamp Set: En Francais, I {Heart} Hearts, Fun & Fast Notes
Cardstock: Crumb Cake, Riding Hood Red, Marina Mist
Ink: Versa Mark, Riding Hood Red, Pacific Point
Pastels: Marina Mist, Riding Hood Red, Pumpkin Pie
Accessories: Pumpkin Pie Button, Linen Thread
Extras: Clear Embossing Powder, Heat Tool, Cotton Balls, Sponge, Dimensionals, Glue Dot

In this first demo I really wanted to highlight the wonderful ways you can use the versa mark ink pad (something I don't think I could live without!). This also included embossing!
I stamped the En Francais background stamp with versa mark on the Crumb Cake cardstock and then used cotton balls to gently rub and blend Stampin' Pastels over it to give some gentle colour and bring out the writing! I then stamped the hearts with versa mark and covered them in clear embossing powder and heated with my heat tool. I used a sponge to rub some Pacific Point ink over the small LOVE heart to show the emboss resist technique. Finally, I adhered everything together, stamped the sentiment from Fun & Fast Notes and added a small button!


Get Well Flowers

Stamp Set: Greenhouse Garden, Fun & Fast Notes
Cardstock: Whisper White, Early Espresso, Old Olive, Crumb Cake, Marina Mist
Ink: Marina Mist, Early Espresso, Old Olive
Accessories: Basic Rhinestones, Whisper White Grosgrain Ribbon (dyed Marina Mist)
Extras: Paper Crimper, Sponge, Dimensionals, Glue Dots, Stamp-a-ma-jig, Modern Label Punch

With this demo, I wanted to show how to use a stamp-a-ma-jig as I think it is an amazing peice of kit and show how perfect it makes stamping and possitioning every single time! I also wanted to show how you can get more out of your ink pad by sponging! 

I used the stamp-a-ma-jig to stamp the medium flower from the Greenhouse Garden. Then I used the sponge to sponge Marina Mist ink around the edge of the Whisper White cardstock, I also dampened a piece of whisper white ribbon and sponged it on both size so it was Marina Mist in colour! A great way to get a piece of white ribbon to match any colour ink you have!! I love it! I layered up the cardstock and then stamped, punched and sponged the sentiment before adhering it to the bottom of the Whisper White cardstock, this just "grounds" the flowers so its not floating. finally I crimped the edge! 


Pie Thanks Magnet


Pie Magnet


Gumball Birthday Magnet


Gumball Magnet

Stamp Set: Every Little Bit, Fun & Fast Notes
Cardstock: Whisper White 
Ink: Basic Black, Pumpkin Pie, Real Red, Marina Mist, Pacific Point, Daffodil Delight, Old Olive
Accessories: Linen Thread
Extras: Bottle Cap, Magnet, small piece of tango can, Blender Pen, Crystal Effects, 1" Circle Punch, 1 3/8" Circle Punch, Dimensionals

If you want to see how to make this way cool magnet, come to my workshop next Friday!!! You get to make one yourself!! 

(CASEd from a swap I received at Coventry Training by Zoe Tant - thanks for the awesome idea!)

Hope you enjoyed seeing a bit from my latest workshops! Please do come along next Friday and bring a friend!! It would be great to see you there! 

Ta ta for now! 

Amanda xoxo

Saturday, 2 April 2011

simply stampin' challenge, week 1

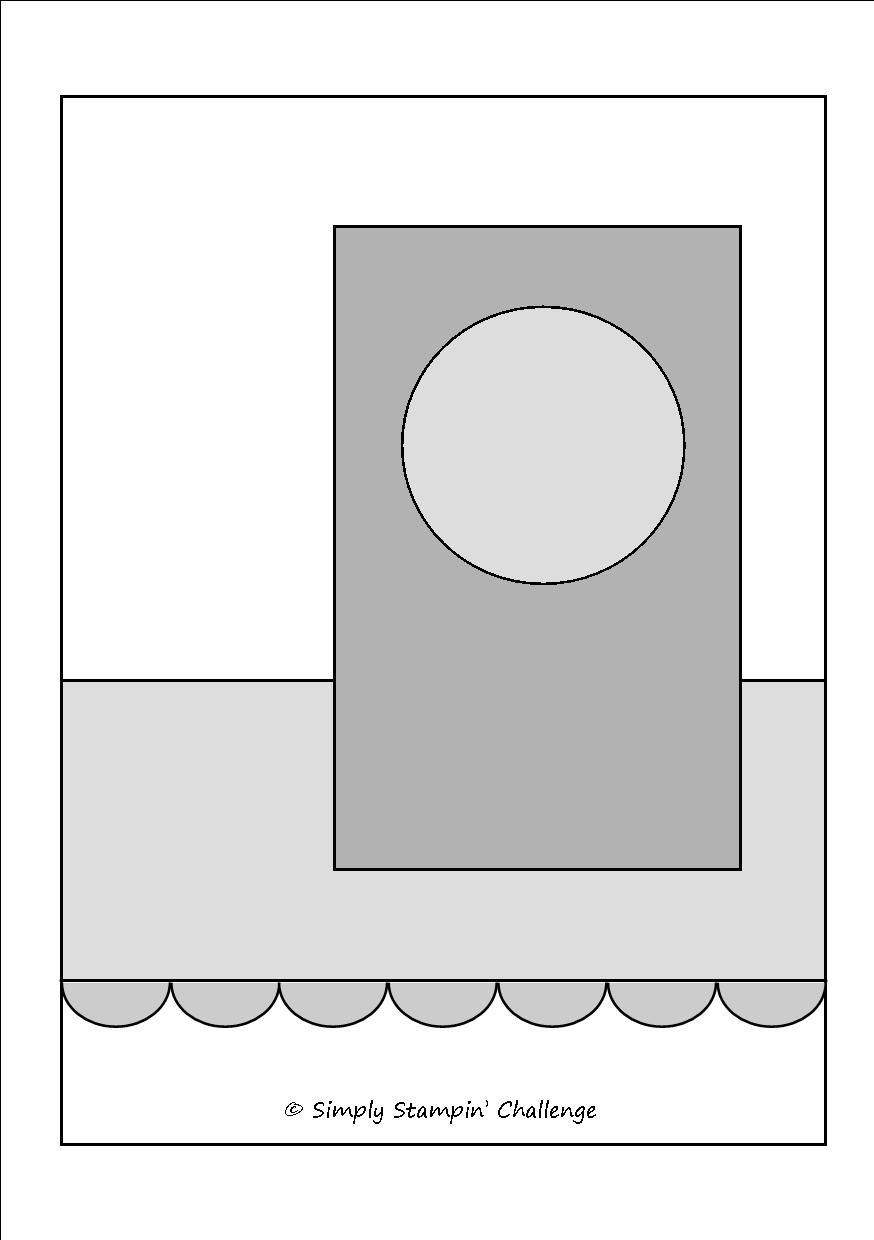
Okay, I am immensely excited to finally show you the first challenge, and what I created from the this week's sketch! Below is the sketch followed by my creation. To see what the other lovely talented DT members created, and to enter the challenge yourself, check out the simply stampin' challenge site!


Get Well Wishes

Stamp Set: En Francais, Fun and Fast Notes, Greenhouse Garden
Ink: Certainly Celery, Rich Razzleberry
Cardstock: Crumb Cake, Rich Razzleberry, Certainly Celery, Very Vanilla
Accessories: Basic Rhinestones, Very Vanilla Satin Ribbon
Extras: Corner Chomper, 1 3/8" Circle Punch, Eyelet Border Punch, White Gel Pen, Dinensionals, Stamp-a-ma-jig

For my workshops next week I was asked to show how to use the stamp-a-ma-jig so as I had it out to work on some samples I thought I'd use it for this project too! The 1 3/8" punched hole works perfectly with the medium sized flower in the Greenhouse Garden stamp set. I'm really loving the Rich Razzleberry and Certainly Celery colour combo at the moment, these two colours are just totally gorgeous! I used the En Francais stamp to add a bit of light texture to the celery background. I finished off the card with a little bit of ribbon, some rhinestones and a bit of white gel pen dot and dash line! 

I hope you enjoyed this first week's entry, leave a comment, and please don't forget to head over to the simply stampin' challenge blog and enter for your chance to win a special prize! 

Take care! 

Amanda xoxo

Friday, 25 March 2011

just a quickie

Its been a busy day! Such nice weather urged me to get some cleaning and other stuff done today so now its late and so today is just a quick little card for you all. This is the swap I made to swap with the the other demos that attended the training last Saturday! 


Birdie of a Branch

Stamp Set: Fun & Fast Notes, En Francais
Cardstock: Very Vanilla, Pink Pirouette, Pretty in Pink, Certainly Celery, Old Olive
Ink: Versa Mark, Certainly Celery
Punches: Eyelet Border, Two Step Bird
Extras: Clear Embossing Powder, Dimensionals

Pretty simple little card, I stamped the Pretty in Pink cardstock with En Francais in versamark and then embossed it with clear embossing powder. I punched out all the shapes and then adhered them altogether. Finally I stamped the sentiment "thanks" from part of the Fun and Fast Notes set using masking technique. 

Hope you've all had a good  day, I better get off to bed now as I have lots to do tomorrow and my workshop is tomorrow evening, don't forget, if you're in the area and interested please do feel free to come! For more details contact me! 

xoxo