Showing posts with label paper piercing. Show all posts

Wednesday, 28 May 2014

Orange Poppy

Hello! 

Wow has it really been a week since I last blogged?! Last week was really crazy. If you remember, I told you that I didn't get the job I applied for at school. On the Tuesday I got told Friday would be my final day working in Student Services - sooner than I had originally been told I'd be leaving so that came as a bit of a shock. Everything was just going really wrong but I was trying to pick myself up and just to my best til the end of the week. I think all the stress and disappointment really made me tired and although the headaches has finally subsided I was sleeping a lot. 

So roll on 7pm on Thursday night, we'd had dinner and I was curled up having a nap on Stuart's lap watching some tv when the phone went, much to my surprise it was the head teacher on the phone wanting to speak to me. Anyway, he basically offered me a job! Not at all what I was expecting to happen and not even a job I had at all considered. This job is as a Learning Mentor. Well you can imagine how happy this made me, and after a night of sleepless consideration, excitement and a chat with the current learning mentors at he school I accepted! Absolutely thrilled to have a permanent full time job! I'll tell you more about it later as this is already getting quite long and I'm sure you'd rather skip to something pretty! 

The card I have for you today reminds me of my Granny - she had these beautiful, big, bright orange oriental poppies in her front garden that she used to love. They were so bright and punchy - I actually have some of them in my garden now - like a little remembrance of her.


Stamp Set: Simply Sketched, En Francais
Ink: Crumb Cake, Baked Brown Sugar, Pumpkin Pie, Tangerine Tango, Old Olive, Black Stazon
CardstockL Very Vanilla, Baked Brown Sugar
Big Shot: Circles Framelits
Embellishments: Brights Buttons, Gold Baker's Twine
Other: Essentials Pierce Pack

I started off with stamping the poppy with the stazon ink on the vanilla cardstock, and used blender pens to colour it in. I then stamped over the top with the En Francais background stamp for a little subtle pattern/texture. 


I used the framelits to cut out a frame for the poppy panel to sit behind, ensuring that it was just big enough to fit the poppy and a sentiment in the frame. I wanted a little extra detail for the circular frame so used the pierce pack to do a little bit of paper piercing around the edge. I think it really finishes off the frame nicely. 

I used the leaves to add a little more pattern to the top and bottom opposing corners in a tone on tone colour. 

Love the final detail of the little button and small knot of baker's twine! 


Inside as it was quite a dark card base I like to add a white or vanilla insert. Of course a little stamping just pretties it up and only took a moment! 

I hope you enjoyed this card. I really love the Simply Sketched set which is a hostess set and will only be available if you host a party before the end of June! 

Now Stuart is taking me away to Chester for a couple nights (as its school holiday this week!), I should be back sometime on Friday. I'll be taking the laptop with me but not sure I'll get much time to blog - it is a holiday afterall! 

Have a lovely week! 

Happy Stampin',

Sunday, 13 April 2014

Simple Sunday - Pierced Circles

Hi! 

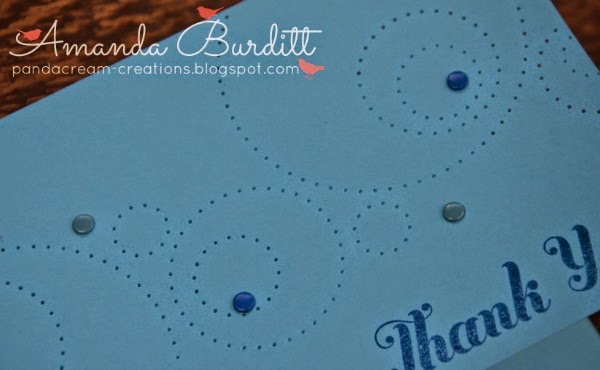
I've got a duo of cards for you today for Simple Sunday! I made these a few days ago as I wanted a masculine thank you for my dad to give along with some chocolates to say thank you for all the lifts to and from work he gave me over the last few weeks! I'm so grateful for all he does! 


I thought I'd keep my design geometric, clean and simple. 


Stamp Set: Lots of Thanks
Ink: Bermuda Bay
Cardstock: Coastal Cabana
Other: Essentials Paper Piercing Pack

I just love the simplicity of the paper pierced circles. It was so easy to do and looks so pretty. If you have difficulty keeping your paper and piercing template in one place I'd suggest trying a little washi tape to hold them together, that way you don't have any fear of the template slipping! 


Really love the pierced circles - the photo doesn't really do it justice! 


Stamp Set: Lots of Thank
Ink: Pacific Point
Cardstock: Tempting Turquoise
Embellishments: Brights Candy Dots
Other: Essentials Paper Piercing Pack

I decided I liked the first one so much that I'd do a second one. This time however I wanted to try off setting the circles rather than centring them as on the first design.


I went a little more crazy on this one and decided to add a few candy dots too! Fun huh?

Personally I think I prefer the first design but both turned out really well. Especially nice for a one layer card. This kind of design really doesn't require lots of materials, is inexpensive and easy. I'd totally recommend giving it a go! 

Hope you are having a happy and blessed Sunday! 

Happy Stampin',

Friday, 4 April 2014

Hardwood Rose Garden

Hello! 

Happy happy Friday folks! So glad its Friday! Looking forward to a break from kids now as its the Easter holidays! I'm a little sad my time working front desk in Student Services has come to an end, its been very different and challenging but I've genuinely enjoyed it! I'll miss all the lovely ladies who work there too! 

Now, I've got card club this weekend, we're using Mosaic Madness as this month's set which is just beautiful! Also some manic sewing to get a project finished - I'll share it once its finished and gifted! 

 I've just got time to share with you the therapeutic crafting I did last night - it was a bit of a rubbishy day but I am so thankful to be able to come home, sit in my little sanctuary and just craft away the worries of the day! Today's card is for both The Paper Players and Freshly Made Sketches challenges!


I loved the choice with the paper players challenge this week. I chose to use the 3 boxes down the left hand side - Birthday, Yellow and Paper Piercing. 


Such a cute sketch and thought it'd work well with the vision I had for the Paper Players challenge too! I love it when things just work out like that!


Stamp Set: Remembering Your Birthday, Hardwood
Ink: Versamark, Baked Brown Sugar, Crushed Curry, Strawberry Slush
Cardstock: Crumb Cake, Baked Brown Sugar, Blushing Bride, Crushed Curry, Strawberry Slush, Gumball Green, Vellum, Gold Foil
Punch: Petite Petals, Itty Bitty
Big Shot: Little Leaves Sizzlit, Spiral Flower
Other: Fringe Scissors, Essentials Piercing Pack, Gold Embossing Powder
Embellishments: Pearls

I realise there's a lot going on here but I kind of think everything works! In all honesty I got some new toys - Hardwood, spiral flower, fringe scissors....I just HAD to play! 
I thought the vellum would be nice as the over layer as I didn't want the top layer to be heavy - the hardwood and flowers were the real stars of the show. When I stamped and embossed the sentiment in gold it looked brilliant but a little lost on the size of vellum so I went back in with the versamark pen (unfortunately SU no longer sells it but I still have mine kicking around) which I used to hand draw in some cute little hearts! 


I thought I'd add just little pops of yellow - the crushed curry is a really powerful colour so just a little still has a big impact! 


The rose is so pretty, isn't it? I sponged crushed curry on the inside edge and strawberry slush on the outside edge to make the flower look more realistic! the centre is a rolled up strip of the fringe strip. after the flower was rolled up and glued I went back in and used some tweezers to fold back the petals. I thought the addition of gold leaves with green was a nice touch to marry the gold sentiment and flowers together. 

I hope you enjoy this. It definitely made me feel better! 

Happy Stampin',

Saturday, 8 February 2014

All Stitched Up!

Hi there! 

I have been having such a lovely weekend! I had a lovely time at Card Club last night with my ladies (had a few new ones too which is always very exciting!!) This morning was quite chilled out, did a little crafting followed by brunch with my darling. We had waffles, blueberries (for me), maple syrup, bacon and eggs (for him) plus oj of course - it was a true feast! Yum yum! Next was a catch up with an old friend from university. It was so great to see Rachel again, hopefully now we'll stay in touch a bit more! 

This afternoon I caught up on a bit of Winter Olympics - watched the opening ceremony (I like all the random facts that the commentator comes out with)! What I love about the Winter Olympics is that it just seems a bit more "normal" - you get a few crazies and amusing people taking part with just makes it that more enjoyable! Here's a few of my highlights from the opening ceremony 
- the Pakistani who learnt to ski on a pair of wooden skis made by his uncle
- a Jamaican bobsleigh team (always going to get a smile!)
- world famous solo violinist Vanessa May competing for Thailand in the Alpine Skiing 
- Prince Hubertus von Hohenlohe of Mexico - competing in the Alpine Skiing in a mariachi ski outfit!!!
-and finally some pretty interesting country outfits, the top three that got my attention have to be the Russians (a wierd cross between Narnia and Santa outfits!?!), USA (The sweatshirts were a wierd cross between cute patchwork and a bad Christmas jumper), but first place for wierd totally goes to the Germans (I can only describe their outfits as something a unicorn has vomited rainbows over). 

I shall try not to bore you too much in the coming weeks with olympics news - my favourites are figure skating and curling. A new interesting one is totally the slug style snow boarding - pretty amazing the height and turns they get in their jumps!! Are you watching any Olympics? What's your favourite?

Anyway, on to to the card I've got for you, its a sketch from Freshly Made Sketches this week. 


Stamp Set: You're Lovely, Fabulous Phrases
Ink: Versamark
Cardstock: Crumb Cake, Gold Foil, Gold Foil Vellum, Vellum
Accessories: Pearls, Linen Thread
Other: Gold Embossing Powder, Essentials Pierce Pack, Needle

This is one of those, morning waking ideas. I've been wanting to use the pierce pack for hand sewing on a card for ages and this idea just came to me one morning. 


I was so excited to see how well the cross stitching turned out! Isn't it cute?! I thought the tone on tone linen thread and crumb cake needed something else with a similar tone. I wasn't sure a bright colour would have worked, but I still wanted something with a little "wow" factor so opted for the gorgeous gold foil vellum, gold embossing and gold foil cardstock! I have really come round to the gold look which is just SO in fashion at the moment!

Thanks so much for stopping by,

Happy Stampin',

Wednesday, 22 January 2014

One Layer Valentine

Hi there! 

Really super quick post and card for you today. This is for the Paper Players Challenge, this week is a CAS One Layer Valentine. 


Oh my, I was tempted to skip it as I wasn't very inspired but I thought I really should give it a go. 


Stamp Set: Express Yourself
Ink: Melon Mambo
Cardstock: Whisper White
DSP: Gingham Garden
Big Shot: Hearts a Flutter
Accessories: Dazzling Diamonds
Extra: Essentials Paper Piercing Pack


Now I couldn't quite decide if this was cheating or not. It was a one layer challenge so I've only used one layer on the front but added a piece of DSP for the colour inside the card. Thinking on it now I probably should have stamped the section inside the card but I couldn't find anything just like what I wanted! Oh well, its sort of one layer. (and it does look lovely and crisp open withough the DSP showing too!)


Hope you're having a good week and stop back tomorrow for a bit more creativeness! 

Happy Stampin',
Monday, 27 May 2013

May Card Club - Masculine

Good afternoon! 

Isn't it just a gloriously weekend?! Right now I'm sitting next to my beloved on our sofa outside, enjoying sun and warmth and drinking in all the beautiful spring smells, mingles with BBQs. I'm guessing quite a lot of my readers will be enjoying a nice long relaxed weekend, being a Bank Holiday in the UK and for my American friends, Memorial Day! I hope wherever you are you are enjoying good weather and spending some time with your dear friends and family. 

Stuart and I are trying our first ever proper BBQ - not like a grill out where you burn charcoal and then stick burgers and sausages on the grill to cook. I'm taking about proper American style BBQ - it involves sticking wet wood chips on the coals to smoke the meat to cook it over hours. I've watched it so many times on the Food Network - love Guy Fieri! So after watching it so many times, doing a bit of research, watching some you tube videos, I've made a dry rub for my beef brisket, made my own BBQ sauce, and got the wood smoking the meat. Now my tummy is grumbling with anticipation. Its going to be epic - if I can remember in my excitement I'll snap a few pics for you guys. 

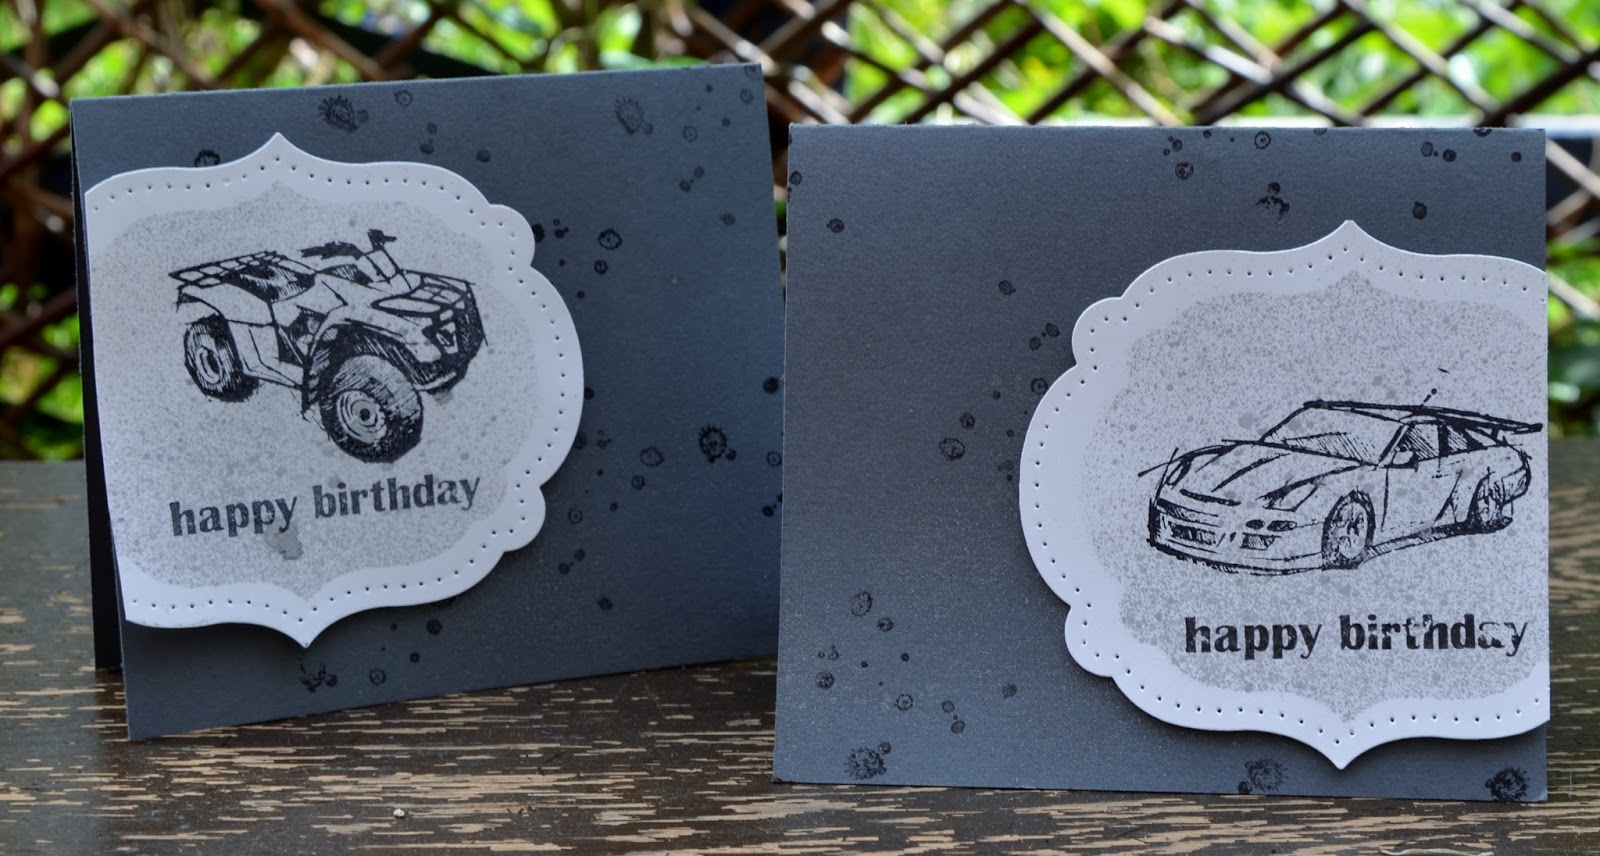
Anyway, onto some card love for y'all. I thought you'd like to see the Masculine collection of cards my lovely card club ladies made last weekend. All were designed so the sentiments could be swapped out - its great to have choice isn't it!? 

With Father's day less than a month away its time to start thinking about making some cards for those special men! 


Aren't these cards fun!?! Do you struggle for inspiration when it comes to masculine cards? They're difficult aren't they!


Stamp Set: Need For Speed, Best Dad Ever, French Foliage
Ink: Basic Black
Cardstock: Whisper White, Basic Grey
Big Shot: Labels Framelits
Extras: Silver Foil Smooch Spritz, Festive Piercing Pack

This card is a bit messy but it looks great and so its well worth getting a little sparkly for! 
A mask was cut from printer paper and temporarily adhered with my awesome two way glue pen to the white cardstock, then spritz with the fab Smooch Spritz (its ready made sparkly spritz that you can mist your projects with - amazing stuff!!). Let it dry a moment while you spritz the background and stamp it with the water blot stamp from French Foliage. By that time it should be dry so peel off the mask and cut with the next size up framelit, pierce with the piercing pack for some extra detail and then stamp the car and sentiment. I thought it looked cool chopping off part of the label. What do you think? Do you like this monochrome card? 

So what are you up to this beautiful bonus weekend day? Have a great day and stop by again soon for more on the other fun man cards we made! 

Happy Stampin',

Amanda x

Thursday, 7 February 2013

It's All About The Pattern!

Hi there! 

I've got a really quick card for you today using the Sale-A-Bration set, Patterned Occasions - totally loving this set!


Stamp Set: Patterned Occasions, Alehambra (wheel)
Ink: Rich Razzleberry, Lucky Limeade, Daffodil Delight, Early Espresso
Cardstock: Whisper White, Rich Razzleberry, Lucky Limeade
Punch: Dotted Scallop Ribbon Border, Corner Rounder
Big Shot: Labels Framelits
Extras: Occasions Pierce Pack

Totally love the pattern from the Alehambra wheel - I think it works well with the pattern on the elephant! I also cracked out my sponges again (haven't used them much recently) to give a little colour to the edge of the labels framelit. I also added the paper piercing  inside the framelit for another little added detail. 

This would be a fun card that would work with any of the stamps in the Patterned Occasions set. Isn't it great when you find a layout that works again and again!?! Less thinking is sometimes the way forward! 

I've got a couple more cards with the Patterned Occasions for you tomorrow, so please do come back to see them! 

Happy Stampin',

Amanda x


Thursday, 31 January 2013

One More Day!

Hey!

So today will be a short and sweet post as I am super busy preparing for the Spring/Summer Catalogue Open House at my home tomorrow. You are most welcome to come and see LOADS of samples, view the new seasonal catty in person (its always so much better in the flesh!) and have some delicious baked goodies along with your cuppa! 


Stamp Set: Fabulous Phrases
Ink: Pool Party
Carstock: Whisper White, Pool Party
Punch: 1 1/4" Scallop Circle, Bird Builder, 2 1/2" Circle
Extras: Essentials Pierce Pack
Acceessories: Whisper White Baker's Twine, Madison Avenue Button, Paper Doily

Snip in between each scallop to make a scallop circle into a sweet little flower (perfect way to stretch your punch!!) The 2 1/2" Circle fits perfectly in the middle of this little doily! I just love the white on white look with a little bit of pool party! A very clean and crisp look! 

Hope you enjoyed today's sneaky peak, if you want to see more pop over to mine to see lots more gorgeous new goodies! More details about my open house can be found in this previous post!

Now I am off to spend the day finishing off samples, tidying and baking!!

Happy Stampin',
Amanda xx 

Saturday, 26 January 2013

Get your Geek on!

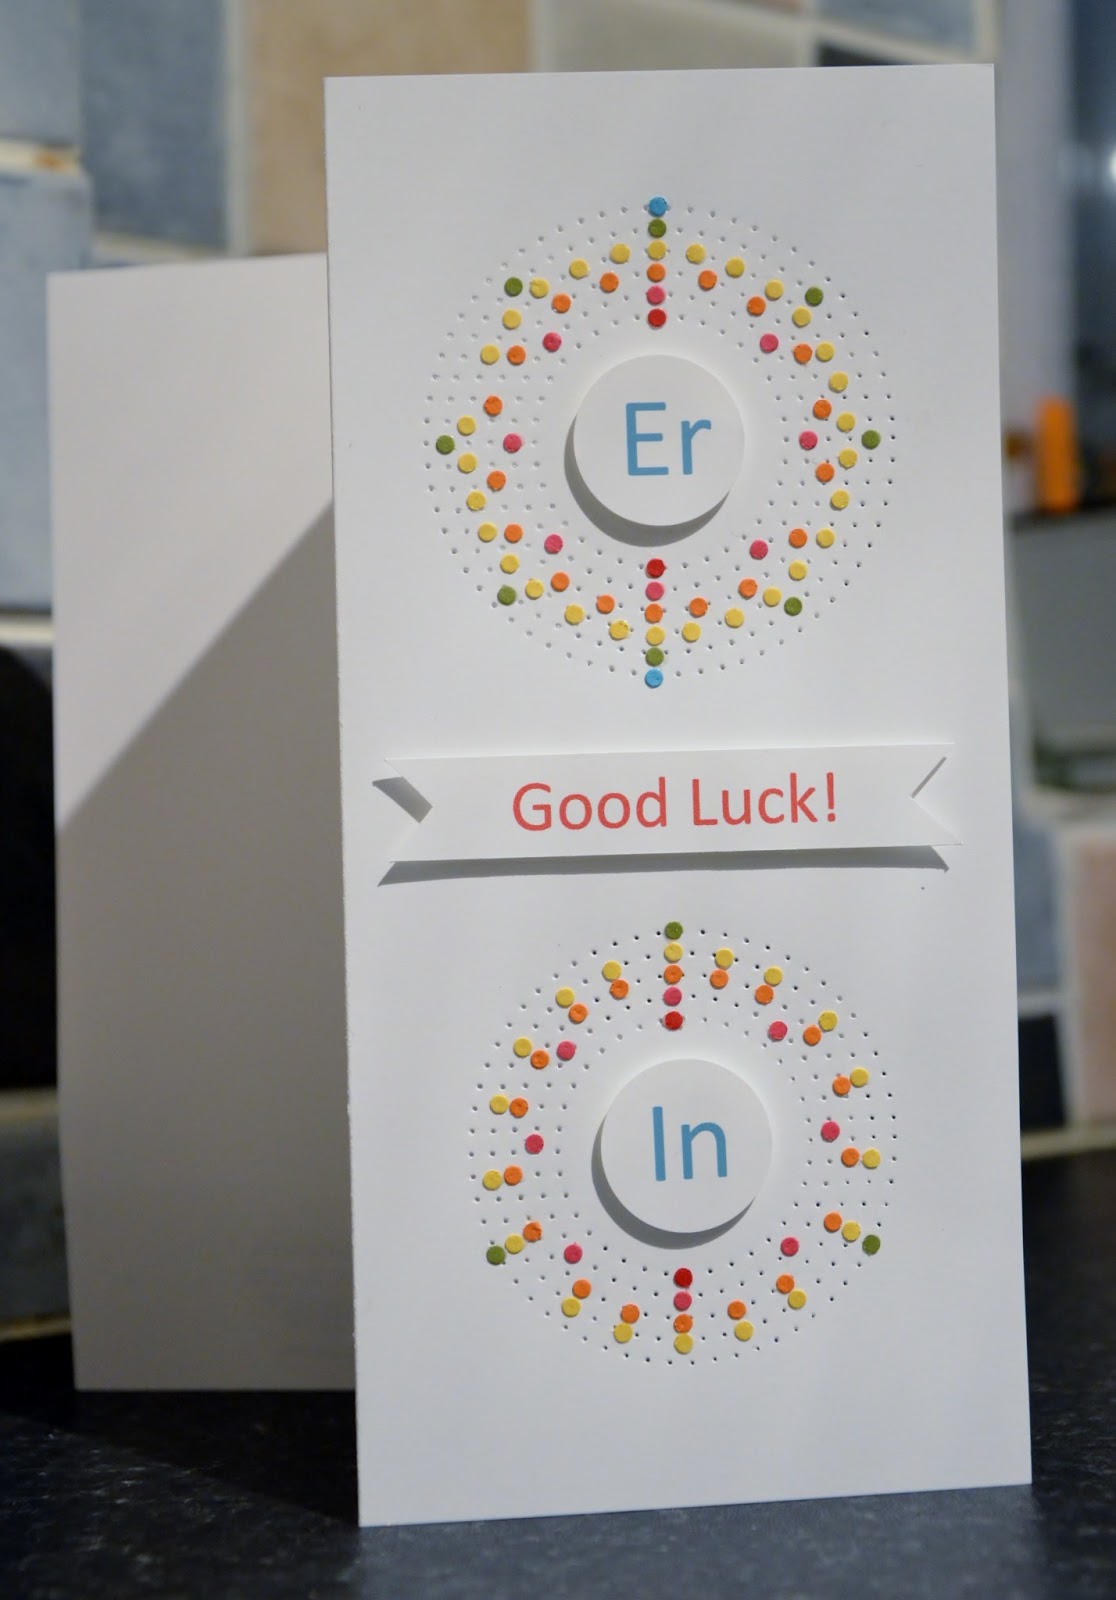
I have a super geeky card for you today. My husband has been mentoring a trainee teacher at school and her placement finished at the school on Friday. He asked if I could make a card for everyone to sign for her. 

I asked Stuart what Erin liked - kind of hoping flowers or butterflies or something easy and girly would be on the cards. He took that as his cue to come with with some geeky idea for me. I grumbled a bit to begin with, saying it was going to be so boring but actually its turned out really well and pretty cute! 


Cardstock: Whisper White, Real Red, Pumpkin Pie, Daffodil Delight, Old Olive, Tempting Turquoise
Punch: Owl Builder, 1" Circle
Extras: Essentials Paper Piercing Pack

These are atoms! Er is Erbium and In is Indium. The rings that each electron travels around were made using the circles paper piercer template - it gives the shape while being subtle enough to look clean and neat which really helps the electrons to stand out. I jazzed it up but making a rainbow pattern  with the electrons! It was fiddly but I think it looks pretty great! Now who said science was boring!?

Happy Stampin', 

Amanda xo

Friday, 25 January 2013

Bloomin' Marvelous & Video!

Hi! 

How is everyone's week been? Mine is going pretty great! Sale-A-Bration has begun, there's snow outside (I'm like a little kid when it comes to snow - can't think of anything better than walking and playing in it!) and last night I got my Christmas present! Stuart got me tickets for Sleeping Beauty Ballet with the Moscow City Ballet! I love the ballet and haven't been in years so it was so lovely to get tickets and it made for a lovely treat in January. Not to mention it just happened to be 6 years since we've become an "item" - where has time gone, it feels like only yesterday. The only downer for the week is that our car died so we have been carless and either having to walk everywhere or beg for lifts! Okay, sorry, I'm babbling, on with today...

I'm posting later than I intended today as I wanted to shoot a video and had to wait ages while it uploaded to you tube, so thank you for being patient with me and I hope you enjoy it!

The card is just a variation on the card I showed a couple days ago but I thought you'd like to see it!


I just wanted to add that if you don't like the colours I've chosen for this card, its very easy to pick some different colours! If you're choosing a pattern paper, you might want to look at what colours the DSP uses and then choose colours to coordinate! 

Happy Stampin',

Amanda xx

Wednesday, 23 January 2013

Pappillon Potpourri!!

Afternoon! 

So, now you've had a day to look at the Sale-A-Bration goodies, how are you liking them? They're fabulous aren't they?! And if you haven't seen them yet, what are you waiting for?! Grab a cuppa, sit down, put your feet up and relax for a few minutes and have a good browse!! 

So to get your day started I've got a cute card I demo'd for a bunch of lovely ladies back in October! Man it was that long ago?! 


Stamp Set: Papillon Potpourri, Fabulous Phrases, Alehambra wheel
Ink: Raspberry Ripple, Daffodil Delight, Primrose Petals
Cardstock: Whisper White, Raspberry Ripple, Primrose Petals
DSP: International Bazaar
Punch: Decorative Label, Elegant Butterfly
Extras: Essentials Pierce Pack
Embellishments: Dahlias

So, this is a bit more of a complex card as I really wanted to show off lots of the awesome new things in the annual catty but a simplified version of this card would be equally effective. I think the two things that I love about and really make this card stand out to me is the paper piercing (a very cost effective way of adding detail to a card) and the different uses of the decorative label punch! I adore that punch and definitely recommend it to anyone that is starting out and looking for one or two punches to get them going!! 

So, how about a simplified version of this card - 


Decorative Label Punch (£15.50)
Essentials Pierce Pack (£7.25)
DSP (£9.95)
Coloured Cardstock (£6.25)
Rhinestones (£4.50) 
Dimensionals (£3.25)
= £46.70 and get the Bloomin' Marvelous stamp set for free! 
It's got both images and sentiments in it so is the perfect SAB set for someone getting started on card making! If you don't have any ink you might want to think about adding an ink pad (£4.95) to this bundle instead of the rhinestones! 


The DSP used here was the Birds of a Feather which is very light, pretty and cutesy style!

I hope you enjoyed this card and the simplified SAB bundle version! 

Catch you again tomorrow! 

Amanda x


Friday, 23 November 2012

merry minis altogether now

The Merry Minis punch pack has a coordinating stamp set. Today I thought I'd show you how you could use both together. 


Stamp Set: Merry Minis, Teeny Tiny Sentiments
Ink: Gumball Green, Raspberry Ripple, Summer Starfruit
Cardstock: Gumball Green, Crumb Cake, Raspberry Ripple, Whisper White
Baker's Twine: Cherry Cobbler
Punch: Dotted Scallop Ribbon Border, Merry Minis
Extras: Festive Pierce Pack

I pierced the bauble in the background and then layered sentiment and some of the merry minis! A little baker's twine bow finishes it off! 

Happy Stampin',

Amanda x

Friday, 9 November 2012

small and simple!

I thought today I'd show you a really easy and tiny card I used for my thank you notes to my customers last month! Cards don't always have to be big and complicated, sometimes its enough to just make a small (7cm square) card! 


Thank You Butterfly

Stamp Set: Teeny Tiny Sentiments, Papillon Potpourri
Ink: Raspberry Ripple
Cardstock: Whisper White, Primrose Petals
Punch: Elegant Butterfly
Accessories: Rhinestone 
Extras: Essentials Pierce Pack

So the butterfly is stamped and punched - love the co-ordination of Stampin' Up!'s stamps and punches - they make life so much easier!! To frame the butterfly I used the new essentials pierce pack to paper pierce a oval onto the card. I added a sentiment and a rhinestone to finish off! 

Hope you enjoyed a quick card today! 

Happy Stampin',

Amanda x


Sunday, 7 October 2012

whirlwind weekend take 2

I'm back as promised with another darling little project that I demo'd this weekend for a couple of parties. It was World Card Making Day yesterday so in honour of it I focused on some card making techniques and tools! 

This project is another Betsy creation. I'm sorry but you're probably going to see a lot of Betsy Blossoms creations in the coming days as I am just crazy for the sweet bird, flowers and leaves!


Rainbow Blooms

Stamp Set: Betsy Blossoms, Betsy Blooms (wheel), Itty Bitty Banners
Ink: Melon Mambo, Pumpkin Pie, Daffodil Delight, Gumball Green
Cardstock: Whisper White 
Big Shot: Labels Framelits 
Extras: Festive Paper Piercing Pack
Ribbon: Daffodil Delight Stitched Grosgrain
Accessories: Rhinestones

This card is showing off the beautiful co-ordination that Stampin' Up! has! See how the flowers in the wheel stamp match so perfectly wit the flower from Betsy's Blossoms?! I love that! So I inked and wheeled the Betsy's Blooms in 3 colours - like a rainbow! In all honesty, I haven't used wheels in a while, they got a little forgotten about but recently I have regained my love or wheels and how easy they make patterned backgrounds! They are really quite inexpensive and so easy! If you haven't tried wheels yet you have to give it a go, they're so much fun! 

I was also showing off the new piercing packs that Stampin' Up! have. Its so neat that they co-ordinate with framelits and punches that SU! carry. Yes, there's that word again, co-ordination. It really is at the heart of what Stampin' Up! is all about and one of the reasons I love them as a company so much!! 

Its definitely got a good pop of colour! A cheery card as we head towards the coldness of winter! I'm not a fan of the cold so hanging on to summery cards and colours as long as possible is a must for me! 

Have a great Sunday,

Amanda x

Thursday, 9 February 2012

Easy Cupcakes

Just a couple really super quick and simple birthday cards for you today using Easy Events! I love that this set has a great set of images for all kinds of cards you need to make, and also has sentiments! 


Easy Cupcake

Stamp Set: Easy Events
Ink: Early Espresso, Perfect Plum, Pretty in Pink, Baja Breeze, Wild Wasabi, Crumb Cake
Cardstock: Whisper White, Perfect Plum, Pretty in Pink
Punches: Scallop Circle, 1 3/8" Circle, Corner Rounder
Ribbon: White Satin
Extras: Paper Piercer & Mat Pack

Okay really easy one here, I stamped the cupcake on Whisper White cardstock and then coloured it in with the markers and punched it out with a circle punch. I punched a scallop circle from the same colour cardstock as the cupcake frosting and used the paper piercer to pierce a hole in each scallop - it just adds a little more interest to a very simple card. I stamped the sentiment in the bottom right hand corner of the card. I wanted a really clean look so used White ribbon for a subtle tone on tone effect, added the cupcake topper and rounded the bottom left hand corner! This is a fab card to have on hand for those birthdays that you forget or come up faster than you were expecting yet still looks really pretty. Do you like it? I hope you do!

Happy Stampin',

Amanda xoxo

Tuesday, 25 October 2011

a few wedding things

If you remember that at the end of August it was my cousin Ben's wedding to his beautiful bride Hannah. I just thought you would like to see the card and gift I made for them! 


Stamp Set: I {heart} Hearts, Basic Phrases (Retired)
Ink: Not Quite Navy, Shimmer Paint
Cardstock: Baja Breeze, Not Quite Navy
Accessories: Pearls, Button
Extras: Mat Pack, Paper Piercer


Embroidery hoop with aida in it and filled with stitching - their names, wedding date and a Bible verse. A big buttons heart fills in the centre.


Finally a quick picture of Ben and Hannah.

Catch you again tomorrow, 

Amanda x

Saturday, 27 August 2011

simply stampin' challenge, week 22

This week's challenge is a Sketch! With no further introduction, because its VERY late, I haven't packed yet and I'm off on holiday in the morning, here is the sketch and card for this week! 


Hello Autumnal Flowers

Stamp Set: Basic Phrases, Greenhouse Garden
Ink: Riding Hood Red, More Mustard, Versamark
Cardstock: Sahara Sand, More Mustard, Riding Hood Red
Accessories: Pearls
Extras: Clear Embossing Powder, Heat Tool, Paper Piercer, Mat Pack, Corner Rounder

Very simple, I stamped three flowers in the background overlapping one another, and then stamped and embossed some more flowers, cut them out. I did a long line of piercer dots along side the 3 flowers and then added the embossed flowers over top. Lastly I stamped the sentiment, added some pearls and rounded the corners! 

I hope you were inspired by this card and head over to the Simply Stampin' Challenge blog to see the other design team's creations and enter yourself! Don't forget that the added bonus of the Forest Friends stamp set is still up for grabs to all who submit an entry...worth getting the creative juices going for because they are just too cute for words! Please do leave a comment.

Apologies again for such a rushed blog entry this week....summer is almost over and then I promise to get back on track and give everything more time! I an just rushing like crazy at the moment. Still trying to get my cousin's wedding present finished for Monday...eek! 

Hugs,

Amanda xxx

Monday, 21 March 2011

bleach stamping and botanical blooms

So just a quick one this morning, I hope you are all having a good Monday... here it is!


Be Kind Blooms 


Be Kind Blooms

Stamp Set: Botanical Blooms
Cardstock: Whisper White, Old Olive, Rich Razzleberry
Ink: Rich Razzleberry, Old Olive, Early Espresso
Extras: Dimensionals, Paper Piercer, We R Memory Keepers Corner Chomper

These cards were CASEd from a sample shown in a old Sale-A-Bration leaflet I found online, as this stamp set was a SAB set a couple years ago. I am really loving it! (I'd suggest the Fast and Fabulous Hostess only set for a current similar stamp set! I only used the outlines, one of the 2 steps from this two step stamping set, here. The card is very minimal in style and is finished off with a simple sweet line of paper pierced holes. 


Bleached Blooms

Stamp Set: Botanical Blooms, All Year Cheer II
Cardstock: Crumb Cake, Rich Razzleberry, Certainly Celery, Early Espresso
Ink: Tesco's thick beach
Extras: 1" circle punch, We R Memory Keepers Corner Chomper, paper towel

This is my first attempt at bleach stamping! Its so easy and very fun! I poured some bleach onto a paper towel to make a bleach ink pad and then inked up my stamps with the bleach. When you stamp it will look clear for a moment and then gradually the image with begin to show as the colour on the cardstock is literally bleached out in front of your eyes! Just make sure you very thoroughly wash your stamp afterwards!

Hope you enjoyed this super quick post this morning. Catch you later! 

Amanda xoxo