Showing posts with label eyelet border. Show all posts

Monday, 30 January 2012

loved up

Okay so I think I am officially loved up with the You Are Loved stamp set. Sorry for all you out there that are getting tired of seeing this stamp set - its just so pretty! 


Thinking of You Roses

Stamp Set: You Are Loved
Ink: Wild Wasabi, Peach Parfait, Early Espresso
Cardstock: Whisper White, Peach Parfait
Punch: Eyelet Border

Really quickly then, I coloured in a stamped the rose stamp twice, without reinking so that it gave this two shade look. Next I stamped the sentiment and finally just to add a little more colour I added a strip of Peach Parfait punched with the Eyelet border punch just under the sentiment. 

This card is very quick and simple to produce, another one that's great for bulk makes or to quickly whip up in a hurry for that occasion you forgot about (let's face it, we all do it!).

Thanks for stopping by,

Amanda xx

Monday, 23 January 2012

i'm back - new spring mini!

Wow its been a long time! I finally got a new laptop - one where I can see the whole screen and doesn't drive me mental when I'm trying to do photos and blogging etc on it!

As you can imagine I have a fair few bits and pieces to show you from the past couple of months so stay tuned for some well overdue updates!

To start with a little Stampin' Up! news - Stampin' Up! has released a Spring Mini Catalogue (valid til April 30th) - it has lot of really pretty things in it and I am having fun playing with the things inside! If you'd like to see the catalogue for yourself you can view it here or why not book a party with me, to see and earn products free for yourself!

In addition to this Stampin' Up! is having their annual Sale-A-Bration promotion which starts tomorrow and continues til March 31st. Sale-A-Bration is an exclusive line of stamps and accessories that ANYONE (hostess AND customer) can earn for free when they spend during the SAB period. It is a great sales booster for your party and everyone is a winner.

If a lovely main catalogue, fabulous mini and Sale-A-Bration aren't incentive enough to host a party - what is!?!

If you would like to host or find out more about hosting or placing an order please email me on amanda_burditt@hotmail.co.uk or call me on 01604 949827.

Now for a quick little creation - something from the new mini to tempt you!


You're Loved Sweet Friend

Stamp Set: You Are Loved
Ink: Wild Wasabi, Pretty in Pink, Rose Red, Peach Parfait, Chocolate Chip, Wisteria Wonder
Cardstock: Whisper White, Pretty in Pink
DSP: Wild Wasabi
Punch: Eyelet Border
Big Shot: Petal Cone die

I used the stampin' write markers to colour in the heart stamp - it took a little while but really makes the image pop! The heart was stamped slightly off centre to leave space for the banner. I cut out the banner from the Petal Cone die and stamped my sentiment on it in Rose Red ink. To finish off the card I added a piece of Wild Wasabi DSP with the eyelet border punch just to balance out the card. 

So what do you think? Come back tomorrow for some more Sale-A-Bration info and another creation! I am really sorry for being absent for so long and am really looking forward to getting back into blogging and sharing my creations with you all! 

Until tomorrow, 

Happy crafting,

Amanda xx

Wednesday, 19 October 2011

gift bags with a difference

I was surfing the net one night a little while ago when I couldn't sleep and got into watching youtube videos, I find it quite theraputic watching others craft and often get some fab ideas. On this occasion and found this excellent tutorial for how to make a gift bag out of an envelope. Now, I'm stupid and didn't save a link to the video, I really wanted to share the link with you. This is such a fantastic idea - I'm always in need of gift bags for pressies and finding one that's the correct size is almost impossible and can end up being quite pricey!

Below are a few examples of Christmas themed gift bags in a variety of sizes (depending on envelope size) and also different closures! This was the make and take project we did at Sue's party last week.


Stamp Set: Season of Joy
Ink: Real Red, Old Olive
Cardstock: Whisper White Real Red
Accessories: Real Red Grosgrain
Extras: Crop-a-dile
Envelope: to fit A5 card


Stamp Set: Season of Joy
Ink: Crumb Cake, Rose Red
Cardsrtock: Crumb Cake, Rose Red
Accessories: Rose Red Seam Binding, Rhinestones, Linen Thread
Punch: 5 Petal, Boho Blossoms, Decorative Label
Extras: Crop-a-dile
Envelope: to fit A4 letter


Stamp Set: Season of Joy
Ink: Marina Mist, Night of Navy
Punch: Eyelet Border
Accessories: Rhinestone Brads, Linen Thread
Extras: Crop-a-dile, Paper Piercer, Mat Pack
Envelope: to fit square card


Stamp Set: Season of Joy
Ink: Daffodil Delight, Early Espresso
Cardstock: Whisper White, Daffodil Delight
Punch: Decorative Label
Accessories: Rhinestone Brad
Extras: Crop-a-dile, Paper Piercer, Mat Pack
Envelope: to fit A6 size card

I hope you liked today's share! They're so easy to make, have a go today!! 

Hugs,

Amanda x

Monday, 17 October 2011

flirtatious speciality

Just a quick post today. A CAS of a card I found here but nobody's name so if this is your design - please take credit! So I found itonline when I was looking for inspiration for cards  to make using the new Flirtatious designer paper. Folding the paper gives the dsp a bit of a different look and more body! I liked it so much that I decided to do the card as a demo at my Hostess Catalogue Preview party a few weeks ago - they all loved it too! 


Flirtatious Ripple

Stamp Set: Just Believe
Ink: Versa Mark
Cardstock: Wisteria Wonder, Whisper White/Pretty in Pink, Melon Mambo
DSP: Flirtatious Speciality
Embossing: Embossing Buddy, Heat Tool, White Emboss Powder
Punch: Eyelet Border


Please leave a comment and let me know what you think! Catch you again tomorrow!

Amanda x

Saturday, 11 June 2011

simply stampin' challenge, week 11

Wow, can you believe its week 11 on the Simply Stampin' challenges already?! Can't believe how time is flying by! This week is another colour challenge. The colours are so lovely I have 2 cards this week, one you will get today and the other sometime later in the week! Without any further ado, here are this week's colours and my first card...


Stamp Set: Greenhouse Garden, Fun & Fast Notes
Cardstock: Crumb Cake, Very Vanilla, Chocolate Chip
DSP: Concord Crush (6x6 Hostess Only pack)
Ink: Concord Crush, Chocolate Chip
Punches: Eyelet Border, Modern Label, Corner Rounder
Extras: Crimper, Crop-a-dile

This is a really simple card, sometimes simple is the most effective though, right?! A few strips of Concord Crush DSP split up with a little bit of Chocolate Chip cardstock. The eyelet border punch mimics the polka dot DSP. I stamped the sentiment on some Very Vanilla cardstock, punched out with te modern label punch and then sponged the edges to give it a softer look. I stamped and cut out a few small flowers from the Greenhouse Garden stamp set to embellish the sentiment (I think the finished effect it looks similar to a stamp in the Just Believe stamp set - just to prove you can get inspiration from stamps you don't own!) To help marry the sentiment and the strips of DSP (and also to soften the very bold flowers) I punched out dots of Very Vanilla cardstock using the small end of the crop-a-dile and added them to the middle of the flowers. Finally I crimped the edge just to break up the large expanse of Crumb Cake, and then rounded the corners. 

Check out the other design team entries at Simply Stampin' Challenge blog, and please do enter!

Please let me know what you think! Are you a lover of Concord Crush?! I certainly am!

Check back later this week for my second entry! 

Amanda xx

Saturday, 4 June 2011

simply stampin' challenge, week 10

Today is a very special day! Its my cousin Rachel's wedding day!! I am so excited! Anyhows, I probably can't express my excitement to its max as I'm actually writing this post a few weeks previous as I'm in the States at the present time. I will have a full report on everything when I return!! But one thing I can say, I cannot WAIT to see the dress! I'm sure Rach is going to look absolutely stunning!!! :D 

This Simply Stampin' Challenge is a sketch and I loved this week's sketch! 


Floral Rosette

Stamp Set: n/a
Cardstock: So Saffron, Certainly Celery
DSP: Rose Red, Pink Pirouette
Punches: Eyelet Border, Two Step Bird, Corner Rounder
Accessories: Daffodil Delight Button, Whisper White Grosgrain Ribbon, Linen Thread
Extras: Dimensionals

I love this card!! And its so simple! I cut out and distressed a number of different sized DSP circles and then layered them up, it makes a really great quick rosette and all you need is paper and scissors! To finished off the middle with some linen thread and a button! I added a band of Rose Red DSP, a strip of Certainly Celery punched with the eyelet border punch and some ribbon. Finally I added some leaves from the two step bird punch in Certainly Celery and then rounded the top corner. It just helps mimic the rosette. 

Now, don't forget to check out the Simply Stampin' Challenge blog to enter and to see all the other design team member's entries! 

I hope you loved this as much as I do! Please do leave a comment, I love reading them and they bring a smile to my face! 

Amanda xo

Saturday, 28 May 2011

simply stampin' challenge, week 9

This week's Simply Stampin' Challenge is a Theme, Flower Frenzy! I wish I had more time to work on this, I had lots of ideas but have been so busy that I just had hardly any time! I must also apologise for the poorness in quality of these photos, you know how it is, photos and windows...they just do not mix!  Anyhow, here is my creation...


Herb Flower Garden

Stamp Set: En Francais
Cardstock: So Saffron, Garden Green
DSP: Pretty in Pink, Rose Red, Wild Wasabi, Daffodil Delight
Ink: Riding Hood Red
Punches: Eyelet Border Punch, 1" Circle Punch, 1 3/8" Circle Punch, Two Step Bird
Extras: Florist Wire, Green Washi Tape, sponge

On my window sil in my kitchen i have some herbs growing, theyre only babies and look a little sad at the moment, so I thought they needed a little cheering up and give myself something to look at when I'm doing the washing up!
I made rosettes using the eyelet border punch and concertina folding the dsp, I finished off each flower with a circle punch stamped with the En Francais background stamp to add some texture and sponged the edges to soften it! Finally I wrapped green tape around some florist wire, and adhered it to the rosette. I also used the wing from the Two Step Bird punch to make some little leaves. 

I hope you liked this week's creation, thanks so much for stopping by. Why not leave a comment, I love reading them! 

Til next time,

Amanda xx


Friday, 15 April 2011

finally friday

I only have a little card to share with you today (I'm actually writing this post the night before, nursing my arm which is really hurting after burning it on the oven! Ice is helping a little but still hurts! booo). Its a little monogrammed notelet. 


"A" Monogrammed Notelet

Stamp Set: Broadsheet Alphabet, Punch Bunch (SAB), En Francais
Cardstock: Very Vanilla, Certainly Celery, Rich Razzleberry
Accessories: Basic Rhinestone
Extras: 1 3/8" Circle Punch, Eyelet Border Punch, Dimensionals. 

I stamped the background with the En Francais background stamp. I stamped the scalloped circle for you stamp from the Punch Bunch in Rich Razzleberry on razzleberry cardstock, I then punched out the centre so just the scallop edge remained. On a separate piece of Very Vanilla I stamped the enitial "A" and the adheredit to the centre of the scallop circle. I adhered narrow strips of Certainly Celery eyelet border to the top and bottom of the razzleberry strip. Finally, I finished off this little notelet with a rhinestone on the monogram. This would make a really cute little monogrammed gift set which is what I intend on doing with this...watch out for the finished gift sets soon! 

I hope you have a great Friday! If you're in the area, tonight, I am having my workshop so please pop along, there's a extra little something in it for all who attend!! 

One more thing, its your last chance today to enter the Simply Stampin' Colour Challenge...a new challenge is released tomorrow so please head on over, enter for your chance to win some lovely goodies!!! 

Take Care!

Amanda xo

Monday, 11 April 2011

let's rock and roll!

It's been a little while since I added some cards that weren't challenges...I've been busy making and have now got lots to upload! Today I would like to share my experimentation with the rock and roll technique!


Thinking of You

Stamp Set: Silhouette Sentiment, Punch Potpourri 
Cardstock: Very Vanilla, Certainly Celery, Old Olive
Ink: Dafodil Delight, Pumpkin Pie, Old Olive
Extras: Staples, Dimensionals

If you would like to see how to do a card like this, and have a go yourself, why not come along to my class in May when we will all be having a go at doing the Rock and Roll technique! Its really easy and fun....not to mention very cool looking! 


Tea Bag Holder

Stamp Set: Punch Potpourri, Bliss, Silhouette Sentiments
Cardstock: Early Espresso, Certainly Celery, Marina Mist DSP
Ink: Early Espresso, Certainly Celery, Old Olive
Accessories: 1/4" Whisper White Grosgrian Ribbon, Dazzling Diamonds Glitter
Extras: Sticky Strip, Tombo Mono Multi Glue, Dimensionals, Velcro, Eyelet Border Punch, 1" Circle Punch, 1 3/8" Circle Punch

Again, this is going to be a upcoming project in my classes, so keep your eyes peeled for the class featuring this project! Its totally gorgeous and makes a fantastic gift! 

Hope you enjoyed today's offerings, please do leave a comment, they make my day! 

Amanda x

Saturday, 2 April 2011

simply stampin' challenge, week 1

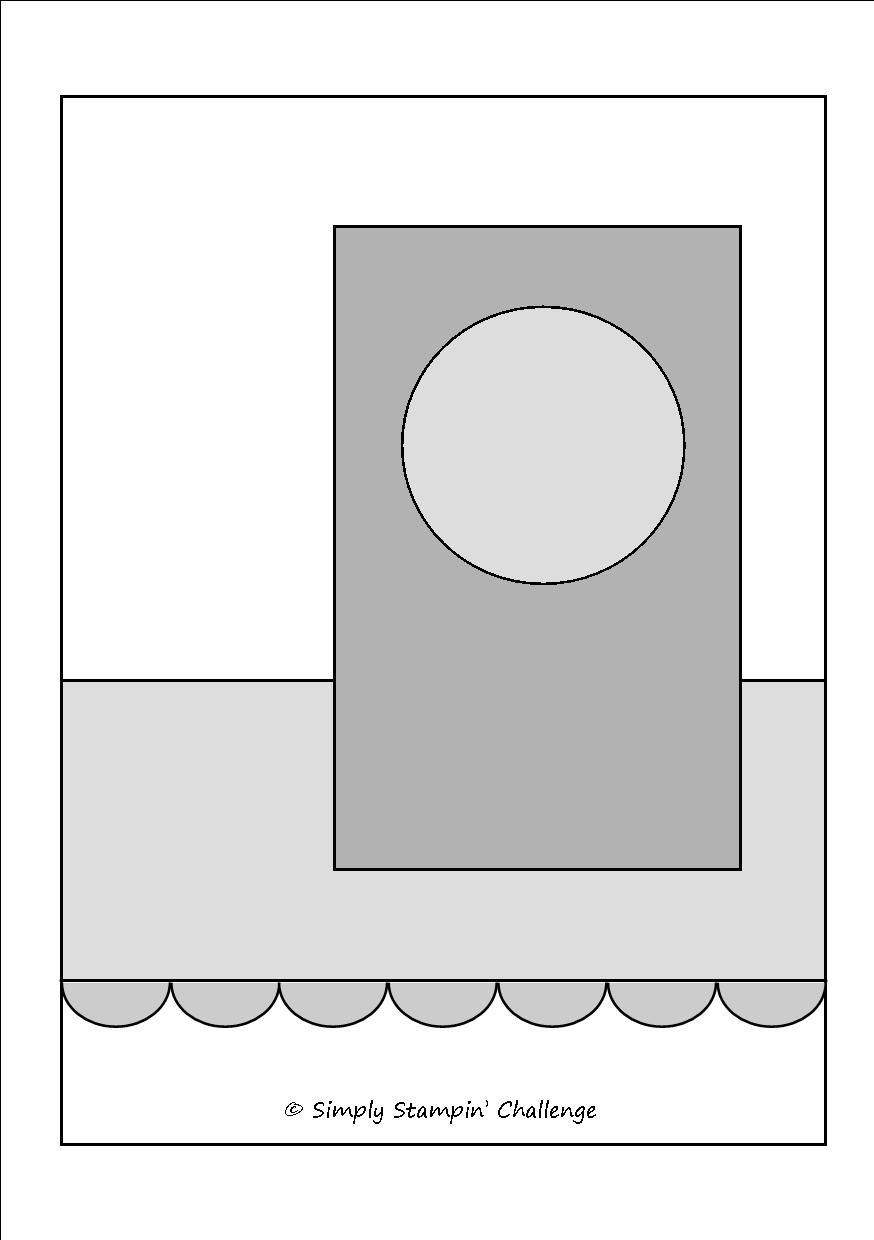
Okay, I am immensely excited to finally show you the first challenge, and what I created from the this week's sketch! Below is the sketch followed by my creation. To see what the other lovely talented DT members created, and to enter the challenge yourself, check out the simply stampin' challenge site!


Get Well Wishes

Stamp Set: En Francais, Fun and Fast Notes, Greenhouse Garden
Ink: Certainly Celery, Rich Razzleberry
Cardstock: Crumb Cake, Rich Razzleberry, Certainly Celery, Very Vanilla
Accessories: Basic Rhinestones, Very Vanilla Satin Ribbon
Extras: Corner Chomper, 1 3/8" Circle Punch, Eyelet Border Punch, White Gel Pen, Dinensionals, Stamp-a-ma-jig

For my workshops next week I was asked to show how to use the stamp-a-ma-jig so as I had it out to work on some samples I thought I'd use it for this project too! The 1 3/8" punched hole works perfectly with the medium sized flower in the Greenhouse Garden stamp set. I'm really loving the Rich Razzleberry and Certainly Celery colour combo at the moment, these two colours are just totally gorgeous! I used the En Francais stamp to add a bit of light texture to the celery background. I finished off the card with a little bit of ribbon, some rhinestones and a bit of white gel pen dot and dash line! 

I hope you enjoyed this first week's entry, leave a comment, and please don't forget to head over to the simply stampin' challenge blog and enter for your chance to win a special prize! 

Take care! 

Amanda xoxo

Friday, 25 March 2011

just a quickie

Its been a busy day! Such nice weather urged me to get some cleaning and other stuff done today so now its late and so today is just a quick little card for you all. This is the swap I made to swap with the the other demos that attended the training last Saturday! 


Birdie of a Branch

Stamp Set: Fun & Fast Notes, En Francais
Cardstock: Very Vanilla, Pink Pirouette, Pretty in Pink, Certainly Celery, Old Olive
Ink: Versa Mark, Certainly Celery
Punches: Eyelet Border, Two Step Bird
Extras: Clear Embossing Powder, Dimensionals

Pretty simple little card, I stamped the Pretty in Pink cardstock with En Francais in versamark and then embossed it with clear embossing powder. I punched out all the shapes and then adhered them altogether. Finally I stamped the sentiment "thanks" from part of the Fun and Fast Notes set using masking technique. 

Hope you've all had a good  day, I better get off to bed now as I have lots to do tomorrow and my workshop is tomorrow evening, don't forget, if you're in the area and interested please do feel free to come! For more details contact me! 

xoxo

Friday, 18 March 2011

i'm addicted to mini's


Botanical Blooms Mini

Stamp Set Botanical Blooms (retired)
Cardstock: Whisper White, Wild Wasabi DSP
Ink: Elegant Eggplant, Certainly Celery, Early Espresso
Extras: Eyelet Border Punch

This card is so simple and really elegant! Literally all I did was stamp the flower (I stamped off once on scrap paper for a paler more subtle look) and leaves 3 times on the cardstock base and then punched a strip of Wild Wasabi DSP with the border punch and adhered it to the bottom. It simply gives the flowers a little bit of grounding! 


Thinking of You Ruffles Mini

Stamp Set: So Happy For You (SAB)
Cardstock: Crumb Cake, Melon Mambo, Pumpkin Pie, Old Olive
Ink: Old Olive
Extras: Eyelet Border Punch, We R Memory Keepers Corner Chomper, White Gel Pen

This card was slightly inspired and very loosly CASEd from a card I saw in the current SU ideas book and catalogue. In the card it had several layers on the eyelet border punch layered on top of one another. I was keen to try this, so I punched several strips of coloured cardstock and began playing around. To be honest I felt it was a little too flat how it was, it needed a bit more body and life to it, so I began crumpling, scrunching and distressing the cardstock pieces with my hands. Now I'm happy with it. The thin strip of Pumpkin Pie just helps break up the wide block of Melon Mambo and also just separate the frills from the sentiment slightly as it gives the sentiment something to sit on. I can't help think that it reminds me of those little frilly mini skirts that seem to be the fashion these days! I'm totally loving this card! 


A True Friend is You Friend

Stamp Set: True Friend (retired)
Cardstock: Crumb Cake, Old Olive, Rich Razzleberry
Ink: Early Espresso, Rich Razzleberry, Old Olive
Accessories: Basic Rhinestones
Extras: We R Memory Keepers Corner Chomper, Dimensionals, 1" Circle Punch, 1 3/8" Circle Punch

Recently, I dug this stamp set out of my stash and have been having fun playing around with it.I stamped the circular medallion on Old Olive and Rich Razzleberry and then punched them out with the circle punches. I stamped the larger medallion stamp from the set in Early Espresso on the Crumb Cake background and then layered the punched circles on top using dimensionals. I finally stamped the sentiment at the bottom, added a rhinestone and rounded the corner. 

I hope you enjoyed seeing more minis! 

Have a fab Friday! 

Amanda x

Tuesday, 15 March 2011

update 3 - miscellaneous

This is the third and final of my updates on the past week and half! I have some more stuff I've been making the past few days but I'll leave that for tomorrow (I'm enjoying some nicer weather so I can take the photos outside, they just look so much better in good lighting! Anyhow, its not a very sunshiny day so I'm going to hold off and hope for a better day tomorrow, its not like I haven't got enough to keep me busy on the blog today anyway!) 

This update, as the title suggests, is miscellaneous cards, which include thinking of you, friend and baby cards! 


For You Poppies

Stamp Set: Punch Bunch (SAB)
Cardstock: Very Vanilla, Pumpkin Pie, Old Olive
Ink: Pumpkin Pie, Old Olive
Accessories: Basic Rhinestones
Extras: White Gel Pen, Dimensionals, Eyelet Border Punch

This is a sweet little card which combines stamping the scalloped poppy stamp in several colours, cutting and layering the pieces on top of one another. the Old Olive and Pumpkin Pie background strip just really makes the scalloped circle pop!


Friends

Stamp Set: Cute By The Inch (Level 2 Hostess)
Cardstock: Very Vanilla, Night of Navy/Riding Hood Red
Accessories: Rhinestones
Extras: Dimensionals, Scallop Square Punch, We R Memory Keepers Corner Chomper

I used a post-it note to mask out the word 'friend' on the stamp so that it just says 'friend' in one of the scalloped squares. By repeating the image but only having one of the images complete with the sentiment really enhances the sentiment and help it out stand out!


True Friend

Stamp Set: Punch Bunch (SAB)
Cardstock: Crumb Cake, Old Olive, Pacific Point, So Saffron DSP
Ink: Old Olive, Pacific Point
Extras: White Gel Pen, 1 3/8" Circle Punch, 1/4" Grosgrain Ribbon

This card is CASEd from a card I found on a website called Splitcoast Stampers,  if you have never heard of it before I'd definately recommend checking it out! Its a fabulous place for inspiration and sharing ideas. 


Welcome Baby

Stamp Set: Punch Bunch (SAB), Every Little Bit
Cardstock: Whisper White, Pink Pirouette, So Saffron DSP
Ink: Versamark, Daffodil Delight, Pink Pirouette
Accessories: 1/4" Grosgrain Ribbon 
Extras: Stampin' Pastels (Daffodil Delight), Cotton Ball, Eyelet Border Punch, White Gel Pen, We R Memory Keepers Corner Chomper, Paper piercer

A really sweet little baby card! Again I stamped the tag in 2 colours so I could paper piece over the top to create a multi coloured image, without having the markers! The ducks from Every Little Bit along the bottom mirrors the tiny ducks on the mobile!

Hope you enjoyed these cards and I look forward to hearing your comments! 

Amanda xoxo

update 2 - birthday cards

Second of my card instalments in an attempt to catch up on the last week or so! I hope you enjoy seeing all the things I have been making! Please feel free to leave a comment, I love reading them! 


Birthday Wishes Pressies

Stamp Set: Every Little Bit, So Happy For You (SAB set)
Ink: Basic Black, Pacific Point
Cardstock: Whisper White, Pacific Point DSP, Rich Razzleberry DSP, Wild Wasabi DSP
Extras: Eyelet Border Punch

A really quick easy card. I stamped the presents on Whisper White CS and then stamped again onto Designer Series Paper and cut them out. I punched some Wild Wasabi DSP with the punch and adhered it to the bottom with a narrow strip along the top. I adhered all that to the white background and finally stamped the sentiment above the presents.  


Birthday Wishes Gifts

Stamp Set: --
Ink: --
Cardstock: Whisper White, Pumpkin Pie, Rich Razzleberry, Pumpkin Pie DSP, Rich Razzleberry DSP, Daffodil Delight DSP
Accessories: Silver Embroidery Floss
Extras: We R Memory Keepers Corner Chomper, Modern Label Punch, White Gel Pen, Dimensionals

I wanted to try using DSP to make presents. I saw a card similar to this on the wonderful Kristina Werner's website, unfortunately I dont think it turned out as nicely as hers did. At least I tried! Let me know what you think!


HB Happy Birthday

Stamp Set: Punch Bunch
Cardstock: Crumb Cake, Very Vanilla, Garden Green, Night of Navy
Ink: Night of Navy, Garden Green
Extras: White Gel Pen, Dimensionals, Scallop Square Punch, We R Memory Keepers Corner Chomper

I cut strips in a variety of widths of cardstock, and adhered them to the card, adding the scallop punched saying HB in a row too. I finished off the card by doing some dots and dashes with a white gel pen on the card strips and rounding the corners. This is a good manly card!


Happy Birthday Owl

Stamp Set: Punch Bunch, Fun & Fast Notes
Cardstock: Very Vanilla, Early Espresso, Crumb Cake, Old Olive
Ink: Elegant Eggplant
Extras: Dimensionals, Two Step Bird Punch

I punched out the leaves and branches using the Two Step Bird punch and then  stamped the owl onto Crumb Cake and Cut it out. I adhered it all together and popped the owl up on some dimensionals to add some depth. 


Birthday Flowers 

Stamp Set: Every Little Bit, Fun & Fast Notes
Cardstock: Whisper White, Rich Razzleberry, Old Olive DSP, Pumpkin Pie DSP, Rich Razzleberry DSP
Ink, Basic Black, Rich Razzleberry, Orange Pen (would have used Pumpkin Pie marker if I had one!)
Accessories: 1/4" Whisper White Grosgrain Ribbon
Extras: Eyelet Border Punch, Crystal Effects, Dimensionals

I simply stamped the flower from Every Little Bit onto some DSP and then cut them out, adding dimensionals to the back and adhereing them in a grid pattern to the Whisper White cardstock, which I adhered to Rich Razzleberry cardstock that had a punched bottom edge on. I added some Whisper White grosgrain ribbon to help finish it off and a small blob of crystal effects to the centre of each flower to give it a glossy finish! Finally I stamped the sentiment in the bottom right hand corner!


Birthday Bliss - Donna's Birthday Card

Stamp Set: Bliss (SAB Set), Fun & Fast Notes
Cardstock: Crumb Cake, Elegant Eggplant, Whispter White
Ink: Versamark, Elegant Eggplant
Accessories: Linen Thread
Extras: Modern Label Punch, Eyelet Border Punch, Clear Embossing Powder, Sponge, We R Memory Keepers Corner Chomper, Paper Piercer, Glue Dot

I stamped the flourish onto Crumb Cake in versamark ink and then added clear embossing powder. I then sponged Elegant Eggplant ink over the cardstock to create this spongy purple and kraft coloured effect. I stamped the butterfly, cut it out and folded the wings up to add dimension. I attached it with a glue dot. I punched the eyelet border and adhered the card together. Finally I stamped and punched out the sentiment, pierced a whole in each side and attached it to the card by wrapping linen thread around the card. 

I hope you enjoyed my second update, check back later for my third update! 

Please leave a comment. 

Have a great Tuesday! 

Amanda x