Showing posts with label sweet sorbet. Show all posts

Friday, 11 April 2014

Kaleidoscope Banners

Hi! 

Sorry I didn't get around to blogging yesterday! Literally spent the entire day yesterday sewing!! I've finally got my project finished and spent today getting it washed and laid out to dry. So pleased with how its turned out.

I've had quite a nice relaxed day - spent quite a good portion in my craft room making some new cards! I made one for this week's Freshly Made Sketch and the Paper Players and set it aside to photo and upload later then completely forgot about the deadline for Paper Players today. Whoops! 

So the Paper Players' challenge this week was "Three Spree" so I'd just kept in mind that however the card turned out I wanted 3 or the main element! 


Of course Freshly Made had another beautiful sketch this week...

Here's how my creation turned out!


Stamp Set: Remembering Your Birthday
Ink: Versamark, Whisper White
Cardstock: Basic Black
DSP: Kaleidoscope
Punch: Banner
Embellishments: Sweet Sorbet Twine, Brights Candy Dots
Other: White Embossing Powder

My starting point was actually the black/grey coloured DSP. It's kinda plain and boring but I thought with the right treatment it could look really lovely! I added it to a black card and jut knew it had to become a masculine card. Now this was all very black and just needed a pop of colour.

The banners gives a nice height and movement to the card. Its a bit of a lighter element than a solid strip down the side like in the sketch which I think has worked out well. 

The twine knots were just a nice finishing touch for the banners. 

Hope you liked this one! 

Happy Stampin',

Monday, 24 March 2014

My Digital Monday - Happy Life!

Hi! 

Its Monday again! I have a full week, so it should be interesting at the very least! 

So, Monday is the My Digital Monday slot. This week I made a pretty simple scrapbook page. This is actually just a random scrap book page. Its an old photo of Stuart and I from about 6 years ago! We look so young!! 

I wanted to make a spring time page - this is a bit of a different spring look. Instead of peppering it with plenty of colour and using lots of fresh white I thought I'd use a black base. This way all the white and ice-cream colour embellishments would really pop off the dramatic background. 

Also another reason for choosing black is just for the challenge! Generally black is a colour I don't use, its bold and can be quite intimidating. I'm trying to conquer my fear and just try something new! What do you think? Are there colours you're scared of?


My Digital Files - 
Stamp Set: Blossoms Abound
Punch: Get It Done Tag, Square
Embellishments: Paper Doily, Sweet Sorbet, Blossoms Abound


All the flowers and the cute bunting and banner are embellishments - they are pre coloured so all I needed to do was add them where I liked. 

The two sentiments I used were stamps from the coordinating stamp set to the embellishments so they fit together perfectly style wise. 

I added drop shadows behind all of the embellishments and layers so it gives all the elements a little lift - takes 2 seconds but really improves the look at work. 

Happy Stampin',

Monday, 17 March 2014

Sorbet Mother PP187 FMS127

Hi! 

Just a really quick second post of today as I really wanted to get a card made with this week's Freshly Made Sketch which ends tonight. 

I thought I'd combine it with this week's Paper Players challenge which is a clean and simple springtime theme. 


My mother in law had asked me to make a Mother's Day card for her (British Mother's Day is the end of the month!) so I thought I'd combine a sweet sketch and pretty springtime theme for this one. 


Stamp Set: Teeny Tiny Sentiments
Ink: Sahara Sand
Cardstock: Whisper White, Sahara Sand
DSP: Sweet Sorbet (SAB)

I love that by keeping the background really neutral the ice-cream coloured flowers really pop off the page. I took a bit of time and fussy cut all these flower out - I think they're just beautiful and look so lovely all layered up! 


Some pearls in the flower centres and scattered about just adds that special little touch. I know its quite a lot of pearls but hey, what Mom doesn't deserve that luxury?!

Happy Stampin',

Monday, 10 March 2014

Giant Cupcake

Hi!

Another new week. Got much on this week? Mine is actually shaping up to be a pretty good one! We have card club this morning and this evening which is going to be good fun. Then on Wednesday evening I'm getting a train down to London to stay with my friend Emma. We're going to see some art exhibitions and hang out. On Thursday Sam is coming to join us so we'll all have Friday together before coming home in the evening! Sounds exhausting but it should be good fun too! Don't worry, I'll have some posts lined up for you while I'm away! 

So my friend Vicky asked me a few weeks ago to make a 30th birthday card for her friend. When I asked her if there was anything specific she was looking for she just said "big cupcake". Okay I think I can work something out there! 


Stamp Set: Express Yourself, Petite Petals
Ink: Pistachio Pudding, Crisp Cantaloupe, Gumball Green
Cardstock: Crumb Cake , Pistachio Pudding, Crisp Cantaloupe, Pool Party, Whisper White, Gumball Green, Silver Glimmer Paper
DSP: Sweet Sorbet

Punch: Modern Label, 1 3/4" Scallop Circle, 1 3/8" Circle, Petite Petals, Bird Builder, Scallop Border
Big Shot: Typeset Alphabet, Decorative Dots (SAB)
Ribbon: Pool Party Ruffle (retired), Silver Baker's Twine
Embellishments: Rhinestone
Other: Tooth Pick

So this card was a bit of a case of just adding and removing items until it looked right. 

I started by just drawing out a huge cupcake on a piece of printer paper using the cupcake builder as my inspiration for the shape. I then just worked at it until it was right and then cut the pieces of pattern paper and cardstock. Here's a photo of the back so you can see how it folds a bit better! 

I thought the striped Sweet Sorbet paper was perfect for the cupcake liner - adding the scallop border punch to the top made it even more realistic. It did however look like a lot of pattern with nothing to break it up. the ribbon I eventually decided on is some that was retired - I kind of wanted to use crisp cantaloupe ruffled ribbon but I didn't have any and using more pistachio would be overload I think.


The 30 piece is supposed to resemble one of those cupcake toppers that seem to be quite fashionable at the moment. I actually sandwiched a toothpick between two of the scallop circles and pierced it through the frosting layer. 


Some texture and sponging on the frosting was to add some interest to quite a large area of Pistachio Pudding and look kind of like sprinkles. 

The flowers were one of the later additions - I loved the topper but it didn't seem to quite gel with the card right. I guess the card just looked a little bare so I added some flowers and leaves. the rhinestones are a nice finishing touch as if they are just sprinkled on. 

Hope you enjoyed this. 

Happy Stampin',

Saturday, 8 March 2014

Retro Fresh

Hello!

Happy Saturday! Stuart has a mountain of work to do today so I'm left to my own devices - housework and stamping it is then! We are having a BBQ later - yum yum! 

I'm playing along with the Freshly Made Sketches challenge today. When I saw the sketch, I must admin, it filled me with fear. I have a real thing about wonky things, or things on a diagonal... sometimes they can look great but if you don't get it exactly right it can look really wrong. I'm definitely a straight line girl! But I was determined to give it a go.


I looked at the sketch but wasn't paying as much attention as I should have been and ended up switching up the two layered pieces. I think it looks okay like this too! 


Stamp Set: Itty Bitty Banners, Geometrical
Ink: Baked Brown Sugar, Tangerine Tango
Cardstock: Very Vanilla, Coastal Cabana, Baked Brown Sugar, So Saffron
DSP: Retro Fresh
Punch: 1 3/4" Scallop Circle, 1 3/8" Circle, Merry Minis
Embellishments: Sweet Sorbet Accessories
Other: White Gel Pen

I love the stripes and thought they'd make a great background on the card! Such scrummy colours! 


The scallop circles were distressed to look more fluffy and give a bit of texture to the card. 

The stars were a later addition that just seemed to fill in the space nicely. 

Hope you liked this short and sweet card today. 

Happy Stampin',

Thursday, 6 March 2014

Babies & Banners

Hi! 

Its Thursday! Only one more day to go until the weekend! I think its going to be another fairly quiet one although we do have a fellowship lunch at church so that'll be something fun and yummy to look forward

I've got a couple of cards for the SU Only Challenge here. The challenge over at SUO is "Banners". Banners are everywhere at the moment and so common I wondered what to do for this challenge. This is kind of a similar card to another baby card I showed you all last week but its got a bit more stamping and is very fun! 


Stamp Set: Cuddles & Kisses, Sweet Essentials, Banner Blast (SAB)
Ink: Wisteria Wonder, Crisp Cantaloupe, So Saffron, Pool Party, Pistachio Pudding
Cardstock: Whisper White, Pool Party, Wisteria Wonder
Punch: Banner (SAB)
Embellishments: Subtles Buttons, Sweet Sorbet Accessory 


I thought it'd be fun to use the sentiments from the Cuddles and Kisses and the Sweet Essentials sets to make my own DSP. The stamp-a-ma-jig was a total must here to get everything just in the right place. This is a very neat way to use all your sentiments in a fun way - it makes the sentiment the focal point of the card rather than being tagged on!

The hearts are stamped twice to get the different shades which adds some depth to the card.


The banners are at different lengths and layered up to add some interest to the strip. 


The button and twine are the perfect simple little embellishment. 

Instead of hearts for the boy card I thought stars were a more suitable alternative! 


Hope you enjoyed this card - girl and boy versions. I am definitely getting well stocked up on new baby cards for all my friends that are having babies at the moment! 

Happy Stampin',

Tuesday, 4 March 2014

Fly Away

Hello!

Are you having a good week? I'm having a good old craft today! Yay! Been looking forward to this for a while - for one reason or another I just haven't had much chance to get into my work room and do some good ol' crafting lately!

I thought today I'd show you a little something I made a while ago...its perfect for Spring and Summer! 


Stamp Set: Fabulous Phrases
Ink: Pool Party, White Craft
Cardstock: Sahara Sand, Pool Party, Soft Sky, Calypso Coral, Whisper White
DSP: Sweet Sorbet
Punch: Triangle, Pennant Builder, Owl Builder, Cupcake Builder
Embellishments: Cayplso Coral Baker's Twine, Basic Grey Baker's Twine (retired)

I love the soft whispy clouds in the background here. I used the frosting from the cupcake builder as a mask which I then sponged with a sponge dauber. I didn't sponge too thickly so that some of the Soft Sky colour showed through!


The triangle punch and the pennant punch were the perfect size to place together to make a kite. I used thin strips of cardstock to cover up the join. The tail bows are just two little hearts from the owl builder punch joined together. I think that works rather nicely! 

I liked the different way of compiling a sentiment that I tried out here too - stamped each word and cut it out individually - perfect for when you can be bothered or are having one of those days when you can get things lined up straight!

Happy Stampin',

Friday, 14 February 2014

A Must....For List Makers!! PP182

Hey there! 

Today's creation is using the gorgeous colour palette from the Paper Players.


I just LOVE the colour palette this week - any of you regular followers know that I'm on a bit of a Crisp Cantaloupe kick at the moment. I was actually admiring (and almost bought) a top in a store on Saturday which had Cantaloupe and Midnight Muse paired up - it was beautiful. 

So this colour combo would make a beautiful card but I had picked up a nice champagne gold frame that I wanted to make into a "To Do" board. It seemed only natural to do it up with the Crisp Cantaloupe and Midnight Muse and add some more gold in there too. Here's the finished article. (sorry for the less than amazing photos - its a dark and miserable day here and the light in my room is less than perfect for photos!)


Cardstock: Midnight Muse
DSP: Sweet Sorbet (SAB), Gold Fancy Foil Vellum
Big Shot: Bigz Alphabet Typeset
Punch: Boho Blossoms
Accessories: Metallic Mini Clothespins
Other: Frame

This frame was just a cheap frame I picked up for £5 - and its big! It'll hold a 12"x10" photo in there for you so it means there's plenty of space for writing that forever uberlong to do list!

I chose probably my favourite sheet of paper in SAB's Sweet Sorbet collection and just cut some letters with the big shot alphabet (its been a while since I cracked these out!) I decided I wanted a bit more of a gold touch to this so go tthe chance to add some of the gold foil vellum - isn't this just to die for!? What I especially love is that I managed to punch the heart vellum with the boho blossoms so there's just a single heart in the centre. 


At that point I was finished. Ish. I saw the metallic clothes pins laying there and thought oh what a brilliant idea - I could hot glue some to the bottom of the frame to clip important piece of paper etc to. 

I'm just over the moon at how well this turned out and really hope it'll keep me a little more organised!

Happy Stampin',

Sunday, 9 February 2014

Simple Sunday - Triangle

Hi! 

Its Sunday today so I have another Simple Sunday for you. Today's creation was inspired by this super cute and simple card my cousin sent me a photo of. This is one of her first ever cards - isn't it just adorable?!


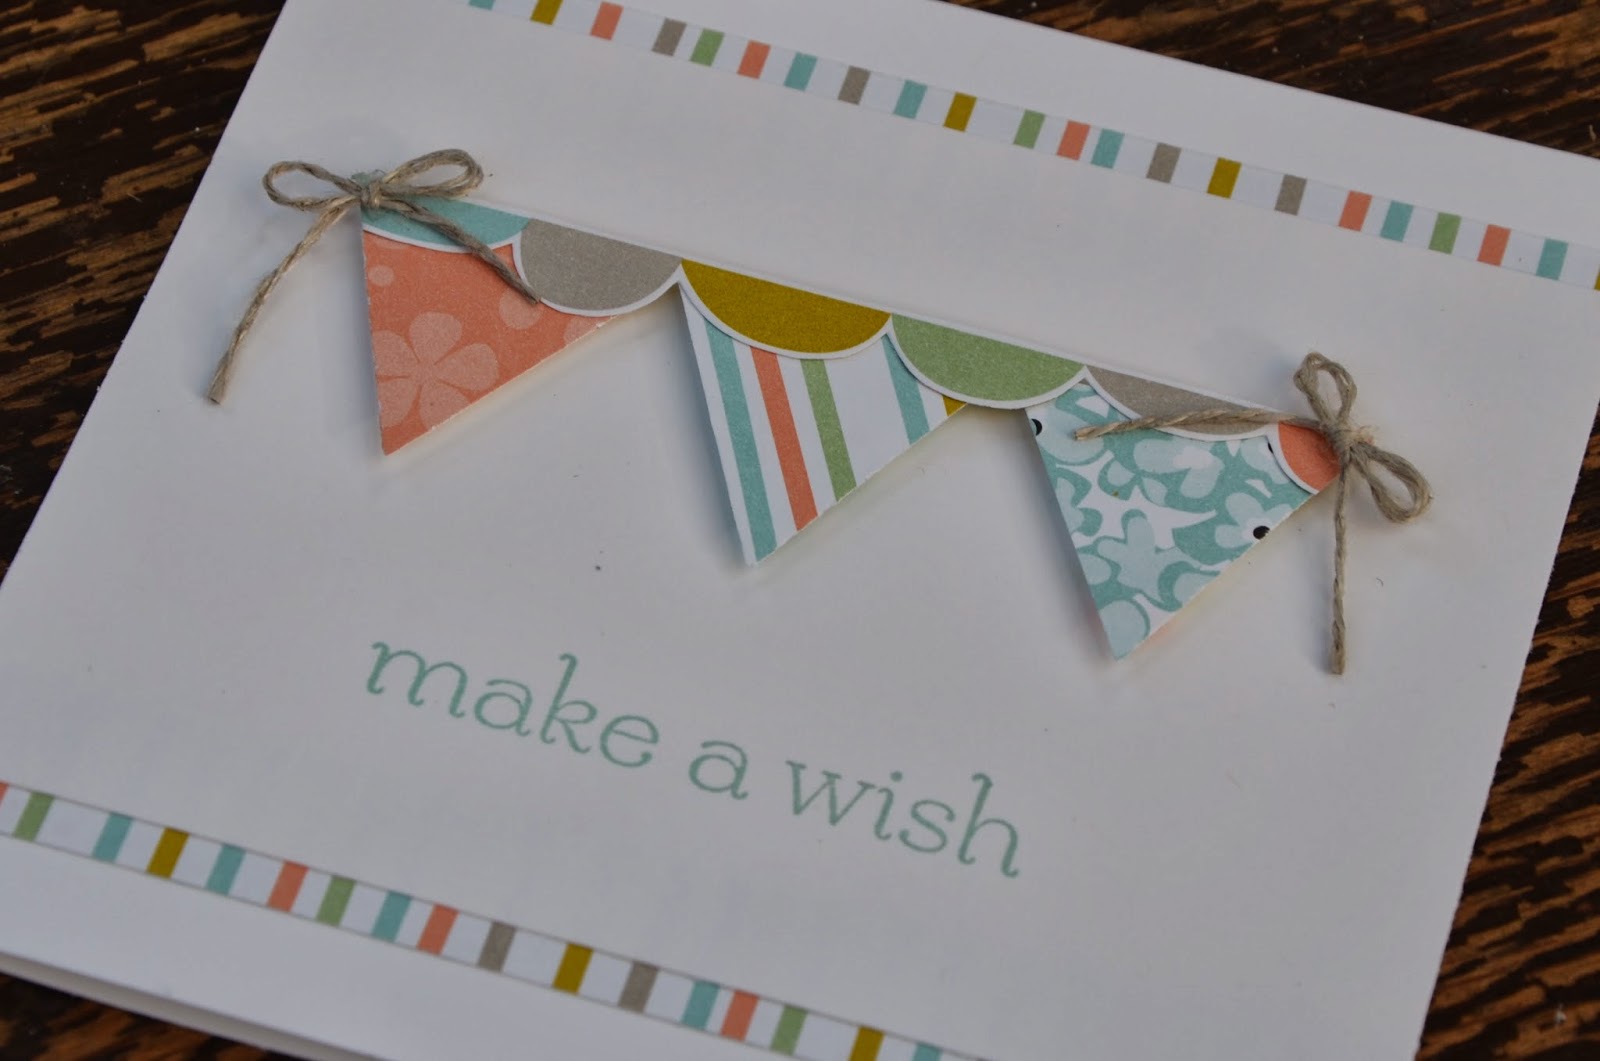
I just loved the pennant bunting and that inspired me to make a few simple variations of my own. Plus this selection would be great for a beginner. I've worked out that you can get a pack of whisper white cardstock, triangle punch, linen thread, an ink pad and a simple sentiment set (the one I've used here is Sweet Essentials but if you wanted a really basic one, I'd suggest Four You) for just over £45 and then you'll get the gorgeous Sweet Sorbet designer paper for FREE during Sale-A-Bration.


Stamp Set: Sweet Sorbet
Ink: Pool Party
Cardstock: Whisper White
DSP: Sweet Sorbet
Punch: Triangle
Embellishments: Linen Thread


And now here's a few stepped up variations using all the same materials...


Just don't punch the entire punch for a smaller triangle, layer them up for a fuller bunting look. 
The tiny pinked trim along the bottom is also made with the triangle punch.


This scallop trim was one of the patterns in the Sweet Sorbet pattern paper which I just carefully cut out a section of and added to the top edge of the bunting. 


If you don't want bunting and pennants why not use a whole host of patterns and create this fun interlocking border strip? Fun huh?


Hope you enjoyed all these easy creative ideas! 

Don't forget you can get the Sweet Sorbet paper for FREE when you buy everything else you need to make these sweet cards during Sale-A-Bration. Visit my shop now to buy your pieces and get them delivered directly to your door!

Have a great day! 

Happy Stampin',

Tuesday, 4 February 2014

Love & Congratulations

Hello there! 

I wanted to share with you a card we made at card club last month. Last month's stamp set was Language of Love and this card is the perfect example using all the stamps in the set. It'd be great for a valentine, wedding or engagement! 

Mine went to some friends, Hannah and Renz, who just got engaged last month. I haven't seen them since our wedding, long time now! Renz is a fantastic photographer and he and his friend Marc did our gorgeous wedding photos! Hannah is an amazing beader and she made my tiara for me, it was just perfect and matched my dress perfectly - it was just what I had in mind and I know its totally unique! Lovely couple!


Stamp Set: Language of Love, Sweet Essentials
Ink: Raspberry Ripple, Crumb Cake
Cardstock: Crumb Cake, Sahara Sand, Raspberry Ripple, Gold Foil
DSP: Sweet Sorbet
Punch: Small Heart
Embellishments: Gold Baker's Twine, Chevron Ribbon

I'd call this a very traditional "romantic" colour combination - gorgeous neutrals with a pop of red and gold. I think what makes this a little different is the rich pinky Raspberry Ripple - tradition with a little twist!

Aren't the little floating hearts adorable? They really raw the eye across the card and fill that dead space to the left of the card making it a lot more balanced. 


 I'm really loving the banners in this set, they're just so cute layered up in a little group especially with this DSP and ribbon in the grouping too. 

Sorry for the short blog posts these last couple days, I've been suffering with the effects a cold and its not making me feel very productive! I spent most of yesterday feeling very frustrated with myself that I wasn't getting more done! One redeeming feature of yesterday was that I tried a new recipe which was absolutely delicious - Ranch Cheddar Chicken by Karly from Buns in my Oven. Totally recommend it if you're looking for a yummy new quick and easy weeknight dinner! 

I hope you enjoyed this and will come back again tomorrow for something else pretty and fun! 

Happy Stampin',

Thursday, 30 January 2014

Petals MM330

Hello! 

I'm trying another challenge today. I've followed and admired the creations on the Mojo Monday blog for quite a while but never got the courage up to enter something of my own. They have lovely sketch challenges, this is this week's...


What a great challenge to make a tall and skinny - so often its tempting to just make a standard sized card so to have the challenge to make a different size is fun! 


Stamp Set: Petal Parade (SAB), Express Yourself
Ink: Crisp Cantaloupe, Pistachio Pudding, Pool Party, Summer Starfruit
Cardstock: Whisper White, Pool Party
DSP: Sweet Sorbet (SAB)
Punch: Fancy Flower, 2 1/2" Circle
Big Shot: Circles Framelits
Embellishments: Sweet Sorbet Accessories (SAB)

I reversed a couple elements on this card to fit in with my incredibly narrow card. I've got to say I didn't really know where I was going with this card. It was one of those cards I just fiddled with until it looked right.

I've used a whole host of Sale-A-Bration products here - the DSP, Petal Prade stamp set and the accessory pack! 


I am totally LOVING the cork embellishments in the Sweet Sorbet accessory pack - love the mixture of flowers, diamonds, scallops! Also in the pack is three twines. This Summer Starfruit twine is three pieces knotted together and then I unravelled them so they'd spread out more. 

For the flower, it was punched and then I used the bonefolder to break down the fibres of the card until it separated - its softer, creates more layers and created a beautiful suede effect. The leaves are just folded and cut tear drop shapes, then sponged a little. 

Hope you enjoyed this creation. Do you ever make tall and skinny cards?

Happy Stampin',

Monday, 13 January 2014

Inky Fingers Challege 2

Hi there! 

I've had a super weekend. It was Stuart's birthday yesterday so we had a weekend of celebrations - dinner out, friends over, cake(!!!), watching Monster's University on dvd and eating Ben and Jerry's....yum! Stu got a mandolin for his birthday so there's been a fair amount of strumming and playing going on too!

Well, here we are a week on and today there is another Inky Fingers Challenge for you all! Did you enjoy last week's challenge? 

Today is a sketch challenge, they can be a bit tricky but so rewarding when you look at what you've created and think wow, I would never have thought of a card like that without that sketch! Its such a great feeling and true of my creation for today. 


The layout looked quite easy and simple but I was determined to do something different and not follow the sketch to the letter! (Yes, its okay to switch up a few things on the sketch as long as the main basis of the sketch can be seen and is being witheld! This is something I didn't realised for ages!)


Stamp Set: Express Youself, Petal Parade (SAB)
Ink: Crisp Cantaloupe, Black
Cardstock: Crisp Cantaloupe, Whisper White
DSP: Sweet Sorbet (SAB)
Big Shot: Circles Framelits
Accessories: Sweet Sorbet Accessory Kit (SAB)


Yes I'm still having a bit of a nuts rave with Crisp Cantaloupe! I'm liking the Sweet Sorbet SAB designer paper - there's some beautiful florals and geometrics in there - a great mix. The centrepiece flowers were all fussy cut out of the designer paper, it took a while but the effect is great! 

I like how the flowers really pop against all the other elements on the card. The strip of designer paper, sentiment and twine are lovely and work so well on the card, tone on tone with the background. 


I just wanted to share a quick trick with you for the perfect bow. Wrapped the twine around the card and taped it on the back, tie a bow and use a glue dot to attach it to the front of the card in the perfect position. Its such a stress free way to get a perfect bow, facing the correct direction without all the fiddling and twisting.


I made a co-ordinating envelope by stamping the Petal Parade stamp set (co-ordinates with the Sweet Sorbet DSP) all over the envelope flap in Crisp Cantaloupe. 

I hope you'll have a go at making a card using this sketch from Inky Fingers, if you do, be sure to upload it to the blog so we can all appreciate your work! I can't wait to see what you all create! It can be as simple or elaborate as you like! 

Happy Stampin',

Amanda xx