Showing posts with label butterfly. Show all posts

Tuesday, 1 May 2012

Mini, mini, mini...

I told you I had loads didn't I!?! Well this is just SOME of the many many things I have to share with you over the next few weeks!

Today I thought I'd show you a few little cards I did in a make and take last month. I swapped rolls and became a guest when I went along to a party that Rhoda was demoing at last month when she was down. It was really fun to just sit and relax! Oh and of course craft! 


Stamp Set: You're a Gem (Spring Mini), Petite Pairs
Ink: Rich Razzleberry, Lucky Limeade
Cardstock: Whisper White
DSP: Berry Blossoms (Spring Mini), Pocket Full of Posies (Spring Mini)
Punches: Decorative Label, Butterfly, Fancy Flower, Boho Blossoms
Accessories: Designer Printed Brads, Subtles Buttons, Pearls
Ribbon: Lucky Limeade Ruffle

Come back tomorrow for some more creative inspiration! 

Amanda x


Monday, 12 March 2012

chasing my tail!

Hi there! 

Sorry for not posting last week, its been one of those super hectic weeks. I'm sure you know the type - everything seems to come at once - prepping for card club, ordering bits and pieces, Stampin' Up party for a friend, making and organising things for a craft fair (this past Sat), helping my dad with work on our roof, helping a friend with a crafty project or two of hers as well as the usual church meetings, house work and so on. I've hardly had time to stop! 

Anyway, I now have lots of pretty things to show you this week as a result of not posting any of my makes from last week! Score!

Today's card is for my good friend Donna who's birthday it was on Friday. She is a loyal crafting buddy of mine and her favourite Stampin' Up! colour is Rich Razzleberry so I obviously had to make her a razzleberry card, right?! Right!


Happy Butterfly

Stamp Set: Flight of the Butterfly
Ink: Rich Razzleberry
Cardstock: Confetti White, Rich Razzleberry
Accessories: Rhinestones, Rich Razzleberry Satin Ribbon (Retired)
Punch: Butterfly
Extras: Frost White Shimmer Mist

So I started off by stamping the butterflies - I inked up the butterfly stamp in Rich Razzleberry and then stamped twice on scrap paper before stamping on the card for a paler background shade. Next I stamped the flowers, this time stamping off once on scrap paper before stamping on the card for a slightly darker shade. I was really trying to build up layers on this card without using tons of cardstock. I stamped and punched out the butterfly in Rich Razzleberry. I added some ribbon to the side of the card, stamped the sentiment and added the butterfly, finishing it off with a few little rhinestones. To just give it a little bit more glitz I spritzed it with the shimmer mist. 

I thought I'd just finish off today with a little picture of inside the card - another little butterfly! 


Please leave me a comment, I love reading them. Thanks.

Have a great day! 

Amanda xx

Tuesday, 23 August 2011

awesome august

A few days ago was my August class. This month's class focused on punches! I love punches so to do a class on punches was just so much fun!! Here are the project we did...


Flutter Away Butterfly

A cute card using the stencilling technique. To finish it off we added a fe punched butterflies out, this made it look like the butterflies were flying off the page! 


Flower Box

This was the main project we focused on this time as it involved rock and roll, glittery, glossy butterflies, gorgeous rolled roses, and fluffy 3D flowers! 

If you would like to have a go at learning these techniques and doing these projects yourself please get in touch for a catch up class, I have several people who have expressed an interest so please don't hesitate, contact me now, at amanda_burditt@hotmail.co.uk

I hope you enjoyed seeing what I and six lovely ladies got up to on Saturday, and I would love to share it with you too. Please do leave a comment.

Hugs,

Amanda

xxx

Thursday, 7 July 2011

plus one

I have a piece of rather exciting news, last week I got my first downline member! I'm just a tad excited! I remember how exciting a time it was when I joined the Stampin' Up! family as a demo and how sweet Rhoda was to send me buttons and rhinestones to help me along. So, with my first downline member, I felt it only natural to share that same joy in giving! Its great to give, it always makes me feel so happy to see someone getting joy out of something you have done or given to them. So, as a thank you and a welcome for joining the Stampin' Up! family I made a little gift for Sue.


Butterfly Box

Stamp Set: Punch Potpourri (Hostess Only)
Ink: Marina Mist, Rich Razzleberry, Pacific Point, Elegant Eggplant
Cardstock: Rich Razzleberry Texture, Garden Green, Crumb Cake
DSP: Rose Red, So Saffron, Wild Wasabi 
Punches: Butterfly, Boho Blossoms, Two Step Bird
Accessories: Rhinestones, Crystal Effects, Dazzling Diamonds
Extras: Sticky Strip, Tombo Multi Glue

I bought this little paper mache box very cheaply and decorated it with strips of dsp. I punched out a variety of colours using the Boho Blossoms punch and layered them on top of one another adding a rhinestone to the centre and a few branches from the two step bird punch! For the butterflies I got inspiration from a video on Michelle Last's blog, click here to see her lovely little video! I changed it slightly as I couldn't really find a flower stamp in my collection that was suitable. I originally intended on curling the edge of the butterflies but after trying one decided it just didn't look good! So basically I did the rock and roll technique, punched out the butterflies and covered then with crystal effects and finished them off with a dusting of dazzling diamonds glitter and some rhinestones. when they were dry I bent up the wings, and adhered them in the centre of the lid as if they are sitting on the flowers. The box was just the perfect size for the small box of flower brads that I bought for Sue to help her get going with crafting! When she saw the box she was stunned and when she heard the rattled she was shocked that there was a little something inside. I love seeing people's excited reactions to gifts, especially when they aren't expecting them! 

I hope you liked today's little share. Come back tomorrow to see the little card I made to welcome Sue into my team. 

Hugs, 

Amanda xx

Monday, 21 February 2011

virus free and back in business

I am officially virus free...thanks to my fab husband! I'm so glad that is all over! It was so horrible having a virus and having no clue what to do and there's that really real fear that you could loose everything. As a result, I am now protected...again!


Now, on to more exciting pretty things, I have a few more cards to share with you. First is my mother-in-law's birthday card, it was her birthday on Friday. So here we go...


Heather's Birthday Card

Stamp Set: Stipple Butterfly (Retired)
Ink: Basic Black, Old Olive, Real Red, Pumpkin Pie
Cardstock: Very Vanilla, Old Olive, Kraft
Accessories: Very Vanilla Satin Ribbon
Extras: White Gel Pen, Glue Dots, Dimentionals, Blender Pen

Ok, so, I know this stamp is retired but I thought it would be just perfect for Mum's card, and it turned out so well I just HAD to share it! I used the blender pen to colour in two butterflies, then cut one out to layer over to add another dimension, folding the wings up and adhering it with a glue dot. I used a scrap of Kraft to make my card, a different style card for me than my usual rectangular/square cards! I think the white stitching and ribbon just really finishes it off! The sentiment was written in my own handwriting, to add a personal touch! 


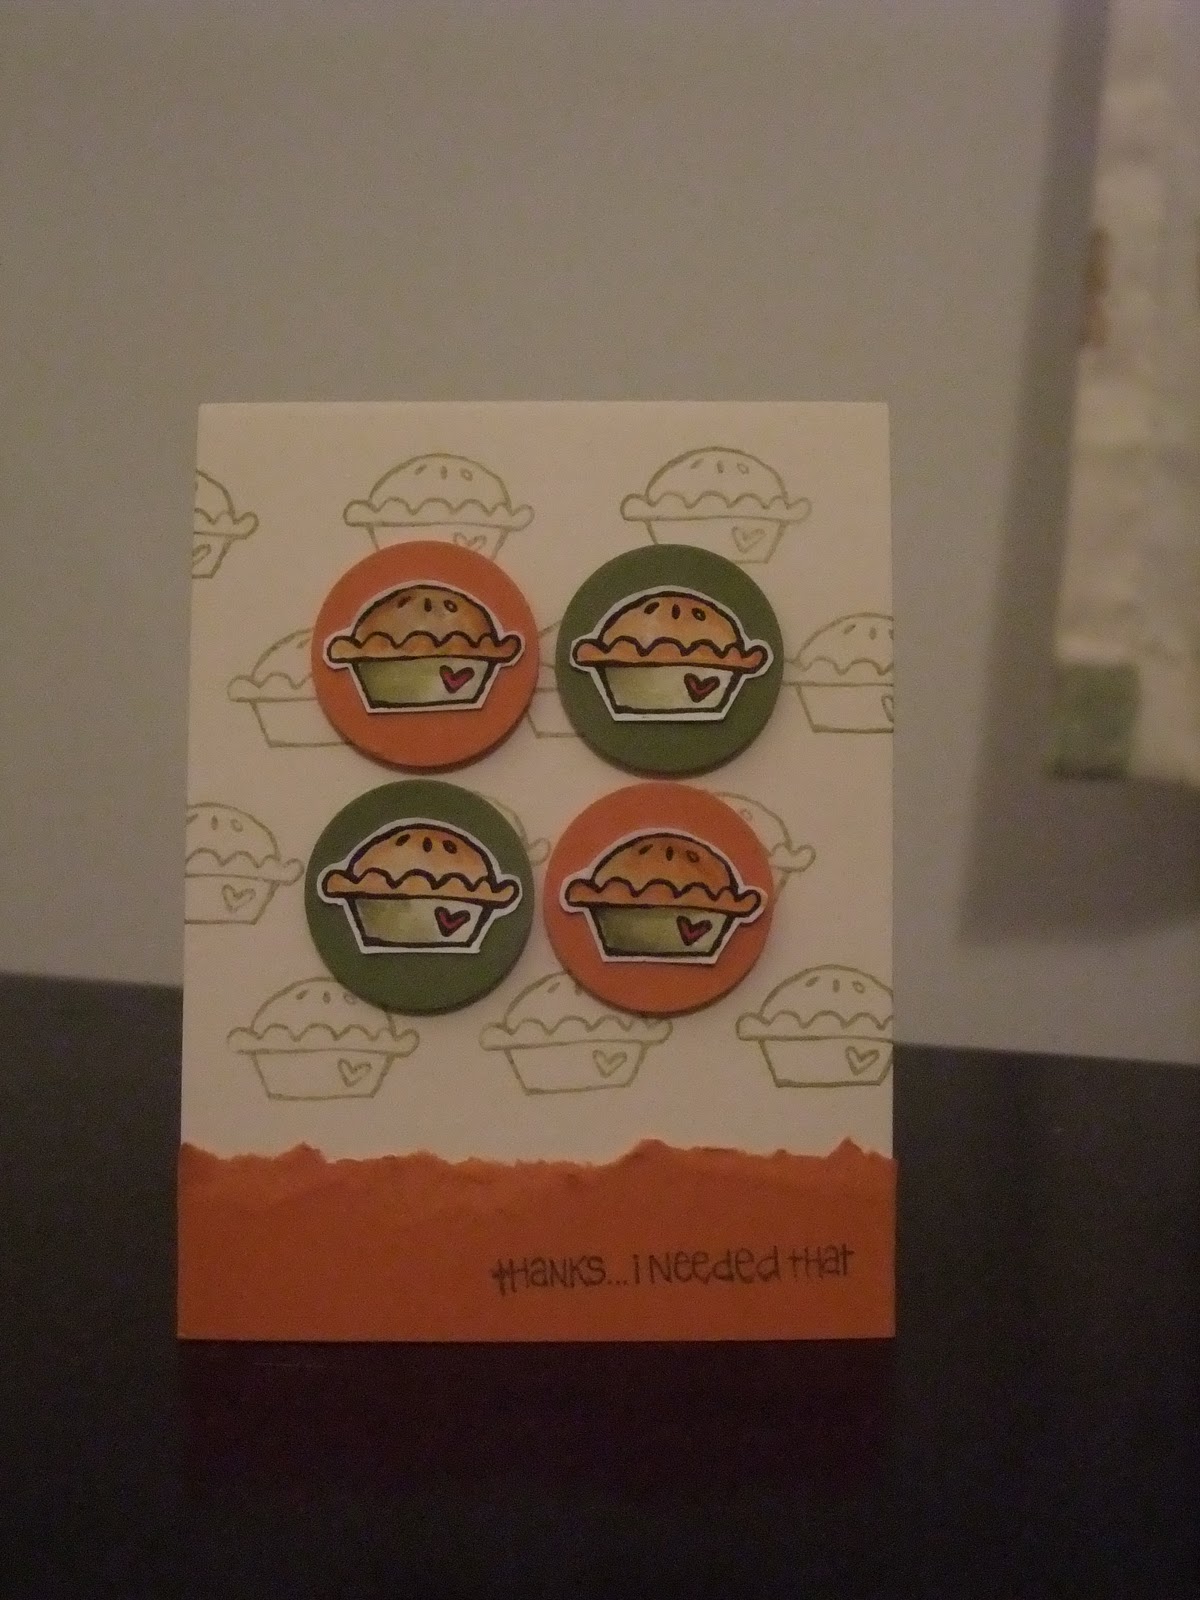
Thanks...I Needed That

Stamp Set: Every Little Bit, Fun and Fast Notes
Ink: Pumpkin Pie, Old Olive, Basic Black, Real Red
Cardstock: Very Vanilla, Pumpkin Pie, Old Olive
Extras: Dimentionals

Just a really quick little card I made to use up some little scraps I had lying around (as you might be able to tell, I am attempting to be better at using up my scraps before starting a fresh sheet). I coloured in the pies with the blender pen, cut them out and mounted them on pumpkin pie and old olive cardstock, but  as I was laying out the card I came to the conclusion it was looking a little bare, after a little thinking, I decided to use the pie stamp and old olive ink (stamped off once for a paler shade) to make my own patterned paper and a little to my surprise it actually worked really well! It not only filled in the empty space but pulled everything together sweetly! Finished off the card with a torn strip of pumpkin pie and the "thanks...i needed that" saying from the fun and fast notes set. 


Birdie

Stamp Set: Fun and Fast Notes, Fast Flowers Wheel
Ink: Versamark, Basic Black, Real Red, Pumpkin Pie, Old Olive, Marina Mist, Daffodil Delight
Cardstock: Whisper White, Marina Mist, Pacific Point (Textured)
Accessories: Linen Thread
Extras: Spiral Border Punch, Stampin' Around Handle, Blender Pen

I used versa mark to stamp the fast flowers background. punched the spiral border punch on the whisper white and then stamped and coloured in the birdie on the cardstock. I ripped and distressed the pacific point cardstock, brushing the versamark pad over the cardstock to emphasise the texture. It was finished off by wrapping the linen thread around several times and then tying into a bow. 

I hope you liked what I had to share today! 

Until next time, 
Amanda x