Showing posts with label crystal effects. Show all posts

Wednesday, 30 April 2014

Mosaic 21

Hello! 

The weekly balance has tipped, we are now on the downhill towards the weekend! Only 2 more days of school until a nice long weekend! Woohoo! Today's been a battle, we were very busy, short staffed and to top it off my head has been feeling very fuzzy, like the beginning of a migraine! I didn't sleep well last night either so I'm going to get a really early good sleep tonight! 

Today I have the other 21st birthday card I made for Bekah's birthday last week! You can see the first one I made here, as that one was really soft and elegant so I wanted something quite different, I think this hits the brief!


Stamp Set: Mosaic Madness, Remembering Your Birthday
Ink: Rich Razzleberry, Bermuda Bay
Cardstock: Baked Brown Sugar, Bermuda Bay, Rich Razzleberry, Very Vanilla
DSP: Natural Composition
Punch: Itty Bitty, Decorative Label
Big Shot: Typeset Alphabet
Embellishments: Rhinestones, Crystal Effects

I pulled out one of my most favourite pattern papers of the moment - Naturals Composition. I just love the neutral colour that seems to work beautifully with any other colour. Its also got gorgeous glossy embossed designs which are just crying out to be inked up. Here I used 2 colours - bermuda bay and rich razzleberry to create this ombre type effect. By applying both colours to the centre section it really helps the 2 colours to blend together! 

I started with the 21 on the decorative label punch on the card and then worked in the other elements around it. 


I love the mosaic pattern in the paper and immediately thought that the Mosaic Madness set would pair perfectly as some scattered elements. I also decided to add a few of the 4 petal itty bitty punches to fill in the gaps, and the shape worked well with the mosaic stamps and paper too!

I wanted this card to be quite fun and jazzy so I went a little crazy with lots of little rhinestones in the centre of the mosaics and also a few just scattered on the background mosaics. Love that look, plus it just gives the card that extra special touch! 

One final special touch I added to the front of the card was to add crystal effects to the 21 - it just makes the letters look more special and blends with the glossy embossed background paper too! I think its little touches like this that really help make a card! 


The patterned paper ended up being a little larger than I thought I was going to want so I trimmed off about 5mm, I was going to throw it as it really wasn't much good for anything then thought it'd be a nice little embellishment for the inside. I added a sentiment and that was the inside sorted! 

Bekah totally loved this card and so did I! If I was turning 21 again I would be totally over the moon to get this card! Its so my style! 

Happy Stampin',

Monday, 27 January 2014

Inky Fingers Challenge 4

Hello!

Its Monday again! And now its time for a new Inky Fingers Challenge. Its the fourth week in the month so that means its a "Kit" challenge! Julie sends everyone who requests it a kit of goodies to use to make the card. 


Stamp Set: See Ya Later, Express Yourself
Ink: VersaMark, Basic Black, White Craft
Cardstock: Basic Grey, Smoky Slate, Basic Black, Real Red
DSP: Modern Medlay
Punch: Owl Builder, Dotted Scallop Ribbon Border, Banner (SAB)
Ribbon: Real Red Taffeta 
Accessories: Antique Brad, Mini Brads
Extra: White Emboss Powder, Crystal Effects

This is actually the second card that I made. I didn't realise I had to use EVERYTHING in the kit, so I merrily went to creating a card that only used some of the bits. I couldn't seem to make the red card and ribbon and the big antique brad work, so I thought I'd just leave it a monochrome, masculine card. 

So I fiished off the card and sent it off to Julie only to get an answer that I hadn't used everything. I was like say what?! That's a lot! I scratched my head and thought hmm, how do I get those bits in?! 


Back to the drawing board I thought I'd have a go at making a more manly Valentine card! (I got Stuart's approval so in my book, its okay for a guy!)

I did the chalk board technique with the sentiment and added the red heart from the owl builder over the embossed heart. The red really pops against the black! What was really baffling me was the ribbon, I didn't want to add a bow because that's not manly apparently. I eventually thought I'd add it as a tiny little strip on the banners.


Actually I'm really please with how this turned out. The red pops and really lifts the card. To make the hearts even more special I added crystal effects. 

Be sure to check out the other design team's creations over at the Inky Fingers blog. 

Happy Stampin',


Tuesday, 21 January 2014

Monster Love

Hello there! 

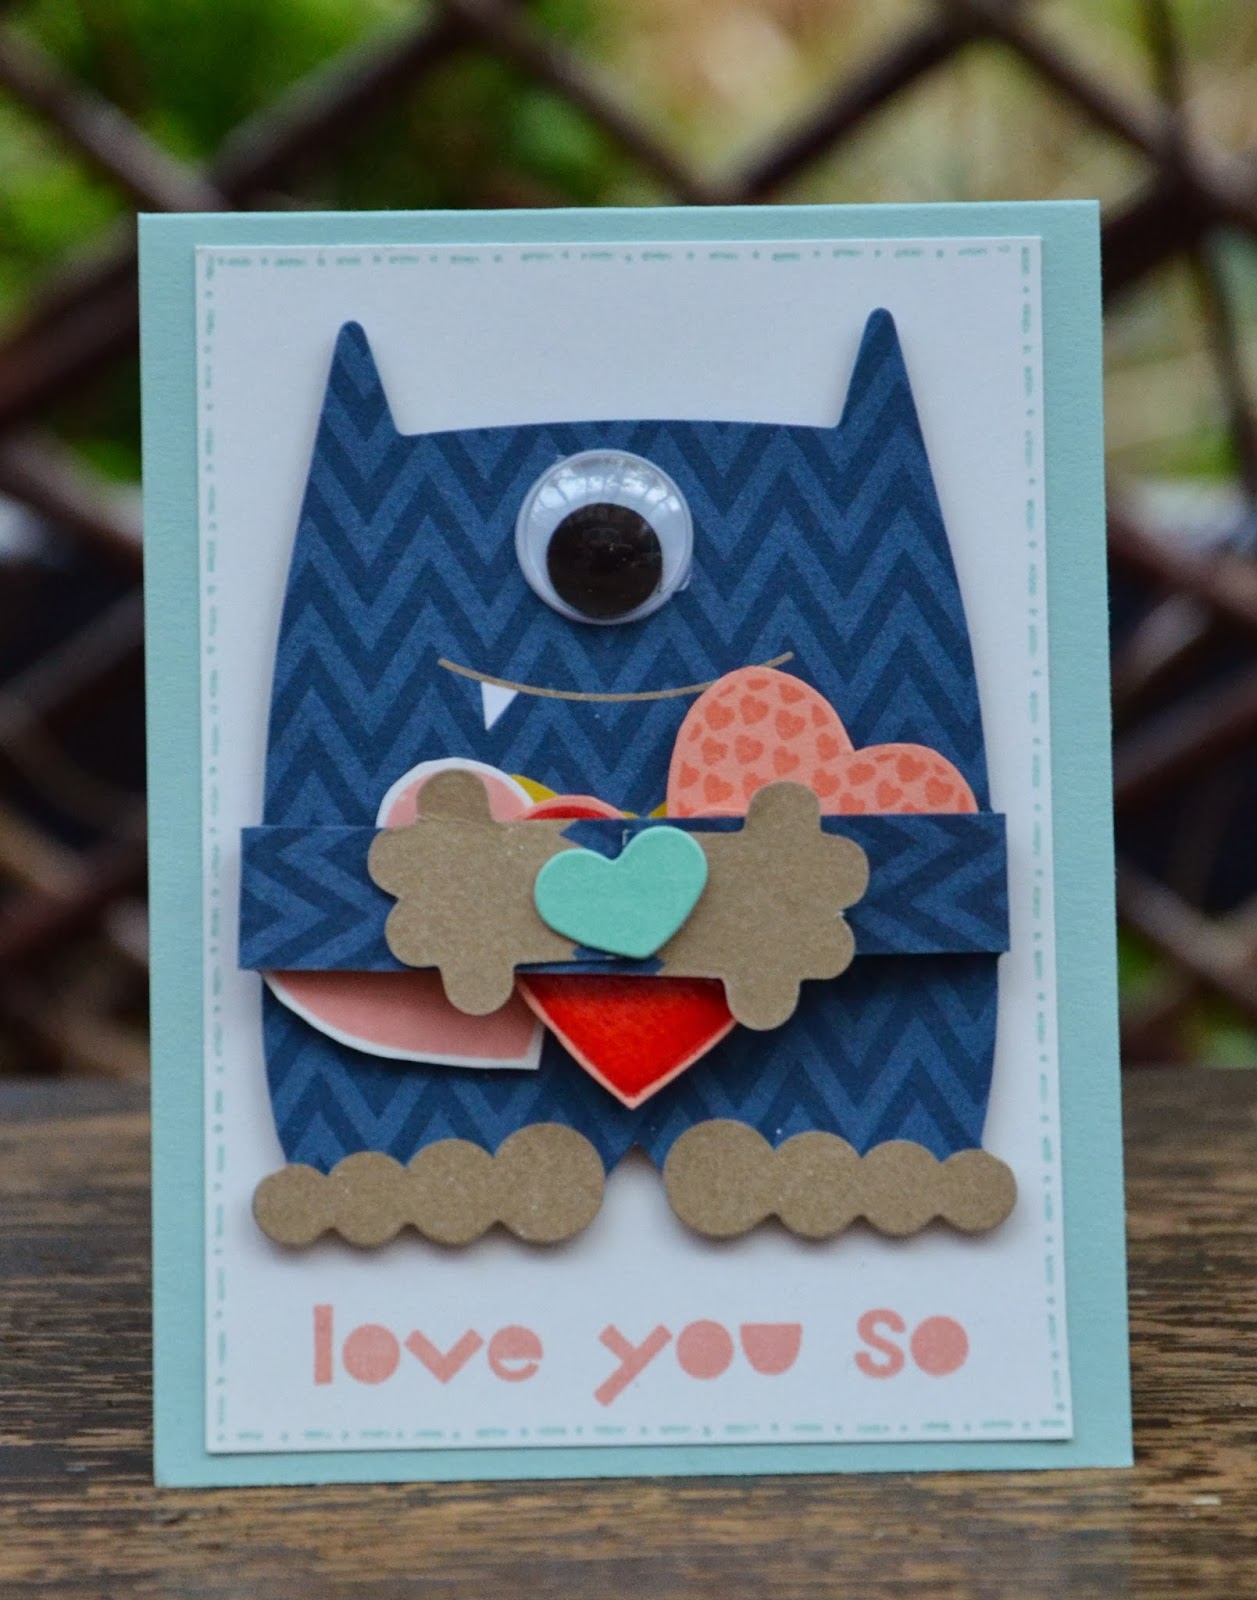
Here's an idea for Valentine's day, or any occassion card really, where you'd want to write your little 'monster' a note to say you love them. I know I don't have any little monsters of my own but I had some of these cuties left from my Christmas project and was trying to find creative ways to use them. 


Stamp Set: Hearts a Flutter, Geometrical
Ink: Crisp Cantaloupe, Pool Party, Real Red
Cardstock: Whisper White, Crisp Cantaloupe, Pool Party
Accessories: Monster Hugs - Girls & Boys, Crystal Effects


These are so easy and quick to do - aren't they so adorably cute!?


Okay, this was just a super quick post for today. Don't forget you can buy these little Monster Hugs in packs of 18 for £5.50, they're available to order from me or buy from my online shop until January 27th.

Happy Stampin',


Tuesday, 14 January 2014

Confetti & Banners

Hello!

Well, today has not gone according to plan. I've got a long to-do list and was looking forward to crossing off a number of items from it today. Unfortunately I woke with a horrid headache, I still went to coffee morning at church this morning, hoping that if I ignored it, it'd go away. Alas it didn't, it simply got worse and developed into a migraine! Oh the fun. When I got home I went back to bed and just dozed for the afternoon! I'm feeling rather frustrated with myself but there's not much you can do with a raging migraine! I'm still feeling a little delicate as I write this but at least it's not requiring a great deal of movement! 

Anyway, onto something I made last night. This year I would love to take part in more challenge blogs, I really enjoy looking at all the pretty things on challenge blogs but seldomly get my act together to actually make something and enter it on time! Two of my favourite are The Paper Players and SU Only and this card fit in perfectly with both challenges! 

The Paper Players' Challenge is this gorgeous colour challenge


SU Only had a 'Fun with New Toys' Challenge on their blog so that's a great opportunity to play with lots of new toys! We all love new toys, don't we!?


Stamp Set: Remembering Your Birthday, Language of Love
Ink: Coastal Cabana, Crushed Curry, Pear Pizzazz, Primrose Petals
Cardstock: Coastal Cabana, Crushed Curry, Pear Pizzazz, Primrose Petals, Whisper White, Vellum
Big Shot: Decorative Dots TIEF (SAB)
Punch: Owl Builder, Small Heart
Accessories: Gold Baker's Twine, Crystal Effects

So I've got to say, these colours just made me feel so happy! They make me think of confetti and sprinkles!
I laid the vellum over the open embossing folder and used the embossing stylus to only emboss the dots I wanted - this meant I could get the look of falling confetti. I then coloured in the embossed dots with my markers. I wish you could feel how lovely this vellum feels embossed! 


The new gold (!!LOVE IT!!) baker's twine and stamped images from the Language of Love set which will be in the Spring Summer seasonal catalogue later this month adorn the top edge - using this bright colours really re-purposes them for other occassions than just Valentine's or for a wedding! 

I also used the Remembering Your Birthday set which is in the AC but its new to me, and I am LOVING it! With the pens I was able to colour in the sentiment, highlight the word sprinkles and omit the word pink to customise it for the card! 


A few little hearts from the Owl Builder and some crystal effects were the finishing touches! 

I am so pleased with how this card turned out. One of my to-do list items for today was a wee video on how to do the embossing technique featured here but alas it'll have to wait until Thursday. 

Happy Stampin',

Amanda xo

Monday, 19 March 2012

simply stampin challenge week 51

Simply Stampin' Challenge time again folks - sorry I'm a few days late - such a busy weekend I didn't get the chance to photograph my project!! This week is a theme, and the theme is...

Totally Tags

I'm afraid due to a busy week and not feeling great I don't have anything massively spectacular for you today. Here are some sweet little tags that I made though. Hope you like them!


Stamp Set: n/a
Ink: n/a
Cardstock: Confetti Ivory, Confetti White
DSP: Everyday Elegance (SAB)
Punches: 5 Petal Flower, 3/4" Circle
Big Shot: Beautiful Wings, Two Tags
Accessories: Crystal Effects

I cut the tags out with the big shot and then decorated them with some flowers I punched with the 5 Petal Flower punch - great way to show off some of the gorgeous patterns! I further highlighted the pretty patterns by adding crystal effects to some of the detail areas! I also added a few little butterflies I had strewn around - great way to use up scraps is to turn them into tags! (Everything I used to make these tags were scraps from other projects!)

Hope you liked my really simple project today. Please check out the Simply Stampin' Challenge blog to see what other tagtastic creations the DT has come up with for you this week and then have a go at making and entering your own tags! I'd love to see what you create! 

Happy Stampin',

Amanda xx

Friday, 17 February 2012

owls!

Yesterday was my friend Kathryn's birthday. I thought I'd show you her card! 


Spice Cake Owls

Stamp Set: n/a
Ink: Early Espresso
Cardstock: Very Vanilla, Early Espresso, Crumb Cake, More Mustard, Pear Pizzazz, Pool Party
DSP: Spice Cake
Punch: Owl Builder, Itty Bitty
Accessories: Pearls, Crystal Effects

Isn't it darling?! The owl builder punch punches out all the bits you need to make these adorable little owls. I added some Spice Cake DSP in there to make them extra cute and finished them off with some little flowers, pearls and crystal effects. 

I hope you liked this little creation. It was made especially for Kat as she loves owls! 

Happy Stampin',

Amanda xo


Wednesday, 1 February 2012

twenty one

My cousin asked me to make up some cards for her a while back. One of which was a special one for her sister's 21st birthday! Well, it was Victoria's birthday last week so now I can share the card I made with you all. 


Stamp Set: Happiest Birthday Wishes
Ink: Rich Razzleberry
Cardstock: Crumb Cake, Daffodil Delight, Melon Mambo, Rich Razzleberry
Punch: 1" Circle, Corner Rounder
Big Shot: Alphabet Simple Letters die
Accessories: Crystal Effects, Dazzling Diamonds

So I punched out the circles of cardstock in Daffodil Delight, Melon Mambo and Rich Razzleberry for the bottom edge of the cardstock. Next I cut out the letters for the words 'twenty one' and adhered them down. I stamped the sentiment "it's your day!" above the lettering. Finally I covered the letters in crystal effects and then sprinkled in glitter to give it some extra pizzazz! Cute! 

What do you think? Thanks for stopping by,

Amanda x

Tuesday, 23 August 2011

awesome august

A few days ago was my August class. This month's class focused on punches! I love punches so to do a class on punches was just so much fun!! Here are the project we did...


Flutter Away Butterfly

A cute card using the stencilling technique. To finish it off we added a fe punched butterflies out, this made it look like the butterflies were flying off the page! 


Flower Box

This was the main project we focused on this time as it involved rock and roll, glittery, glossy butterflies, gorgeous rolled roses, and fluffy 3D flowers! 

If you would like to have a go at learning these techniques and doing these projects yourself please get in touch for a catch up class, I have several people who have expressed an interest so please don't hesitate, contact me now, at amanda_burditt@hotmail.co.uk

I hope you enjoyed seeing what I and six lovely ladies got up to on Saturday, and I would love to share it with you too. Please do leave a comment.

Hugs,

Amanda

xxx

Tuesday, 26 July 2011

for rhoda

A couple weeks ago it was my upline, Rhoda's, 30th birthday, so she obviously needed a special card! Unfortunately I didn't have anything with numbers on it, so I improvised and it actually worked even better than I was expecting! Here we go...


30th Birthday

Stamp Set: Slice of Life (Hostess Only), Basic Phrases, Candle Crazy Builder, So Many Stars Builder
Ink: Crumb Cake, Baja Breeze, Rose Red, Regal Rose, Perfect Plum, Basic Black
Cardstock: Regal Rose Texture, Perfect Plum, Rose Red, Crumb Cake, Very Vanilla
Punches: Modern Label
Accessories: Very Vanilla Satin Ribbon, Basic Pearls, Crystal Effects, Dazzling Diamonds
Extras: Blender Pen, Jumbo Wheel Handle, Wheel Guide, Builder Spindle and Spacer, Dimensionals, Tombo, Pencil, Black Pen

So I stamped my cake in some Very Vanilla cardstock and the coloured it in with a blender pen. I drew in pencil the 30 on top of the cake so I could get it exactly how I wanted it before tracing over in pen. I added a spot of glitter to the top of the 30 to make it look like burning candles. I ran the builder wheel across some Perfect Plum cardstock, added some satin ribbon in the centre and adhered it to the Crumb Cake base card. I mounted the cake on some Regal Rose and Rose Red cardstock, and adhered to the card with dimensionals. I then stamped and punched out the sentiment, adhered with dimensionals and added a few pearls. I also decided to add crystal effects to the cake stand to give it a little extra glossy shine. I Rhoda liked it! 

Please leave me a comment and let me know what you thought, I love reading them! 

Come back tomorrow for another card! 

Hugs,

Amanda 

Thursday, 7 July 2011

plus one

I have a piece of rather exciting news, last week I got my first downline member! I'm just a tad excited! I remember how exciting a time it was when I joined the Stampin' Up! family as a demo and how sweet Rhoda was to send me buttons and rhinestones to help me along. So, with my first downline member, I felt it only natural to share that same joy in giving! Its great to give, it always makes me feel so happy to see someone getting joy out of something you have done or given to them. So, as a thank you and a welcome for joining the Stampin' Up! family I made a little gift for Sue.


Butterfly Box

Stamp Set: Punch Potpourri (Hostess Only)
Ink: Marina Mist, Rich Razzleberry, Pacific Point, Elegant Eggplant
Cardstock: Rich Razzleberry Texture, Garden Green, Crumb Cake
DSP: Rose Red, So Saffron, Wild Wasabi 
Punches: Butterfly, Boho Blossoms, Two Step Bird
Accessories: Rhinestones, Crystal Effects, Dazzling Diamonds
Extras: Sticky Strip, Tombo Multi Glue

I bought this little paper mache box very cheaply and decorated it with strips of dsp. I punched out a variety of colours using the Boho Blossoms punch and layered them on top of one another adding a rhinestone to the centre and a few branches from the two step bird punch! For the butterflies I got inspiration from a video on Michelle Last's blog, click here to see her lovely little video! I changed it slightly as I couldn't really find a flower stamp in my collection that was suitable. I originally intended on curling the edge of the butterflies but after trying one decided it just didn't look good! So basically I did the rock and roll technique, punched out the butterflies and covered then with crystal effects and finished them off with a dusting of dazzling diamonds glitter and some rhinestones. when they were dry I bent up the wings, and adhered them in the centre of the lid as if they are sitting on the flowers. The box was just the perfect size for the small box of flower brads that I bought for Sue to help her get going with crafting! When she saw the box she was stunned and when she heard the rattled she was shocked that there was a little something inside. I love seeing people's excited reactions to gifts, especially when they aren't expecting them! 

I hope you liked today's little share. Come back tomorrow to see the little card I made to welcome Sue into my team. 

Hugs, 

Amanda xx

Saturday, 25 June 2011

simply stampin' challenge, week 13

This week we are back to a Sketch at the Simply Stampin' Challenge blog! I am going to admit right now that I found this the most difficult sketch to date, usually I love sketches as it gives you the template and all you have to do is insert the paper and stamping - it takes some of the thinking and decision making out of the process. Unfortunately this one, I was trying to make ahead of time several weeks ago, and I don't know why but whatever I did just looked a nightmare! I finally gave up on it and then came back to it this past week, and finally made it work! I'm actually really happy with the final outcome!

Here is the sketch and my creation...


For You Gala

Stamp Set: Basic Phrases
Cardstock: Whisper White, Chocolate Chip, Baja Breeze
Ink: Chocolate Chip
DSP: Greenhouse Gala
Punches: Modern Label
Extras: Crystal Effects, Dimensionals

A really simple card really, I used strips of the Pear Pizzazz and Baja Breeze dsp paper with the small round flowers on it in the background then used the coordinating large Pear Pizzazz and Baja Breeze flowers on another piece of the Gala dsp. I added some Whisper White and Chocolate Chip cardstock between the two layers to help the flowers stand out. I adhered everything down onto a Whisper White background and popped the sentiment and large flowers up on dimensionals. The last thing I decided to do was coat the centres of the flowers with cyrstal effects just to add a different texture and accent to the card! 

Please let me know what you think, I love reading your comments! Head over to the Simply Stampin' Challenge blog, take a look at the lovely creations by the other design team members and enter this week's challenge! I look forward to seeing your entries! :) 

Amanda xoxo

Wednesday, 13 April 2011

oh baby!

Everyone seems to be popping out babies at the moment, and I realised that I don't really have any baby cards, so I thought it was about time to put that right and use the way cute baby pram from the Fun and Fast Notes set! 


Happy New Baby

Stamp Set: Fun & Fast Notes
Cardstock: Very Vanilla, Early Espresso, Marina Mist
Ink: Early Espresso, Marina Mist 
Extras: Crystal Effects, Dimensionals, Blender Pen

I stamped the image, coloured in the wheels with a blender pen, paper pieced the carriage in marina mist using dimensionals to add a bit of depth to the image and after adhering it all together to the background, added some crystal effects just to jazz up the wheels a little bit more! Its such a simple but very cute baby card 

Side Note: This is a quick one too so good for those last minute rushes when you suddenly realise you need a card and don't have one! The time it would take to make think is probably shorter than the amount of time it would take going to a shop and picking one out! And if I do say myself, much nicer!)


I also did a girly version using Pink Pirouette cardstock and Pretty in Pink ink! 

Hope you enjoyed today's creation and please do leave a comment! 

Amanda x

Saturday, 9 April 2011

simply stampin' challenge, week 2

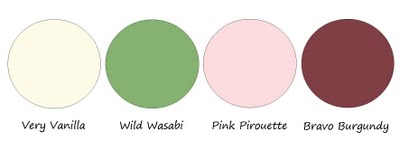
This week's Simply Stampin' Challenge is a colour challenge!


The colours are:


I have to start off by saying that I colour challenges have never really been my strong point, so I struggled a bit with this one! Not to mention that I didn't actually own anything Bravo Burgundy coloured so I just got myself an ink pad, I think I would have liked to use some Bravo Burgundy cardstock too if I had had some! I still think the card turned out ok though! So without further a do, here is this week's project! 


Bouquet

Stamp Set: Every Little Bit, Greenhouse Garden
Ink: Bravo Burgundy, Pink Pirouette
Cardstock: Very Vanilla, Pink Pirouette, Pink Pirouette & Wild Wasabi DSP
Accessories: Whisper White Grosgrain Ribbon
Extras: Sponge, Crystal Effects, Dimensionals

I used used heart and flower stamps from the every little bit stamp set on dsp with Bravo Burgundy ink and then cut them out. I used the stem from the Greenhouse Garden to stamp some stalks for my bouquet on the Very Vanilla cardstock and then layered up the hearts (for leaves) and flowers. I sponged the Whisper White ribbon with the Bravo Burgundy ink and then sponged the edges of the Very Vanilla cardstock with Bravo Burgundy too, just to add some more definition (very important when you have several very pale colours all working together!). I stamped the Pink Pirouette card base with the flower stamp in  Pink Pirouette ink for a tone on tone pattern. Finally I added crystal effects to the centre of the flowers in the bouquet just to add a little more interest! 

I hope you enjoyed this week's offering! Please leave a comment! I love reading them and its so nice to see your opinions! 

It has been so great to see so many of you play along with last week's challenge and I hope even more of you will play along this week...its so fun to see what you all create and how you interpret the challenge! 

Finally, please head on over to the simply stampin' challenge blog to see what the other lovely design team members have created and to enter in for your chance to win lovely goodies! 

Take care! 

Amanda xoxo