Tuesday, 31 May 2011

in-love with in-colour...poppy parade

This is the final of the five in-colours I have been playing with recently! And I think I found this colour the hardest. For some reason I find red a really difficult colour to work with. Especially the bright ones. Give me something like Riding Hood Red, a darker more muted and richer shade and I am fine but bright red just causes me difficulties so after a few failed attempts and beginning to feel slightly exasperated I decided to look through Tiff's old Sketchy Sunday sketched and I found this little gem! 


Poppy Parade Get Well Wishes

Stamp Set: Fun and Fast Notes
Cardstock: Whisper White
DSP: Poppy Parade (6x6 Hostess only)
Ink: Poppy Parade, Early Espresso
Punches: Scallop Square, 1" Circle, Modern Label
Extras: Sponge, Dimensionals

The end result is a very simple card but shows off the patterns beautifully. It took hardly any time to make at all, uses minimal supplies and therefore definately makes it a contender for a quick and simple bulk card!! 
I simply punched out the shapes in the dsp, layered them up and adhered them down. stamped, punched and sponged my sentiment and then used dimensionals to adhere that to the centre of my four squares! 

I hope you liked this oh so simple card! Oh and don't forget if you've liked this series and would like to make these cards for yourself why not host a workshop and you can get this pack of all five in-colours with all these gorgeous patterns for FREE!!! 

Please leave a comment, let me know what you think. Is Poppy Parade a favourite of yours? 

Until next time!

Amanda xx

Saturday, 28 May 2011

simply stampin' challenge, week 9

This week's Simply Stampin' Challenge is a Theme, Flower Frenzy! I wish I had more time to work on this, I had lots of ideas but have been so busy that I just had hardly any time! I must also apologise for the poorness in quality of these photos, you know how it is, photos and windows...they just do not mix!  Anyhow, here is my creation...


Herb Flower Garden

Stamp Set: En Francais
Cardstock: So Saffron, Garden Green
DSP: Pretty in Pink, Rose Red, Wild Wasabi, Daffodil Delight
Ink: Riding Hood Red
Punches: Eyelet Border Punch, 1" Circle Punch, 1 3/8" Circle Punch, Two Step Bird
Extras: Florist Wire, Green Washi Tape, sponge

On my window sil in my kitchen i have some herbs growing, theyre only babies and look a little sad at the moment, so I thought they needed a little cheering up and give myself something to look at when I'm doing the washing up!
I made rosettes using the eyelet border punch and concertina folding the dsp, I finished off each flower with a circle punch stamped with the En Francais background stamp to add some texture and sponged the edges to soften it! Finally I wrapped green tape around some florist wire, and adhered it to the rosette. I also used the wing from the Two Step Bird punch to make some little leaves. 

I hope you liked this week's creation, thanks so much for stopping by. Why not leave a comment, I love reading them! 

Til next time,

Amanda xx


Tuesday, 24 May 2011

in-love with in-colour...pear pizzazz

This is the fourth in my series of playing and highlighting the gorgeous in-colours available. This time its Pear Pizzazz! Its quite similar to Certainly Celery which I am already in love with but Pear Pizzazz has a little more depth, its slightly darker and more dusty creating a deeper more intense colour and also making it match up with the dustiness of Blushing Bride perfectly! 


I actually did this card and post a couple weeks ago but am splitting them up, one a week so you all have something to look forward to and something to read when I go away! I hope you enjoy it! Because this was done a few weeks ago I decided to use the current Sketchy Sunday sketch for that week as it was so cute and I was a little lost for inspiration that day! Aren't sketches just a fabulous source of inspiration!?!


Pear Pizzazz Day of Sweetness

Stamp Set: Punch Potpourri
Cardstock: Certainly Celery (I wanted to use Pear Pizzazz but alas I had none!), Crumb Cake
DSP: Pear Pizzazz (6x6 Hostess only)
Ink: Early Espresso, Certianly Celery
Ribbon: Pear Pizzazz Stitched Poly
Extras: Corner Rounder, Brown Pen

I wanted to show off the gorgeous patterns again so thought I'd keep it simple and have the butterflies in different patterns. Unfortunately I don't have the butterfly punch yet so what I did was stamp on the other side, cut out, so when I turned them over you got the shape but couldn't see the stamping...brilliant cheat trick! I am totally tripping on the massive polka dot pattern at the moment so I laid a large slab on the left side, this looks great and also balances out the pattern that is on the right. I added in a little Crumb Cake and Early Esspresso to give the card a lightly more earthy feel and ground all that Pear Pizzazz going on! It is an extremely green card! I finished off with some lovely Pear Pizzazz Poly Ribbon (its so much nicer and yummier than it looks in the catalogue for sure!!). And finally I hand wrote my sentiment with a brown pen and added a little detail to the butterflies! 

Let me know what you think. Are you loving Pear Pizzazz? Or is it all a bit of an over dose on green for you?! Hopefully all being well, and I haven't missed a connection or something else, this should be my first full day in the States, so please leave a comment and give me a little smile for my return to England! 

Amanda xx

Saturday, 21 May 2011

marvellous may class fun!

My first class is over and it was fab! There were 5 lovely ladies that joined me today, and I couldn't have been happier with how it went, apart from perhaps the few moments where I got totally tongue tied but hey ho that happens to everyone, we live and learn! So, I really enjoyed it and from what I can gather, everyone seemed to have a great time too! It makes me so happy to see others getting enjoyment out of creating a card or other project and its such a blessing to be able to share my passion with others! Its actually what gets me out of bed in the morning...love it!


 And now I would like to show you what we did, and if you didn't make it, what you missed out on!


Poppin' Pastels Flower 


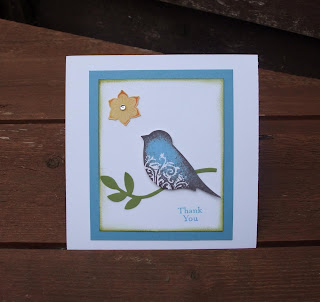
Rock And Roll Birdie


Greenhouse Garden Waterfall


This was an BIG hit...its so much fun to make a interactive card and everyone really did go ooh and ahh when they saw it cascade! 


Candle

I gave everyone freedom to create whatever they wanted on their candle! They turned out beautifully and clearly showed each person's individual taste and flare! 

If you like what you saw and really wished that you had come I am thinking of running a catch up class on my return in June so if you are at all interested please email me on amanda_burditt@hotmail.co.uk 
It will depend on the amount of interest I recieve as to whether I run this catch up class so please do email me if you would like to make all of the above projects. 

I will leave you with a comment from today: 

"After using the stamp-a-ma-jig today it has really given me the confidence to use it at home, its a lot less daunting"

It is so lovely to see the confidence build up in people. Please do email me if you are interested. 

For those interested in my June class, it will be on June 18th from 11am-2pm at mine. Don't forget to email me to book your place! (there were "WOWs" today as I showed sneak peaks of June's class!!) 

Can't wait to hear from you! 

Amanda xoxo

simply stampin' challenge, week 8

We are into another colour challenge! And what a colour combo we have this week! 


I just LOVE these colour! They're so bright and cheerful and summery! I thought I'd try going for a little bit more of a busy over the top card this week, and here we are...


Thanks a Bunch

Stamp Set: Greenhouse Garden, Just Perfect Alphabet
Cardstock: Very Vanilla, Old Olive, Pumpkin Pie, Daffodil Delight
Ink: Daffodil Delight, Old Olive, Versamark 
Extras: Big shot, Scallop Envelope, Crop-a-dile, clear embossing powder, Tombo Mono multi glue

I started off by stamping and embossing the large and small flowers from the Greenhouse Garden set. I cut them out and then curved up the petals to make them look a bit more real. I thought the background was looking a little plain so I used the Daffodil Delight marker to colour in the smallest flower and by colouring in very roughly and not breathing on it to re-moisten the ink gave a more rustic look. I thought it would be cool to attach a scallop envelop to the front with a the greeting inside, giving the receiver some way to interact with the card. I stamped "thanks" using the Just Perfect" alphabet and added it inside the envelope. I attached the envelope to the card at an angle to the card and added the flowers all around to make it look like it was in a bed of flowers. To finish off the flowers I used the crop-a-dile to punch out small little circles and added them as the centres to my flowers. 

Please check out the other design team member's creations at Simply Stampin' Challenge

Today is a big day, my first class is today...I'm feeling a little nervous but I hope it will all go okay! Wish me luck hey? 

Leave a comment, I love reading them! 

Amanda xoxo 

Tuesday, 17 May 2011

in-love with in-colour...peach parfait

Third in my series of in-colour playing! Today its Peach Parfait! This colour is just so yummy looking! Just like the Blushing Bride, it looks amazing in the patterns so I wanted to do a very simple card so that the patterns could really come out to play and do most of the talking! 


Peach Parfait Best Wishes 

Stamp Set: Silhouette Sentiments
Cardstock: Crumb Cake
DSP: Peach Parfait (6x6 Hostess Only)
Ink: Early Espresso
Punches: 1" Circle, Modern Label
Extras: Brown Pen

You can't get much simpler than this, can you?! I punched out circles of patterned paper, laid them out in a pattern and adhered them down. I went around the edge with a brown pen using a dashed line. The sentiment was stamped and punched out of the patterned paper also, adhered underneath and then just to make it look like it was attached I put little dots at either end. 

I hope you like it, if you haven't tried any of the in-colours yet I really would recommend doing so, they are super! If you would like to have a go with the colours yourself, why not book a workshop with me and I will come show you more of the lovely patterned papers you can earn for free by hosting your workshop! Its a win win situation!! :D 

I'd love to hear from you so please leave a comment. 

Thanks,

Amanda xx


Saturday, 14 May 2011

simply stampin' challenge, week 7

Week 7 at Simply Stampin', and we are back to a sketch once again!  When I saw this week's sketch I thought it might be difficult, and it was. To be honest my first attempt was a COMPLETE disaster! It was beyond repair. So I ditched it and started again. I think I've played it very safe this week but I hope you like what I came up with! 


A Happy Hello

Stamp Set: I {Heart} Hearts
Cardstock: Certainly Celery, So Saffron
DSP: Certainly Celery, Rose Red
Ink: Versa Mark, Daffodil Delight
Accessories: Whisper White Grosgrain Ribbon, Basic Rhinestones
Punches: Modern Label
Extras: Clear Embossing Powder, Dimensionals, Sponge, White Gel Pen

 This card is very bright, clean and springy. Perfect for the end of spring as we head into summer! To add a little more difinition I sponged the edge of the So Saffron layer and then did faux stitching with a white gel pen. It looks lovely and ties in the ribbon. Where the two ribbons crossed I added a couple hearts and for some difference in texture I embossed one of them with clear embossing powder. I finished off the card with the modern label punch and some handwriting again with the white gel pen! 

I hope you like this! I'm pleased with the final outcome after all my struggles, even in it is a little safe! 

Please check out the other design team member's entries at Simply Stampin' Challenge blog! Please do enter too, I can't wait to see what you create! 

I am off to my friend Kathryn's (one of my bridesmaids from my wedding) wedding today...very excited! I hope their day is very special indeed! The lovely couple on my wedding day...


Amanda xx

Tuesday, 10 May 2011

in-love with in-colour...blushing bride

The second in my series of playing with the in-colours, this time its Blushing Bride! I admit, I just wasn't that taken with the colour. My first thought was we have Pink Pirouette and Pretty in Pink, why do we need another pale pink?! But when I got the pack, looked at the colour my opinion changed, its a lovely colour, a little dusty and it really looks great on the hostess patterned paper pack I've been playing with! I loved my upline, Rhoda's, banner cards she made a few months ago (click here to see), and thought it would make a perfect summery baby girl or even wedding card! 


Blushing Bride Congrats

Stamp Set: Just Perfect Alphabet
Cardstock: Whisper White
DSP: Blushing Bride (6x6 Hostess only), Certainly Celery
Ink: Certainly Celery
Punches: Modern Label
Accessories: Linen Thread, Brads (Pale Green-non SU- I wanted to use Certainly Celery brads but I don't have any yet!) Basic Rhinestones
Extras: Stamp-a-ma-jig, paper piercer

Isn't it such a sweet card?! I punched out the modern label punch in different patterns, fold them over and then use the stamp-a-ma-jig to stamp the letters on them (the Just Perfect Alphabet fits PERFECTLY on this punch for banners). I then stuck the two sides together with the linen thread in the middle. I pierced two holes, stuck the brads through then wrapped the thread around the brads so the banner was hanging between the two. SO CUTE! I used a tiny bit of adhesive it keep the "flags" from moving around, adhered a strip of Certainly Celery dsp to the bottom and then added a rhinestone and bow to finish off the banner! 
Doesn't the banner show off the patterns beautifully! It could almost be fabric! 

Please leave a comment, they make my day!!! 

Amanda xx

Monday, 9 May 2011

today's offering

Last Friday we received a wedding invitation to my cousin Ben and his fiance Hannah's wedding at the end of August. We are really looking forward to it, my parents, brother and Stu and myself have booked a little cottage up in the peak district for a long weekend. Looking forward to getting in some walking and picnics etc and also a lovely wedding! 


Anyway, when you receive a wedding card you obviously need an acceptance card to respond, right? So, that is what today's share is. Unfortunately the stamp is not Stampin' Up! but its similar to a stamp that Stampin' Up! does carry and one which is on my wish list...as are many others. Everything else is Stampin' Up! though! 


I usually try and make a acceptance card and wedding card that matches the colour theme of the wedding. Their card was ivory with a teal ribbon in a bow. Sadly Stampin' Up! no longer has a teal colour in their collection...they so need to!!


Acceptance

Stamp: Starburst Lace - Hero Arts (I really would have loved to use Stampin' Up!'s Medallion background stamp)
Cardstock: Baja Breeze, Old Olive
Pastels: Not Quite Navy, Wild Wasabi, More Mustard, Old Olive
Ink: Versa Mark
Punches: Modern Label, Corner Rounder
Accessories: Old Olive Button, Whisper White Satin Ribbon, Linen Thread
Extras: Cotton wool balls, Glue Dot, Dimensionals, White Gel Pen

As Stampin' Up doesn't have teal in their collection and their turquoise was just too bright I decided that stamping the "medallion" stamp in versamark and then adding poppin' pastels to the image I would be able to blend the pastels and create my own teal(ish) shades. I added a button with s bit of linen thread through it to finish off the centre. Down the side I added some satin ribbon. Finally I hand wrote the sentiment and adhered it to the bottom right hand corner. 

Please let me know what you think, and leave a comment!

Until next time, 

Amanda xx

Saturday, 7 May 2011

simply stampin' challenge, week 6

It's Saturday again and time for another Simply Stampin' Challenge. As last week was a colour challenge it means that this week is a theme!!! 
 
This week's theme is Buttons & Bows

I decided not to do a card, I do one almost every week and while Buttons and Bows would lend itself excellently to a really great card I thought I'd do something different. In the wake of the Royal wedding, I have begun to think about my own upcoming weddings I'm attending. My friends Kathryn and Robert get wed next Saturday and my cousin Rachel marries Ed in just under a month. So as I was looking through my wardrobe at my "wedding" clothes I pulled out a lovely dress I acquired last year, and thought perfect, all I need is some accessories. With that in mind I thought I'd make a hair clip to match using buttons and bows. Here it is...


Stamp Set: n/a
Cardstock: n/a
Ink: Rich Razzleberry, Old Olive, Pacific Point
Accessories: Satin Ribbon, Grosgrain Ribbon, Brights Buttons, Linen Thread
Extras: Sponge, Needle, SNAIL

My dress is very bright and colourful! Whisper White, Rich Razzleberry, Pacific Point, Old Olive, Pumpkin Pie, Basic Black, Early Espresso...I only had white ribbon and as the dress was so brightly coloured I knew I needed a hair accessory as colourful to match! I did my usual trick of dying ribbon myself. I looped the ribbon and used SNAIL to hold the loops in place while i stitched them together with some linen thread. Finally I sewed on a Rich Razzleberry and a Pumpkin Pie Button on top of all the ribbon bows. I finished off the linen thread by tying it in a little bow on top of the buttons! 
To the back I attached a hair slide from a pharmacy.

I hope you enjoyed what I made this week! I look forward to seeing what you all create! So head on over to the Simply Stampin' Challenge blog to enter and also see what the other design team members have created for you this week! 

Amanda xx

Thursday, 5 May 2011

general update

Its been a funny few weeks, I'm still battling some bug and meanwhile trying to keep going with work, Stampin' Up! and everything else in my life. Its been a struggle when to be honest all I want to do is sleep. But I can't as I am leaving for America in just over 2 weeks (YES I am VERY excited!!) For anyone wanting to place orders or book a workshop, please note I will be away from May 23rd until June 9th. During that time I will have limited internet access!!


I'm really hoping my throat thing has cleared up by the time I go away or I will be very miffed off. I went to the doctor yesterday and he was nothing but useless! I feel as though I wasted an hour of my life! 


On the plus side, I had a lovely Bank Holiday Monday (I was feeling almost completely better - before getting worse again the following day, yeah, go figure!). The Hacketts and Scarsbrooks (some of Stu's uncles, aunts and cousins) returned from the US so it was lovely to catch up with them and a bunch of other family members at a little cafe in Castle Ashby. Little Georgia was there, and I got a cuddle!! (I'm not a baby person but she's just so sweet - yes I am excited I got a cuddle!) Actually I got more than a cuddle, the minute Abi gave her to me she started to cry (mainly due to hunger) so I got to feed her her bottle and burp her. First time ever in my life I've fed a baby, its quite exciting really. After her bottle she ended up falling asleep and we had the nicest little cuddle...she's just SO adorable!!! I realise I might be coming across as a slight nutter here but its a big thing for me, and I just wanted to share it with someone. I hope you will allow me my moment of craziness! 


Catch you later,


Amanda xo

Tuesday, 3 May 2011

in-love with in-colour...concord crush

This post is a little late, I made the card using the Sketchy Sunday sketch challenge, last week and then I just didnt quite get time to post it...so here it is. Better late than never hey?  


Concord Crush Rosette

Stamp Set: Greenhouse Garden
Cardstock: Very Vanilla, Riding Hood Red, Certainly Celery Always Artichoke
DSP: Concord Crush (6"x6" Hostess only pack)
Ink: Concord Crush
Accessories: Very Vanilla Satin Ribbon
Punches: Two Step Bird
Extras: White Gel Pen, Big Shot, Lots of Tags Sizzlets

This card really came out as I had recently got the hostess only pack of 6x6 in-colour dsp and having not really had a chance to play with those colours yet thought I'd just set myself a few cards to make...I have a few more that I'll show next month as part of the Simply Stampin' Challenge! Can't wait! I thought I'd use the Sketchy Sunday sketch as a starting point for my card. I love the vast expanse of Concord Crush dsp, it just allows the eye to really drink in gorgeous deep colour. As a focal point I cut out rough circles from Concord Crush dsp and Riding Hood Red cardstock, distressed and then layered them up. For the centre of the flower I stamped the smallest flower from Greenhouse Garden. I used two of the bird wings from the two step bird punch for the leaves. Finally I added some ribbon and a tag from the big shot to fill it out a bit and create a balance between the expanse of colour and detail. 

I hope you enjoyed this card, please do let me know what you think, I love reading people's comments! 

Have a nice day!

Amanda xx

Sunday, 1 May 2011

may class

As I said, at the beginning of each months I will announce the details of the month's class techniques and 3D items! Without any further ado, here they are for the month of May:


Techniques:
Rock and Roll 
Two Step Stampin'
Stamp-a-ma-jig
Poppin' Pastels 
3D Item:
Candle 


Just to remind you the class is on Saturday May 21st from 11am-2pm and costs £12.50. This includes all the materials you will need to make all the projects and also lots of tea and cake! :) Places are limited so please book.


I am very excited to say that I already have 5 people who have booked their places for my first class, but still have a few left! It would be lovely to see you there too, I promise it will be fun so please do book your spot as soon as possible to avoid disappointment! 


For any more information or to book your spot please email me at, amanda_burditt@hotmail.co.uk


I hope to see you there! 


Until next time, 


Amanda xx